

Wez21
-
Posts
122 -
Joined
-
Last visited
Content Type
Profiles
Forums
Events
Gallery
Store
Everything posted by Wez21
-
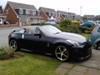
Well here goes! Hope you can see them, did not realise how bright the door reflector is until I tried to capture it on the camera!
-
Haha, ill try and get some up tomorrow. Do most people use photobucket? not put any on here before!! Ill try and get some both day and night shots!
-
Hi Chris, I have done exactly this! Cheapest and best looking way imo is too just buy some white leds and resistors from ebay, make a small panel, drill holes, glue them in, then glue the panel in behind the reflector! I have 16 behind one reflector and it looks spot on! Completely OEM look! If you wanted you could even do them in the shape of a Z!! I put 4 along the bottom of the door card too, these had the shrouds on so they only direct the light down! Very handy in the dark for seeing what you step out into! I just ran the wire through the door harness and tapped into the room lamp! While I was on I put some orange leds in the footwell for when the door is open too!! I think all in only cost a few pounds!!
-
Hi again! I was thinking of connecting the sidelights as the current draw shouold be OK on that circuit, the headlights I think maybe too much! Ive been reading allot about the LED in the door handle too and was thinking about doing this. I already have the power in the doors as have put lights behind the reflectors!!!
-
Hya, mine completely sheared off, was rusted straight through so not much chance of welding! Pulled it apart enough to get a slightly smaller straight piece of pipe in to strengthen it up, then welded best it could then plenty of exhaust paste on. Has lasted 6 months so far and still no blowing! If you go to a back street garage I would pay no more than £20 for welding! Its a bit embarassing when you work for the company that makes the exhausts, allbeit these ones comes from Japan!!!
-
Hy mate! Im assuming you mean playing with the car haha!!! That would be great thanks. I work with a bit of electronics/electrical and have been wanting to look at doing this, but no point in re-inventing the wheel so too speak!! I also fancy making the headlights come on when you unlock like some other car manufactures, you not fancy this?
-
Hi mate. Do you think you will be able to arrange the wiring so that when you get in the car and lock it with the door console button the mirrors dont fold back in? Really fancy doing this but I always lock the doors when I drive off!! Keep up the post, really enjoy following it!!!
-
That would be excellent matre thanks. In no rush as have to start hacking the centre console to bits! Im changing the controls but there are differences in the wiring for the 2 models, just want to compare on the drawings, but need the part numbers to get the drawings!! Thanks.
-
Hi all. Need a little help please with a part number. I am going to be changing from the standard 3 black HVAC knob controls too the facelifted 3 brushed aluminium controls. I need the part number on the back of the assembly please, it is printed on the white plastic and is made by Calsonic Kansei. Mine has rubbed off so cant get the number! Would be very greatful! Thanks.
-
Hi all, This is alot easier than you think. I have done this too mine a while ago. I made a small plate with 16 holes in for behind the red reflector. I used 5mm white led's for this (with resistors) and just glued them in, looks completely OEM when fitted. I also put 4 in the bottom of the door card so they shine on the ground when the door is opened, this sounds naff to some but its one of the best things ive done! There are several empty pin holes in the door harness so I just ran the wires through there, only down side is that if you ever wanted to unplug your door harness and remove the door the wire will be there. But to be honest how often do you take your door off! I then just ran the wires up the A pillar and tapped into the room lamp. They even dim too same as the interior lamp!! While I was on i mounted some orange leds in the footwell and put them in the same circuit! This only cost a few pounds for the leds and resistors!
-
I noticed you had been parking further away! Not quite as far as the orange zed in the very far corner! I always try to park down the single row, or on the end so can can park wide! Ive tried parking further away but wherever I park someone parks next to me! Give me a shout next time you see me!! Thought our cars where exclusive until I started parking in the Nissan car park!!! Bloody loads of them!!!
-
Hi Nath, thanks for that offer, I may take you up on it! Im putting my original bumper back on for a month or 2 as the v2 needs a respray and im going to try and put the washer jets in, but when it goes back on ill either make one myself or buy one from you. It is a great price for the work involved! You have even made me think about removing my canards looking at your photos!!
-
Looks great mate, spot on fitment and colour! Ill keep an eye out for it in the car park at work!!!!
-
Hi there! Loving the pics! Can I ask what is it your using to hold the number plate out like that? I have the same bumper/kit on my roadster with a slightly illegal small plate in the gap on the bumper. I want to change to a normal size but was looking at the best ways to fit it. Cheers.
-
Hi there, can you not get it aluminium welded as a temporary measure? Im sure some engineering companies will do it for you for a small fee? Hope you get some luck with it!!
-
Excellent write up mate, and great pictures. One thing to note is that the 350z has cross-coils to move the pointers, not stepper motors! If you have the meter upside down for over 15 mins then you run the risk of the silicone inside the cross-coils running out. The silicone is used to dampen the movement of the pointers and enable a smooth operation. If the silicone runs out then the pointers will not sweep correctly and show eradic movement. Also, be very careful when prying off the pointers, too much too soon will result in the spindle detaching from the motor and then its goosed for good!! But again, great guide.
-
Will a Nissan/Clarion HU replace the Bose/Clarion?
Wez21 replied to HampshireRob's topic in I.C.E & Electronics
Hi there! If it brand new then ask if it comes with the original Nissan box, looking at his location id be pretty sure its nicked from the production line!!! Also im 99% sure the wiring is different and the plugs are different. He states it has bluetooth, it will! but without the microphone and bluetooth module then it is a waste of time as these are not built in!!!! If you want it just for the stereo then it should be Ok once you have matched the wires and he can guarantee it has never been in a car before, but the bluetooth is out! They do look nice when lit up though!! The orange will match the rest of the dash. -
I thought I would offer this up on here before it goes on ebay! I have 2 brand new in the box Fujitsu Siemens Scenicview A17-3 17" Flatpanel displays. They are white in colour and can be seen on the following Amazon link for £132!! http://www.amazon.co.uk/dp/B000WPJSCY/r ... nkCode=asn Im looking for £90 each including delivery or £170 for both including delivery. Paypal or cheque preferred payment, item will be sent once cheque has cleared. Thanks
-
Carbon Style trimmed interior panels- DreamCustomz
Wez21 replied to P15UL T's topic in Member Traders
Ill give it a few weeks when you have cleared the backlog (if that happens at all!) and also funds permitting! They do look really neat , was going to use alcantara on door cards and a-pillars but that looks allot nicer I think! How thick is it? -
Carbon Style trimmed interior panels- DreamCustomz
Wez21 replied to P15UL T's topic in Member Traders
Hi Paul, they are looking great! Good prices too. If you dont get the cubbys and ashtray covred do they still open then? Would you mind telling me what the material is stuck on with? Cheers, would love to get allot of that done in time!!! -
Ill give it a go putting more laquer on this weekend! Would love to get a proper paint gun and compressor in time. Quite enjoy it - when it goes well!!! Thanks again.
-
Its not the engine cover, just a few other things I have painted, some rust spots on the gf's car boot and some plastic door trims. Have degreased, sanded(600, 1200), primed, sanded(1500), painted, sanded(1500), then laquered! Was going to get some 2000/2500, use that, then polish with my dual polisher. So if im too quick with the laquer it spreads too thinly and thats why it feels rough? If im slower and have the laquer thicker that will make it smooth (particles closer together)? I appreciate your help.
-
Thanks for that. I wouldnt so much say its orange peel, it looks OK but is not shiney and glossy, but very rough. Is this the same reason - going to quick? if your doing it right should you not need to sand after laquering?
-
somethng like that yes, im very happy with the painting, its just after the laquer. What am I doing wrong? as a comparison it looks like the smoked lights DIY on 350ztech before he sanded them glossy.
-
How do you guys such such a gloss finish after laquering? Do you use some 2000 paper or something to make it smooth? I just find that it goes very rough after the laquer.