

Dipper
-
Posts
77 -
Joined
-
Last visited
Content Type
Profiles
Forums
Events
Gallery
Store
Everything posted by Dipper
-
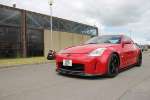
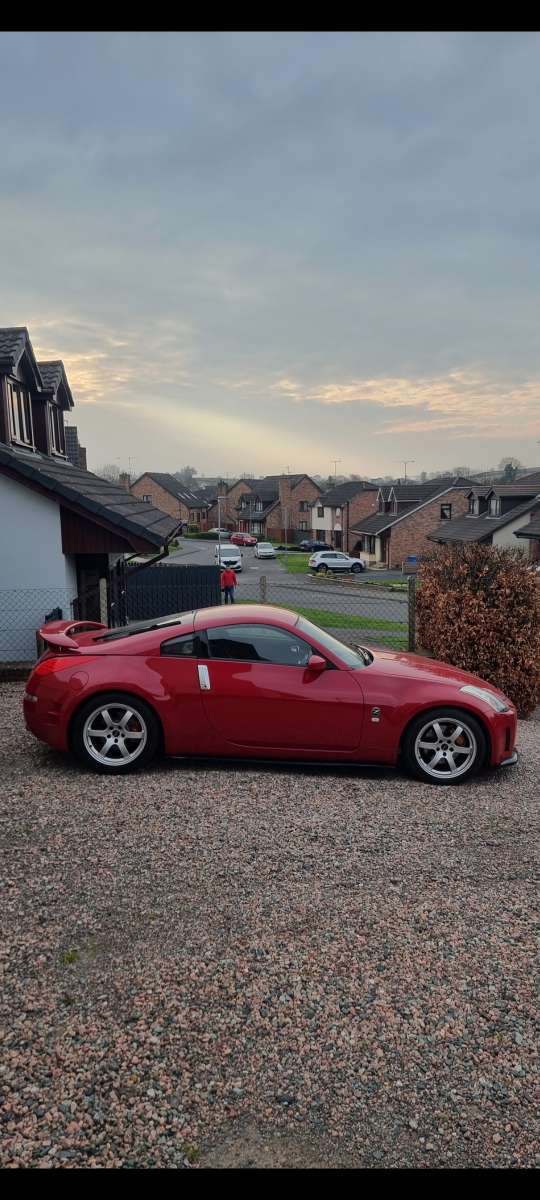
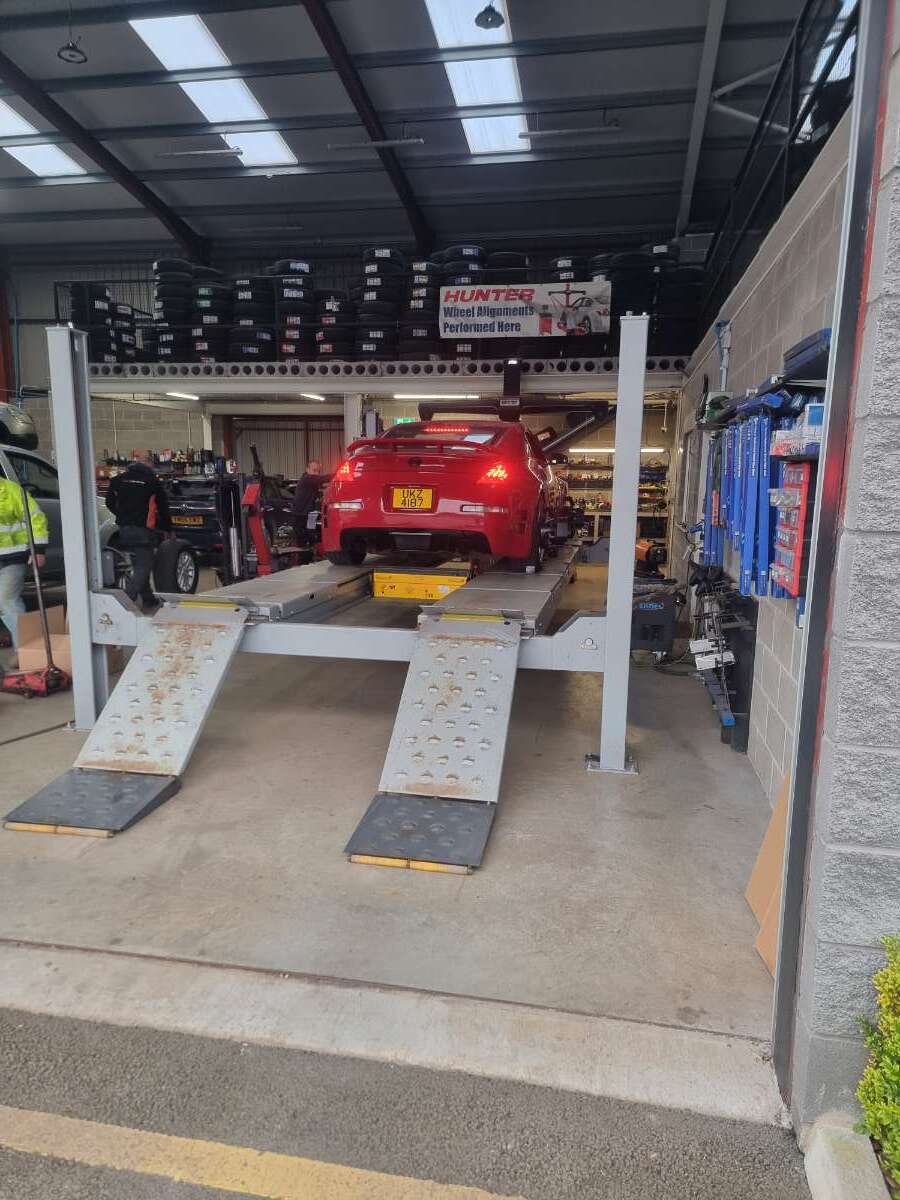
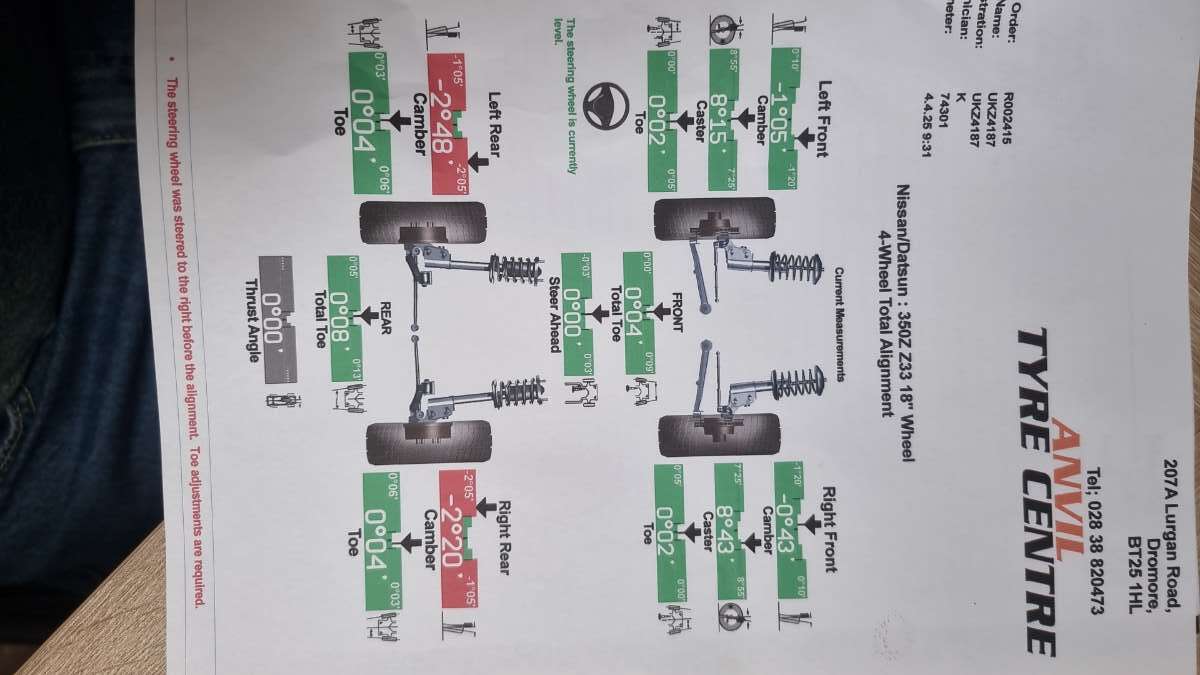
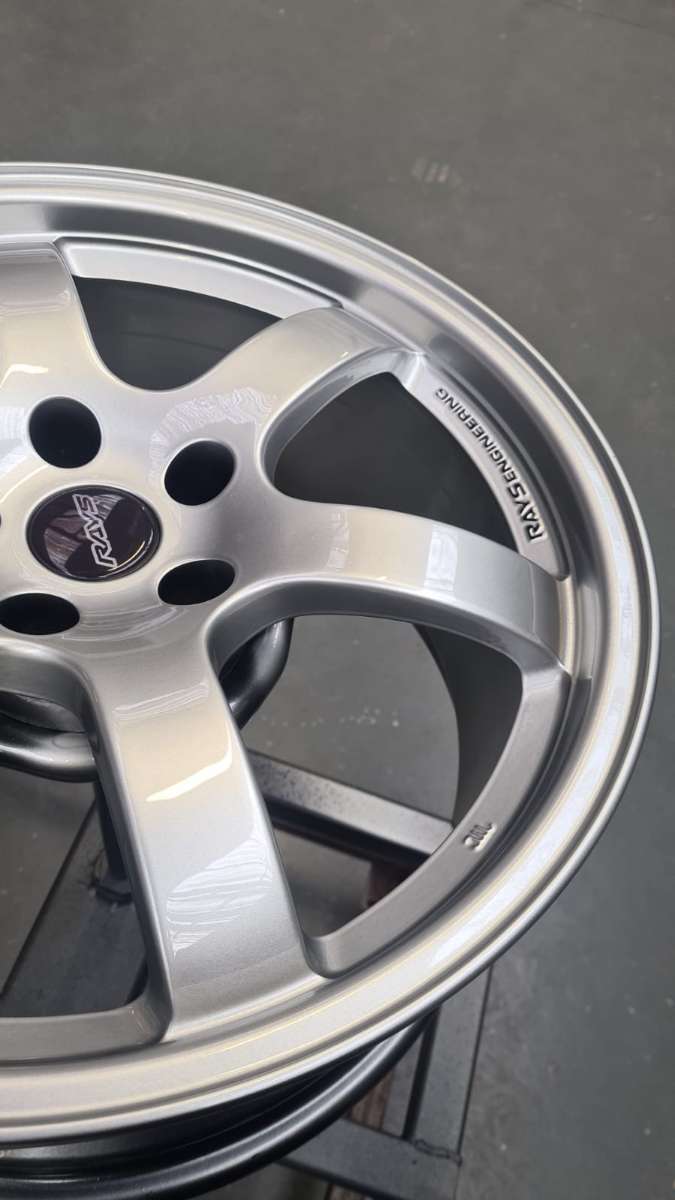
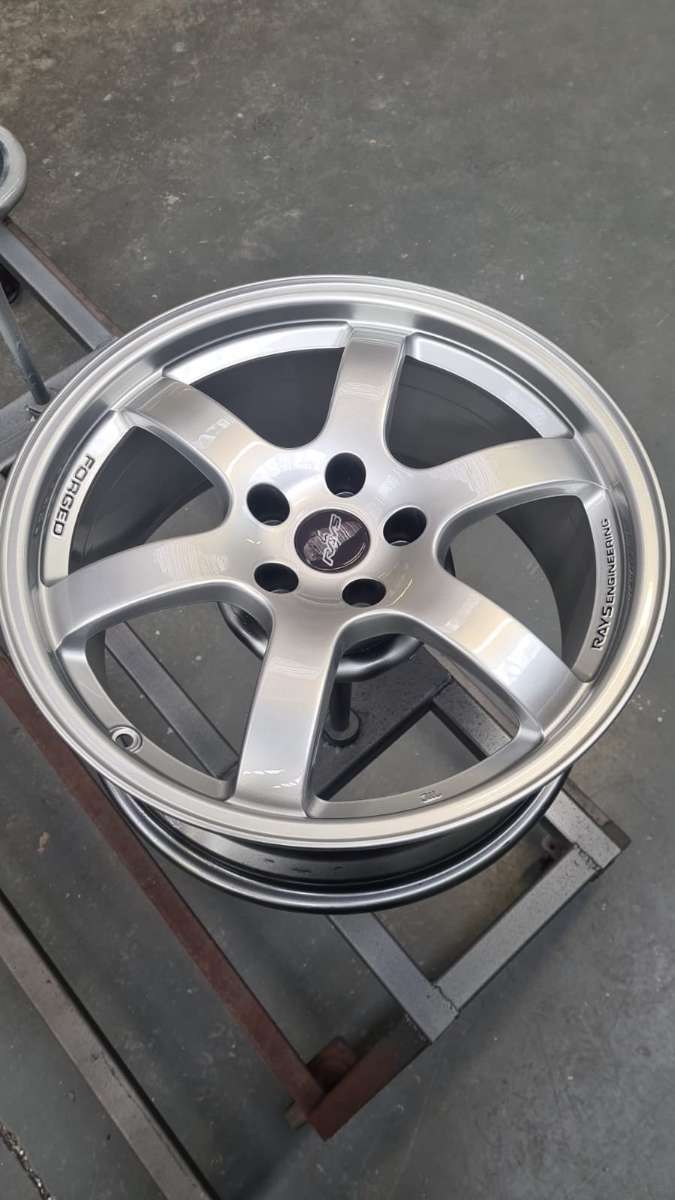
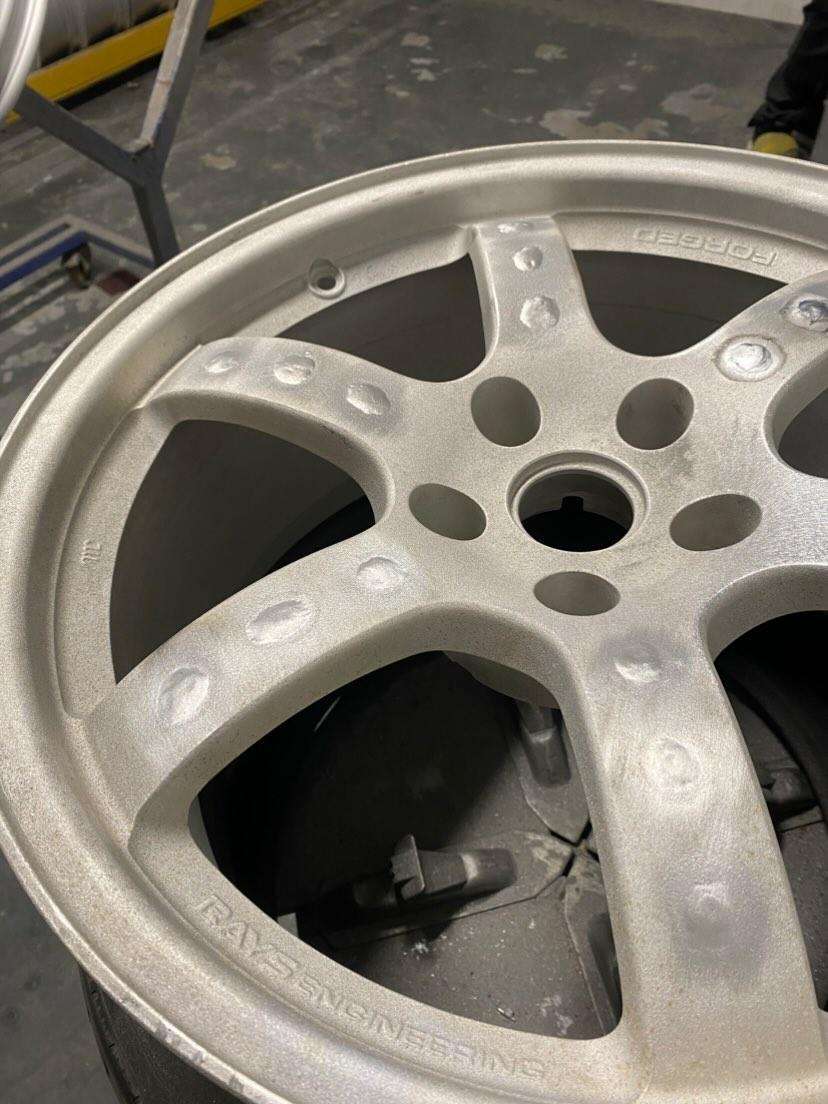
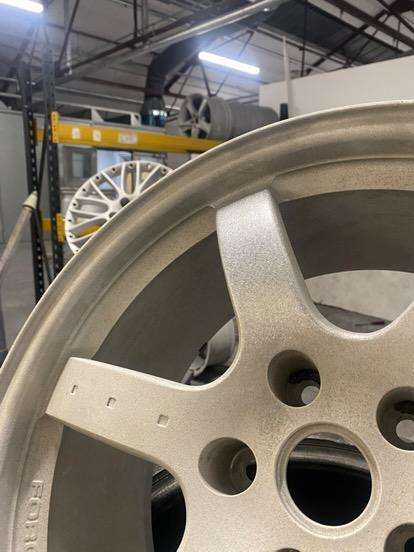
I also took the time get the height right on the rear adjusting the new coilover set up. Front probably needs to come down a little more. But it also meant I was able to get up the ramp to get it aligned a bit more easily. So maybe a blessing. Also the big news. Got the modified and refreshed wheels back. So happy with them. Ultamotive did a great job with them.
-
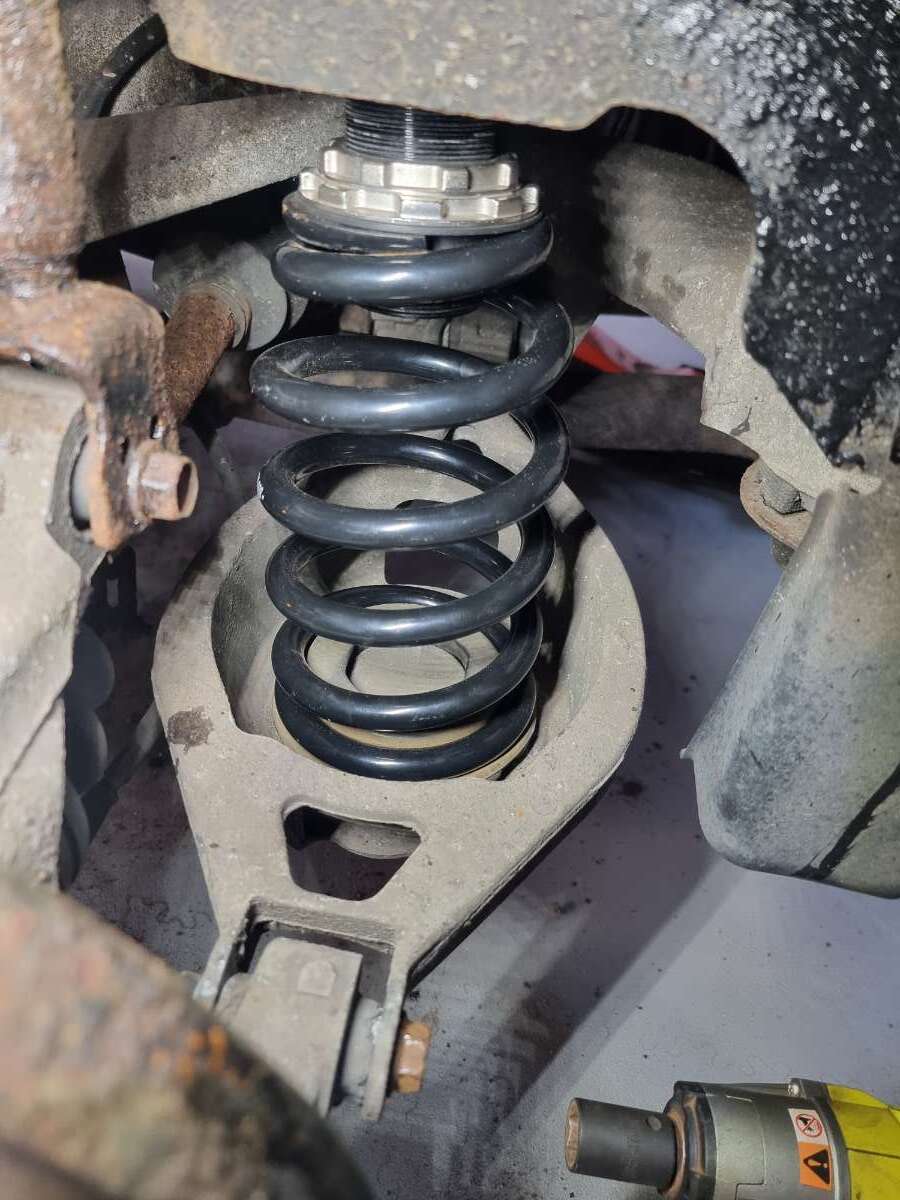
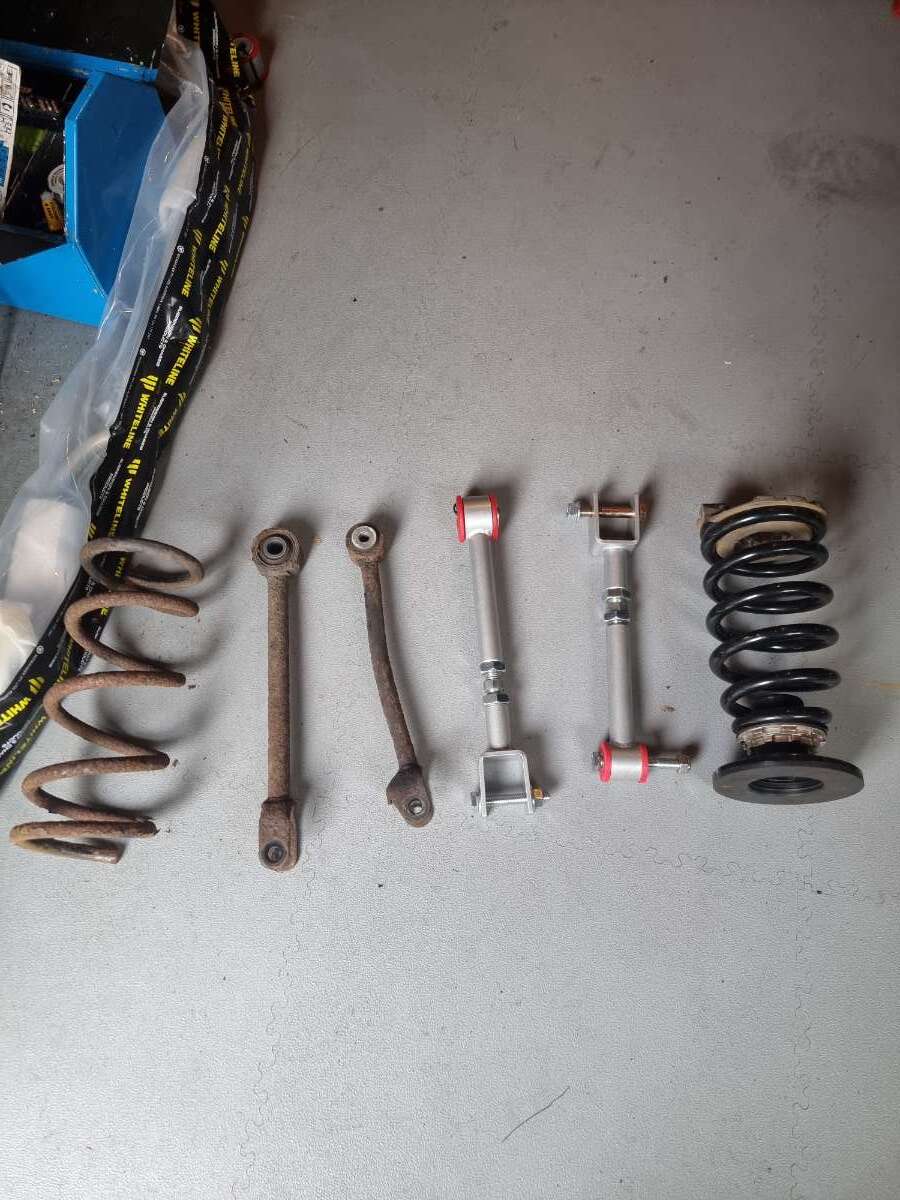
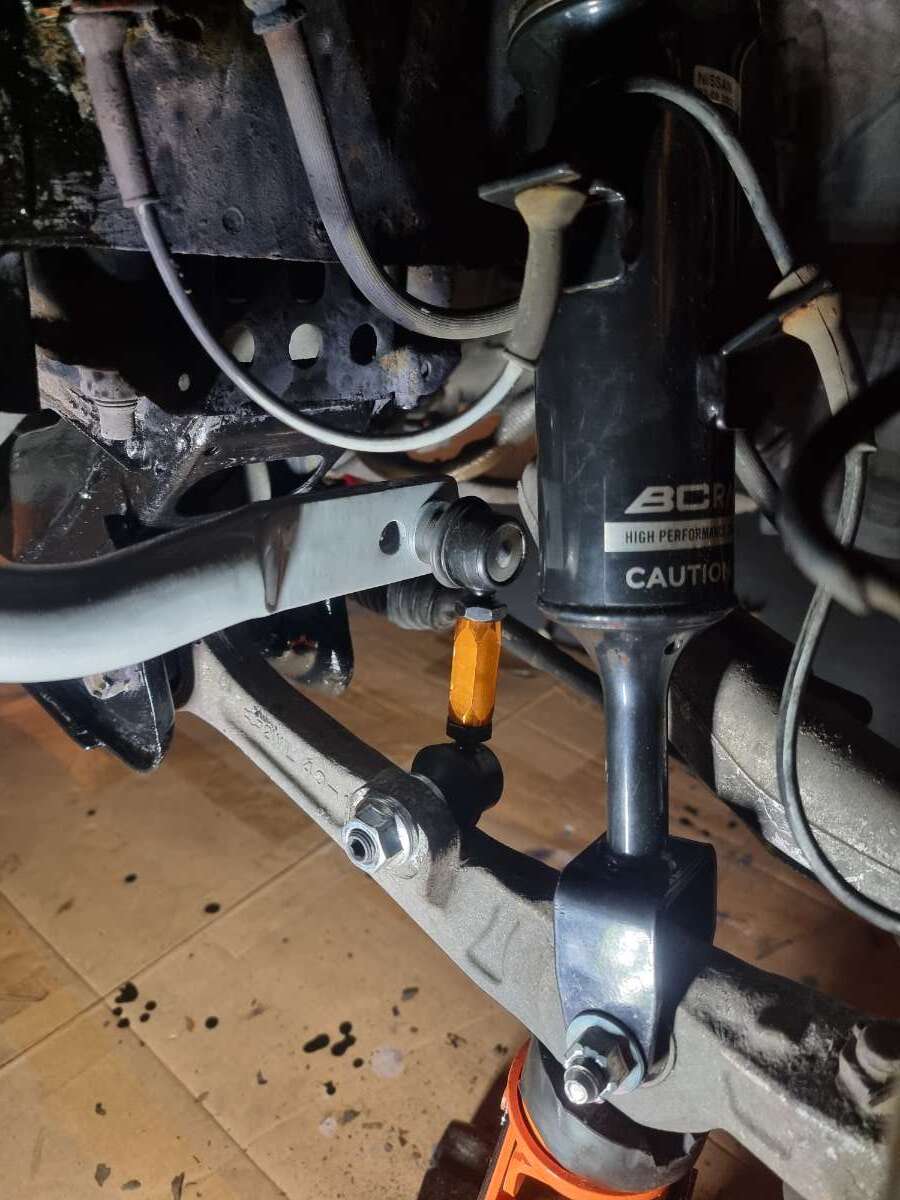
Staying on the rear suspension I managed to pick up some "air lift performance dampers" from Ebay. Apparently they are made in the same factory as Bc racing. And they are 30 point damper adjustable which was what I was after. Dampers fitted to the rear. And off for an alignment. The eccentric bolts on the spring buckets/arm were seized however. (Literally the only bolts I didn't replace, typical) so the camber is a little out untill I can get that replaced.
-
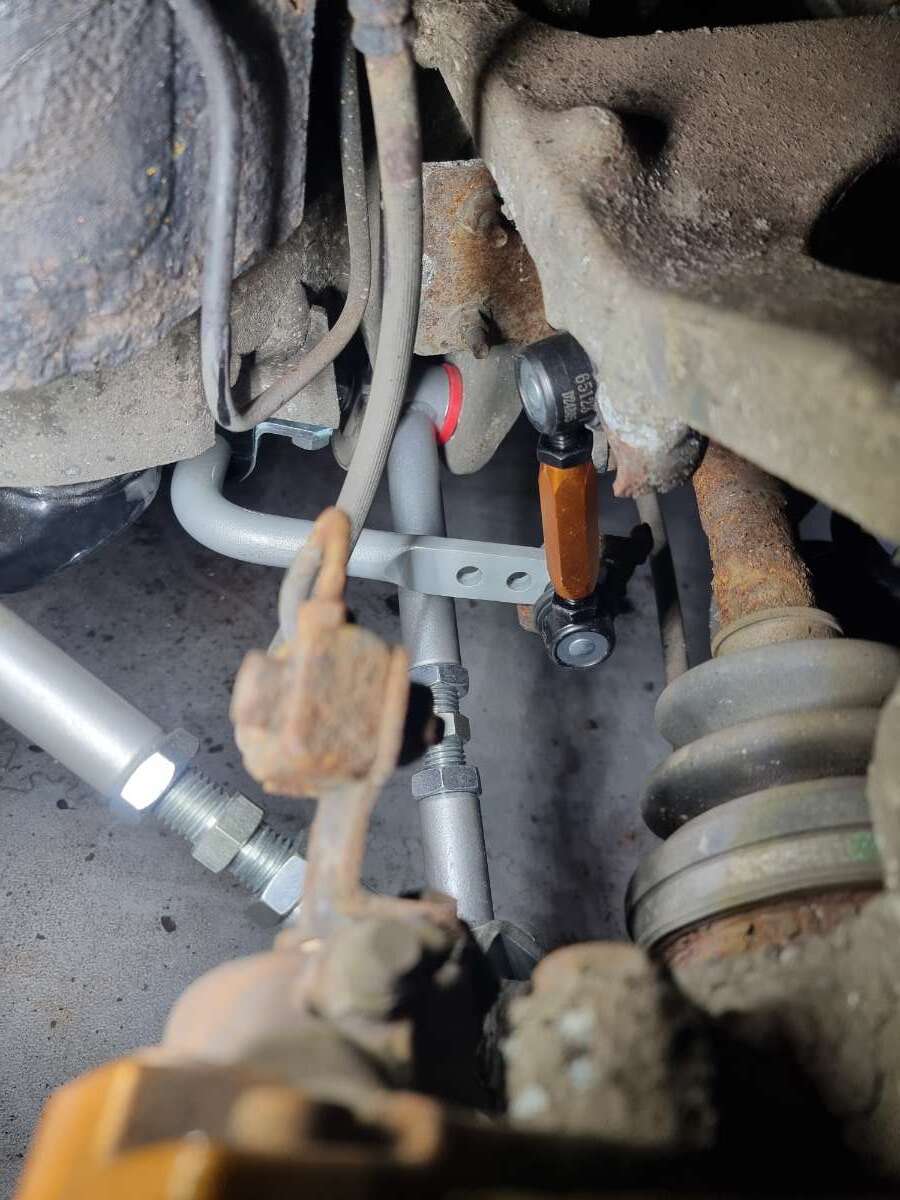
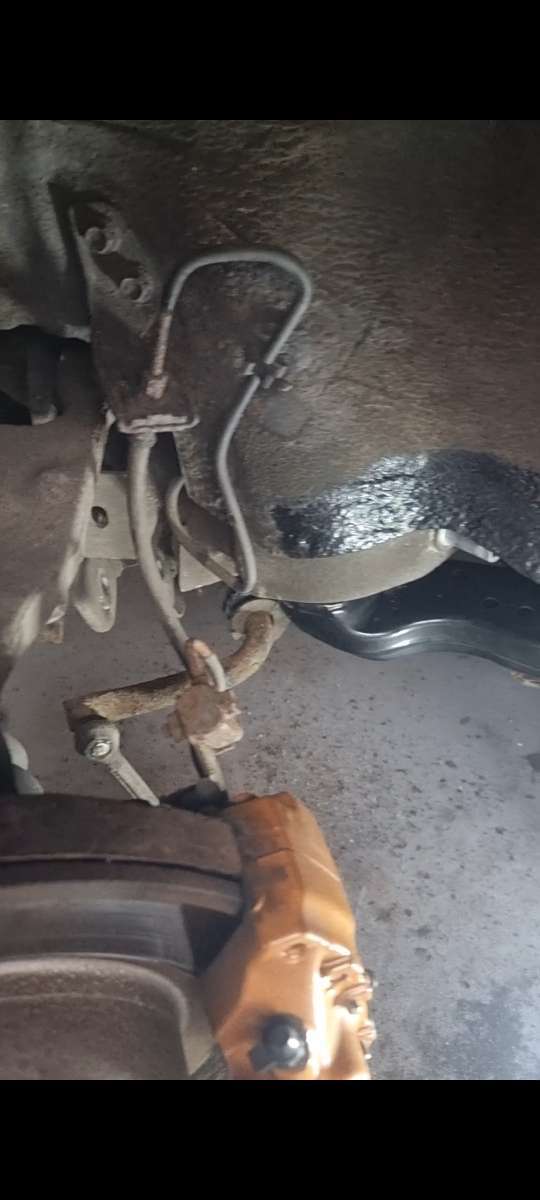
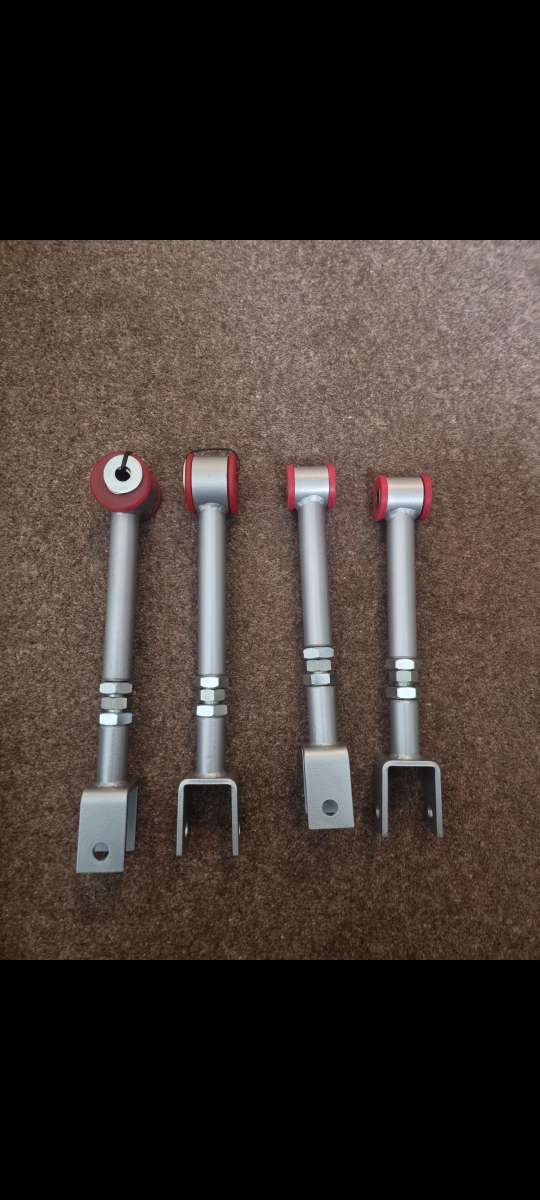
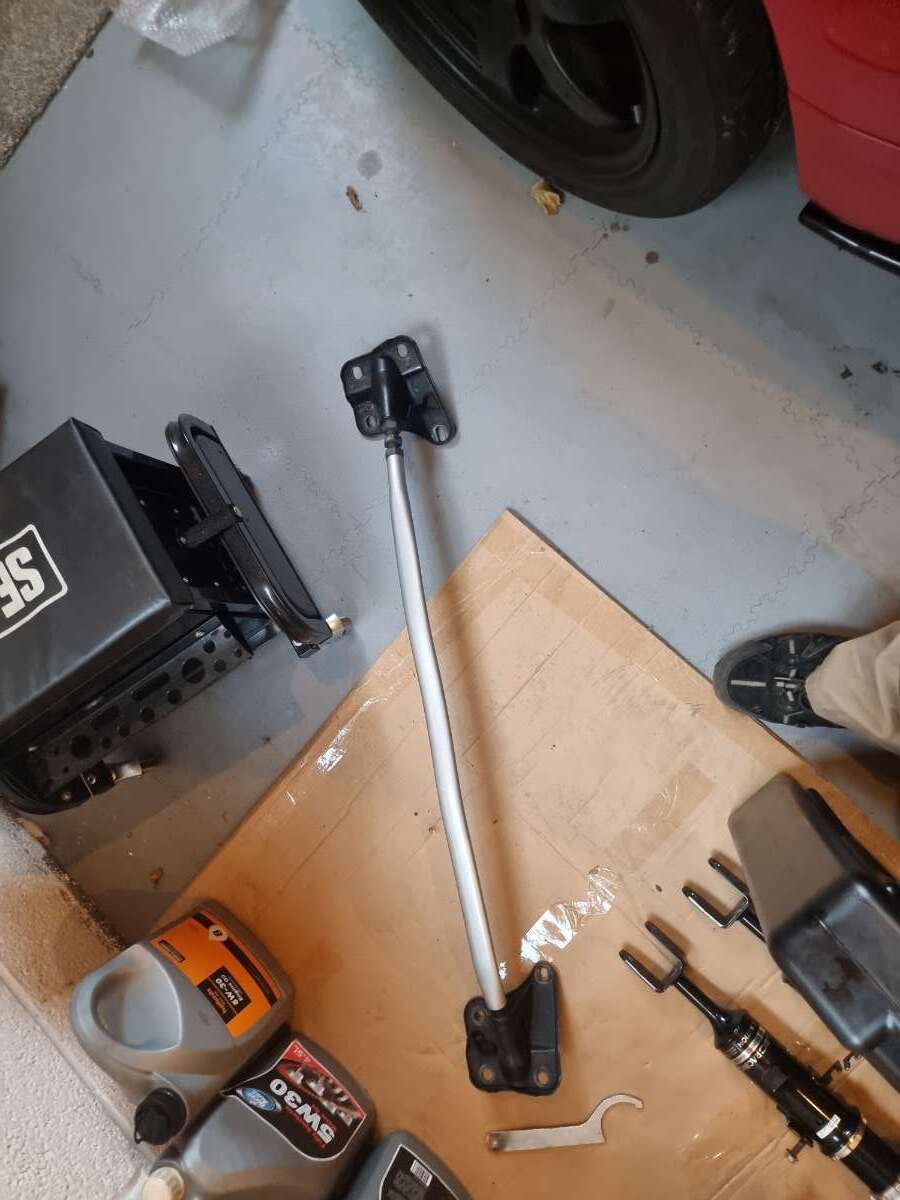
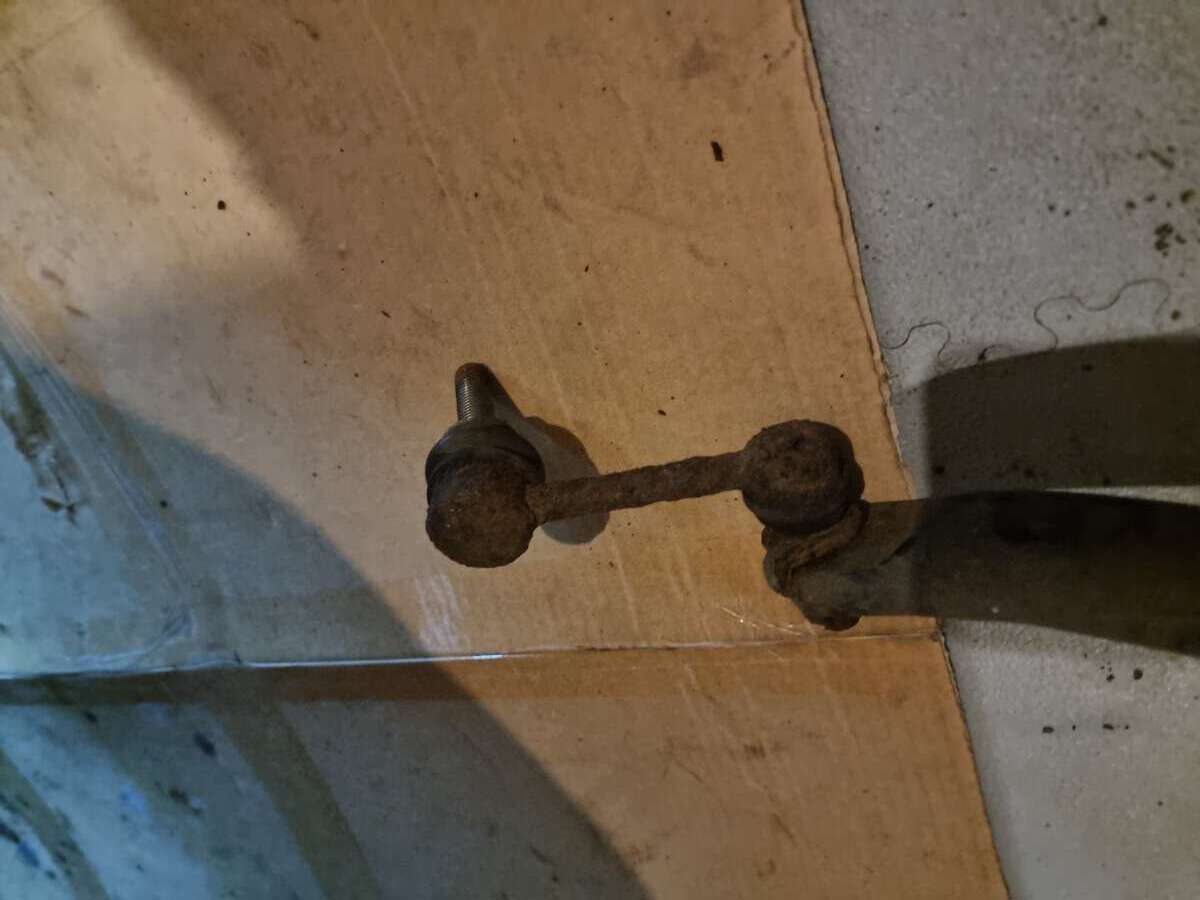
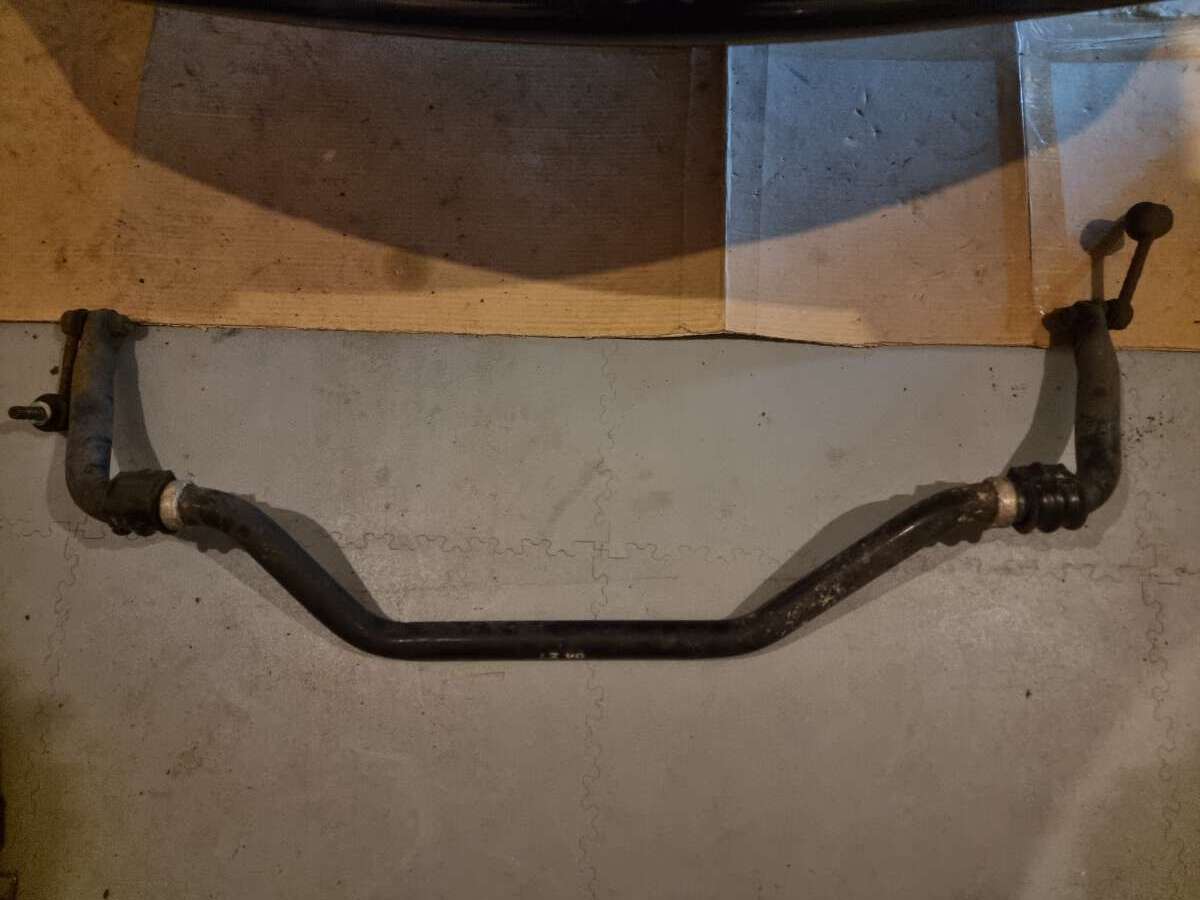
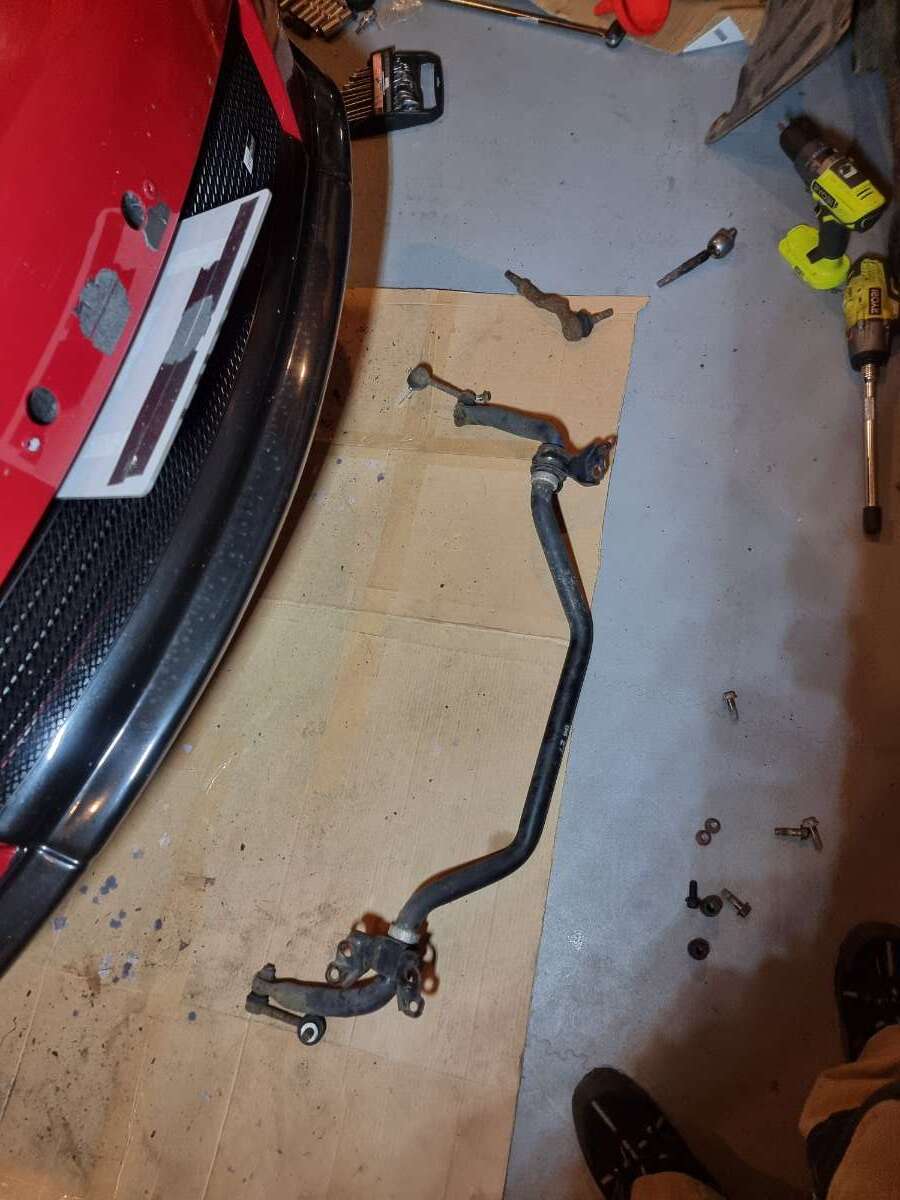
Another day spent working on the car today, and a few more steps closer. New kinetix adjustable traction arms and camber arms installed. New drop links and new anti roll bar installed. My exhaust is pretty crusty and most people seem to remove the exhaust to get the rear antroll bar on. But with some pushing and shoving and twisting and removing one of the exhaust mounts. I managed to get the old one out and the new whiteline adjustable anti roll bar in. Also dropped in the adjustable height bc springs. Hopefully getting the wheels back this week. So I can get it all back together, taxed and on the road for a a propper alignment front and rear. Also ended up using the jack to undo and particularly stuck traction arm bolt.(while hiding behind my hands in fear)

-
Yeah time and motivation often a key factor in these things. I'm going to try and do little bits here and there. Mine still isn't taxed and the wheels haven't come back yet. So while it up on axle stands I'm using the time productivity. (I hope)
-
Meanwhile I've started the arduous task of trying to remove 20 year old crusty bolts. Aim is to replace the rear traction arms, camber arms, rear anti roll bar, rear drop links and get the adjustable height springs from Bc racing installed. First step getting them out. Easier said than done. Allot of the bolts and nuts really fought me. Managed to get one side unassembled.
-
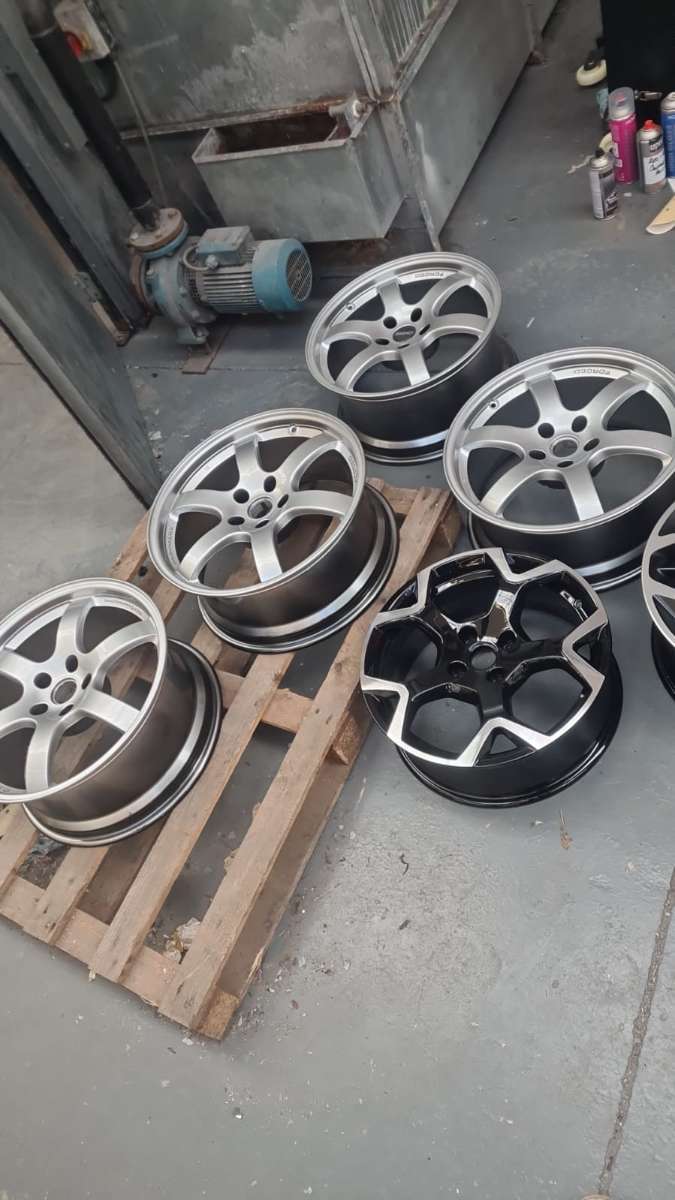
Got a sneak peak at my wheels that I sent off the be modifed and refurbished. Cant get over how well they look! Ive Always like the Rays but always thought they were missing a little something. But now with the smooth spokes. And the embossed black text. You know they are a Rays wheel and little more special. Feel like a poor man's TE37 lol. Can't wait to get them back.
-
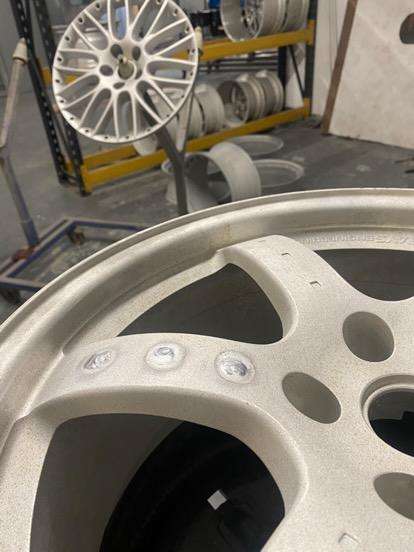
My Rays wheels were looking pretty tired. They had been painted (Probably more than once) so the paint was quite thick, and the colour was inconsistent. So decided to try something different. They were black and although I'm not one for black alloys they didn't look too bad on the red car. However I've decided to do things a bit different as allot of people have the Rays. And the Rays always looked like something was off on them to me. They are still at Ultamotive wheels getting the work done. But here's a few photos of progress....
-
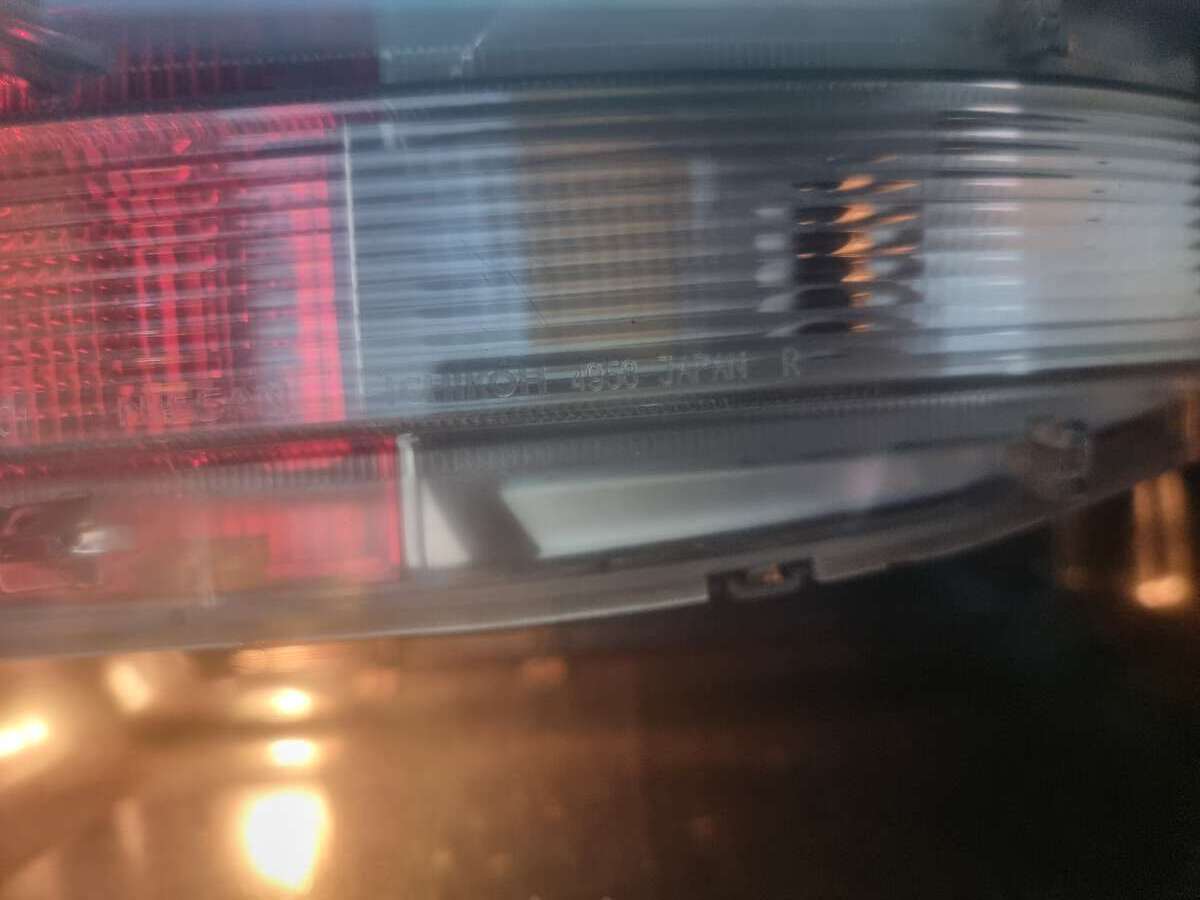
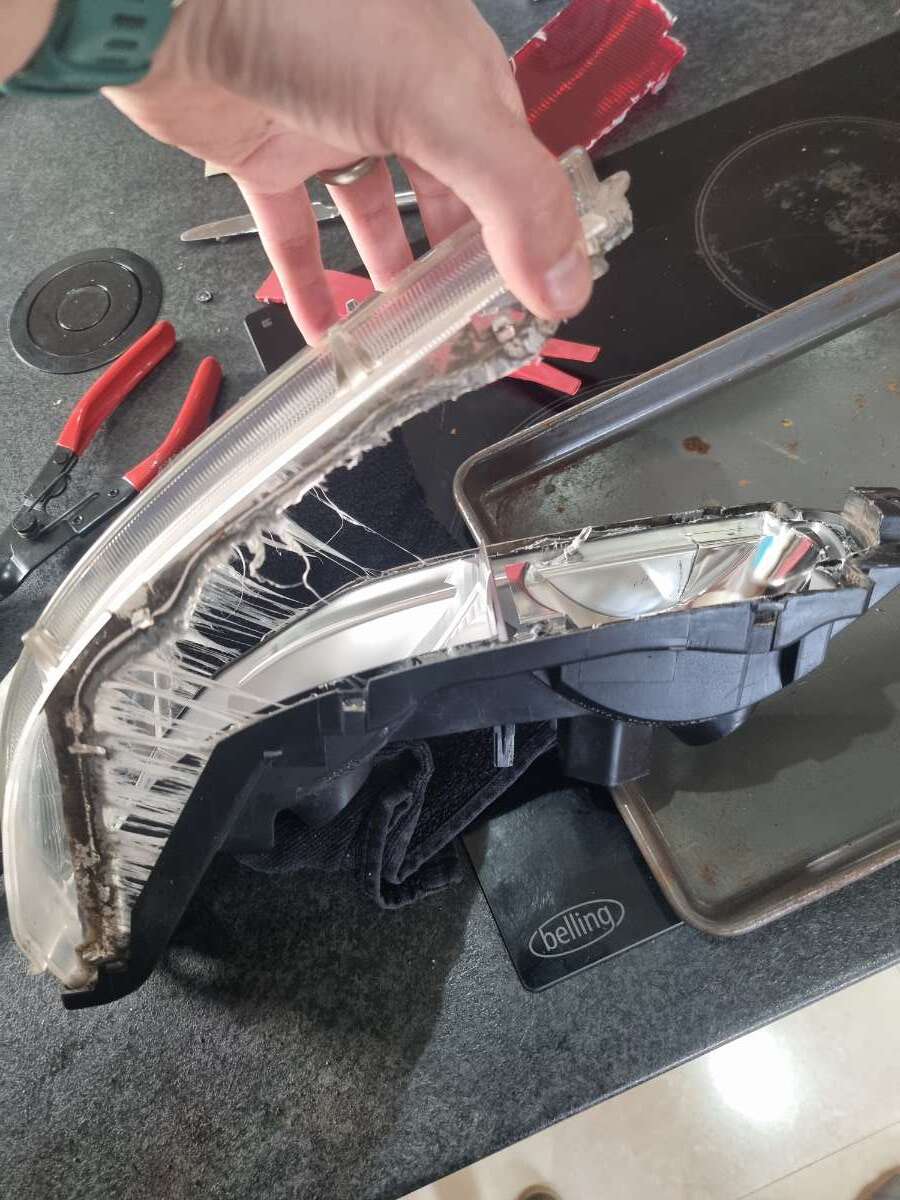
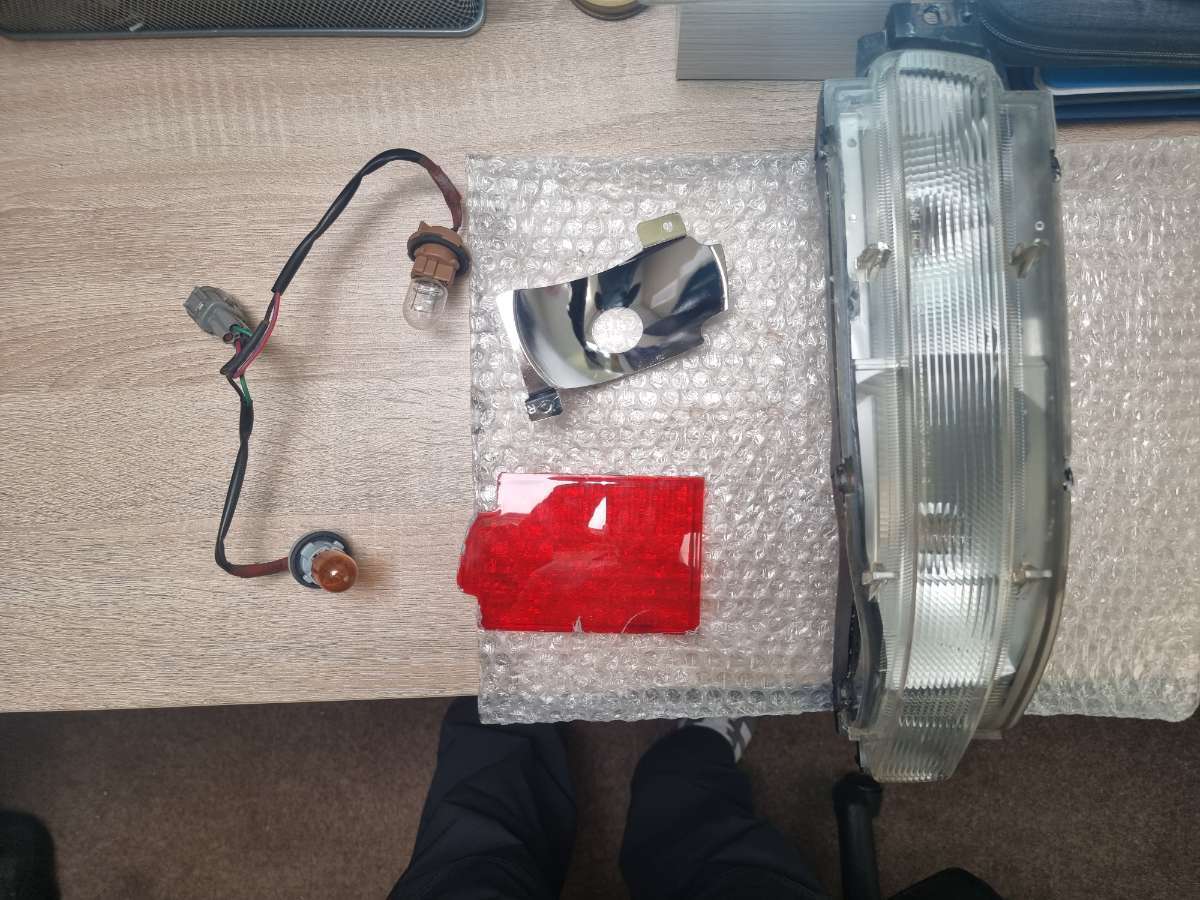
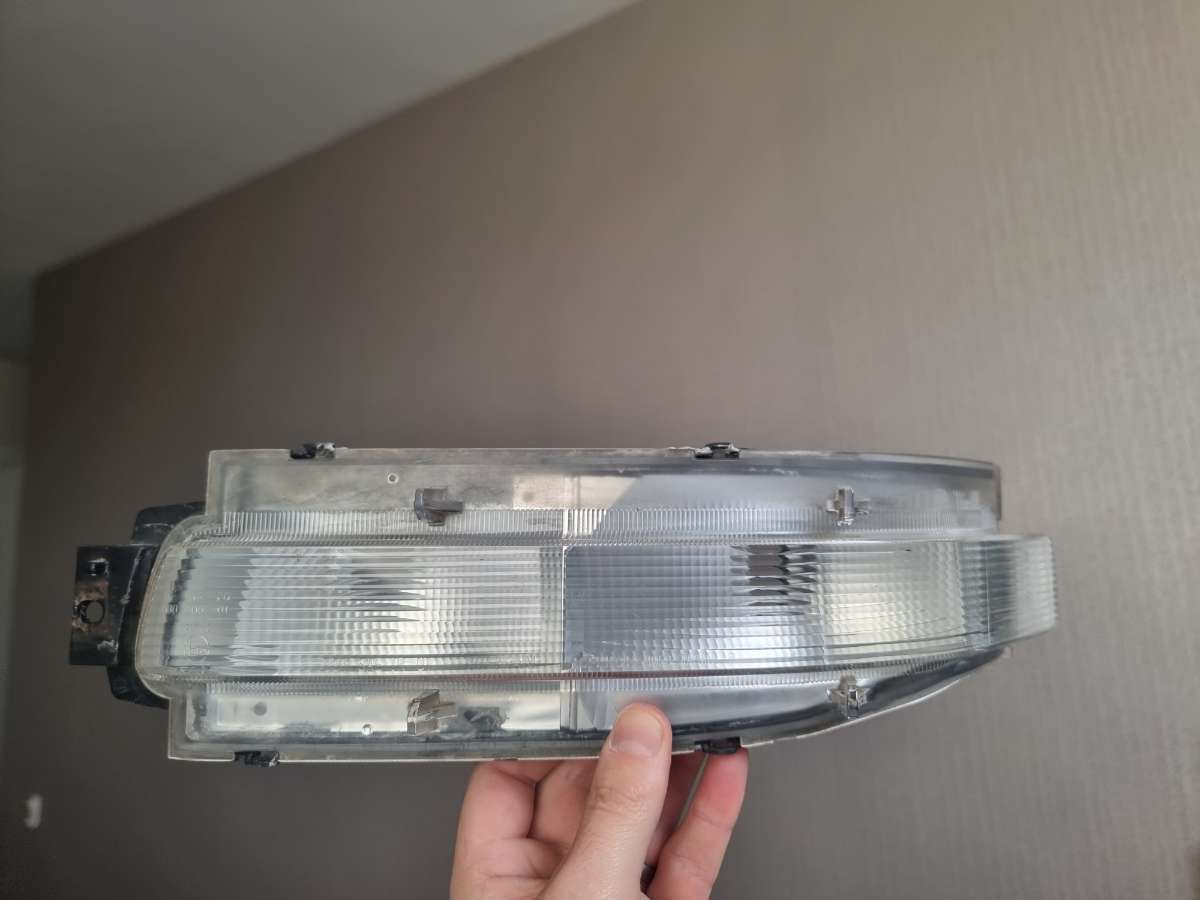
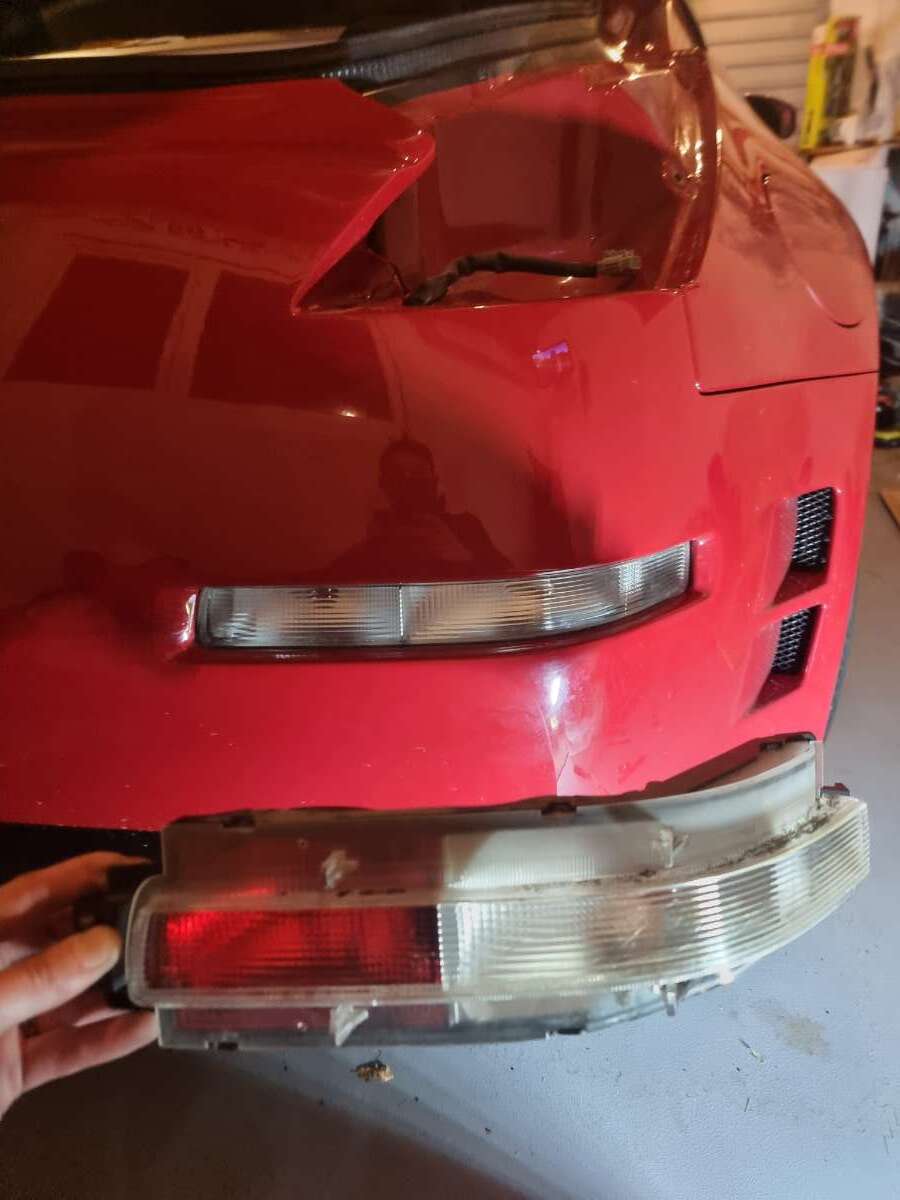
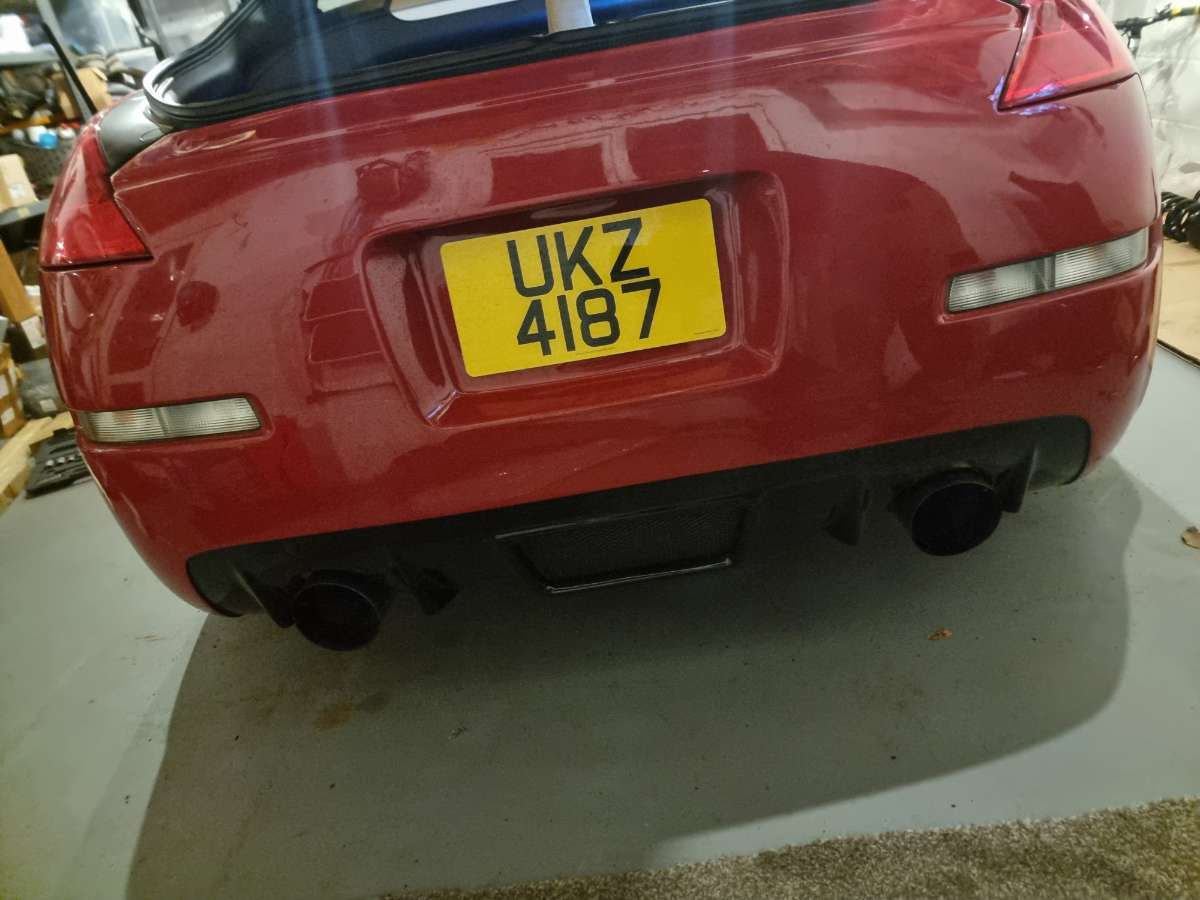
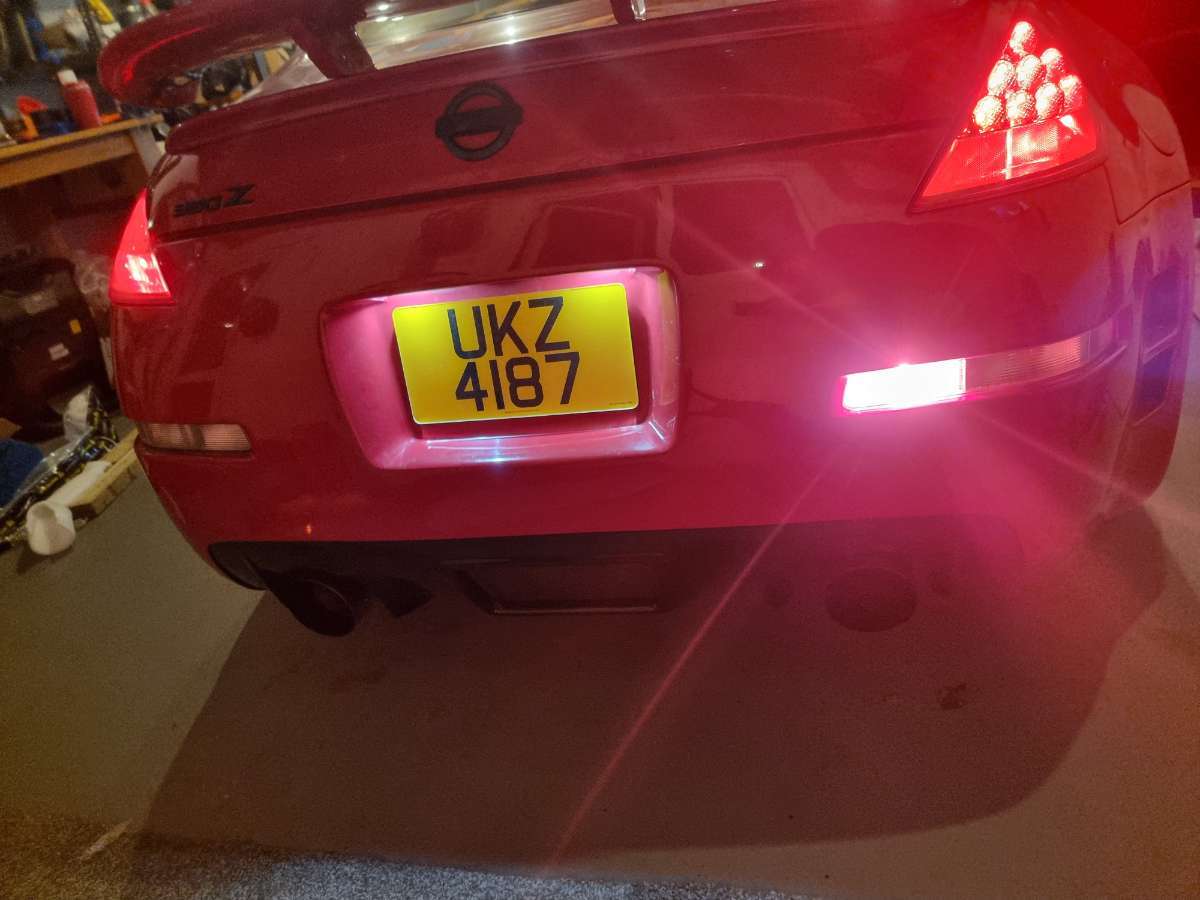
Finally got round to getting these fitted. Was a bit of a faff getting the bumper off. I only loosened it on one side. Then with a little key hole surgery managed to get in behind the bumper. Disconnect the old indicator/rear fog unit and replace with my previously modded clear one. (I fitted a red bulb in place of the red lens) all back together and the back of the car looks nice and symmetrical now.
-
That's cool yeah. rare to see white ones
-
Nice sneaky v1 nismo bumper on there. Is is white or silver?
-
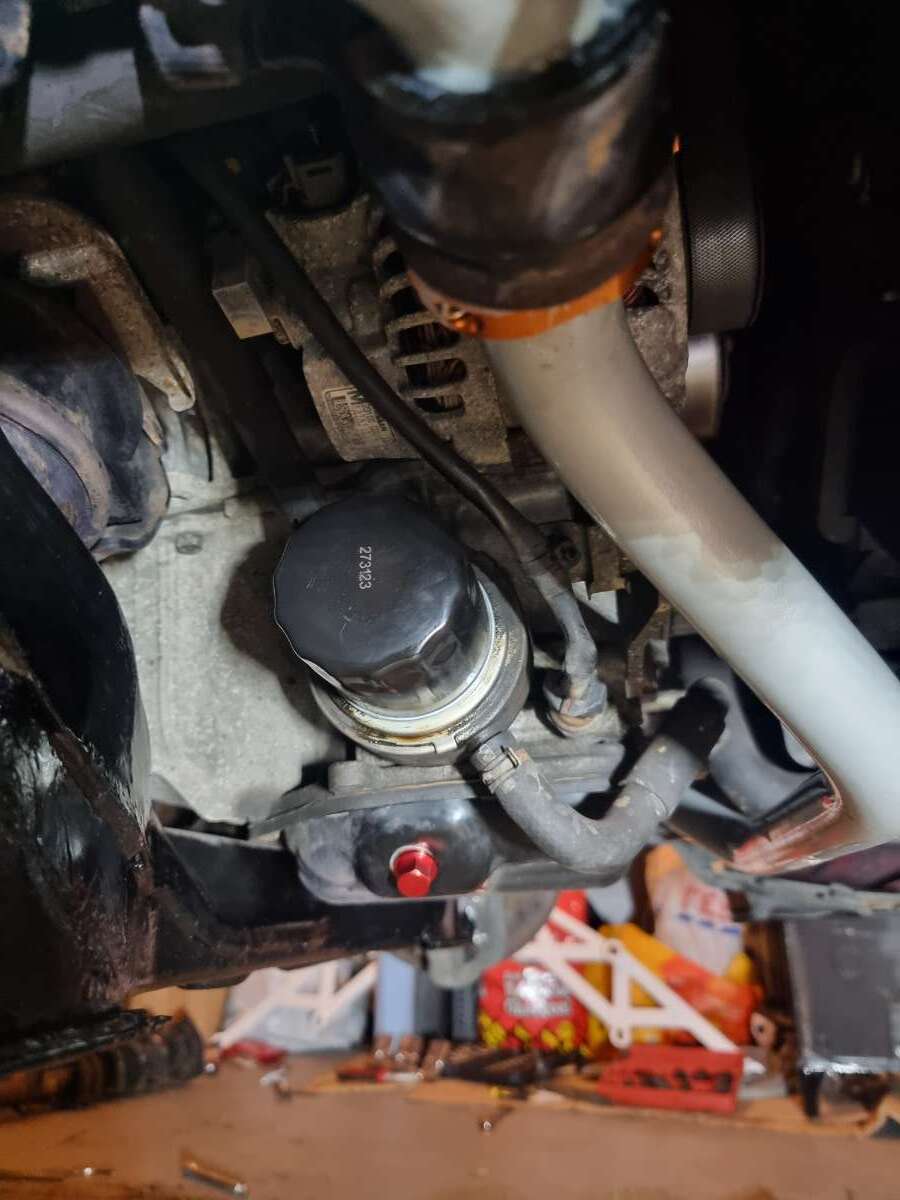
You're not wrong. It was set to off road at that height! Had to take it waaayyy down. Lol. I'm still fine tuning truth be told. I didn't even consider weight saving you know. That's a bonus. I know the after market subframe is a good bit lighter than oem too. So should see a few kilos shaved off so! It's mad a 1.0 litre engine micra has the same filter as a 3.5 litre. Bonkers
-
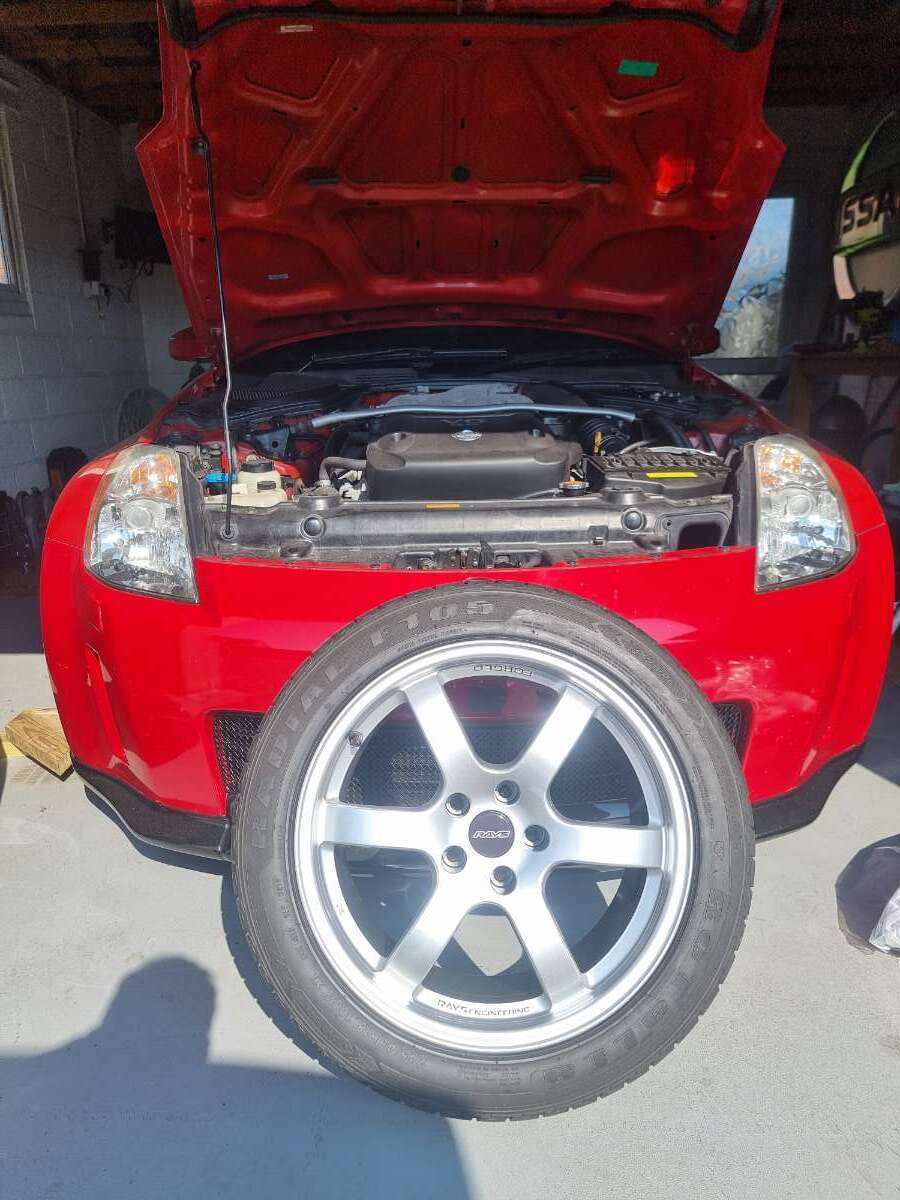
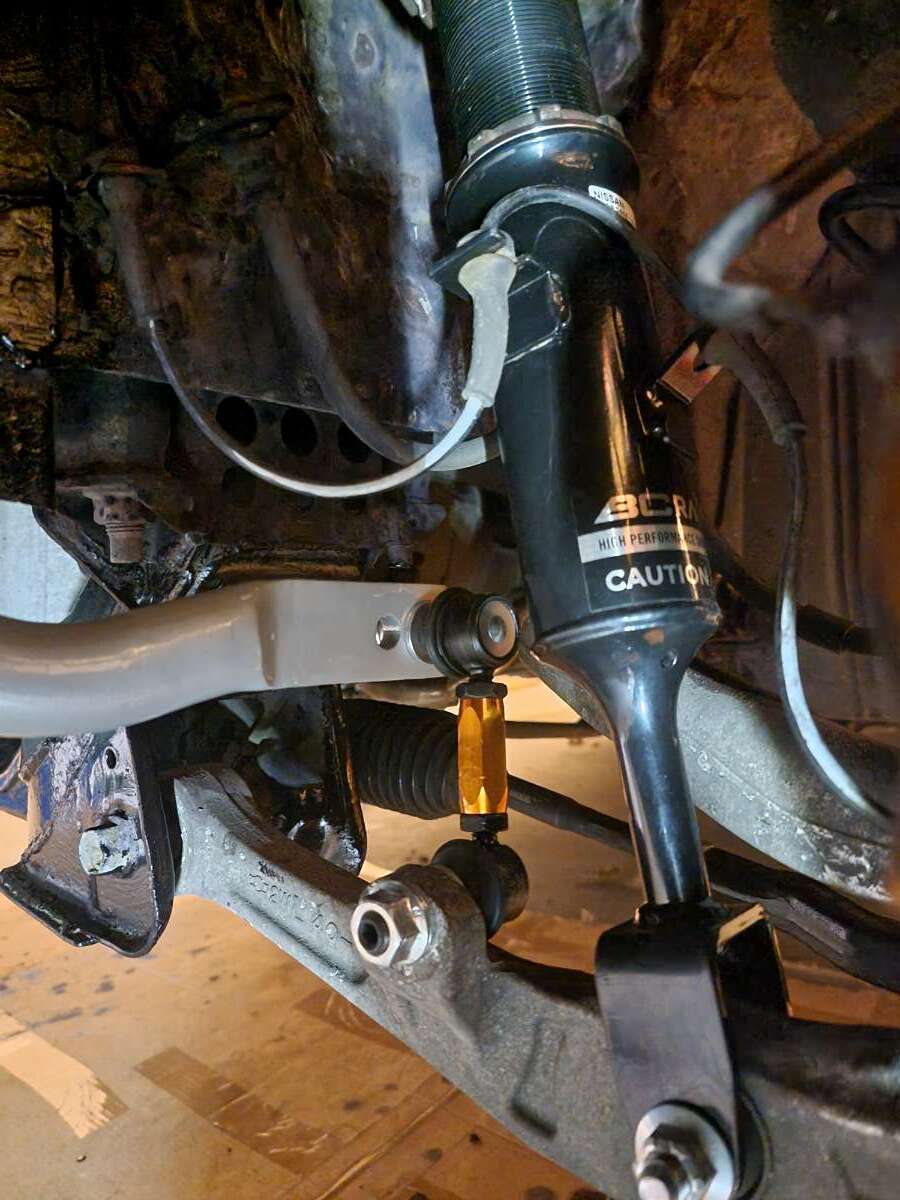
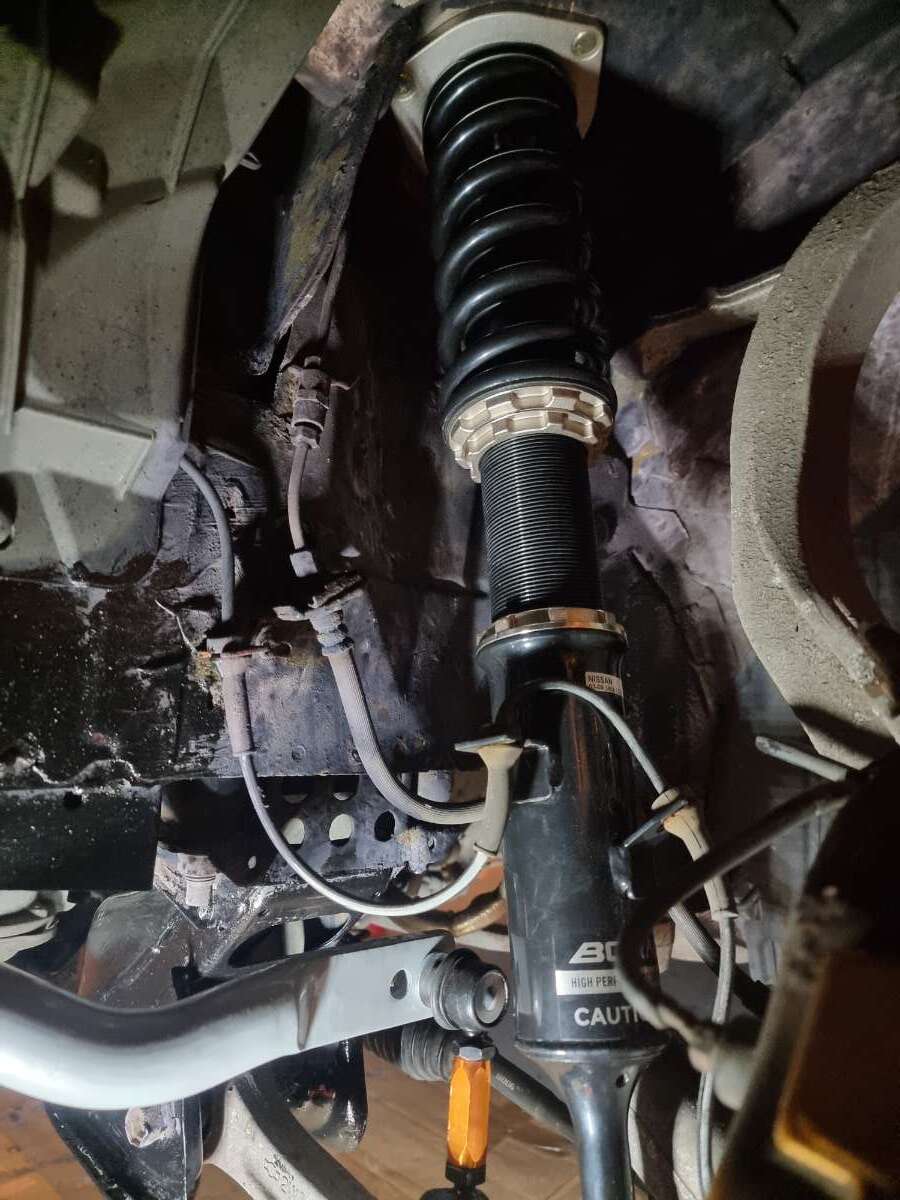
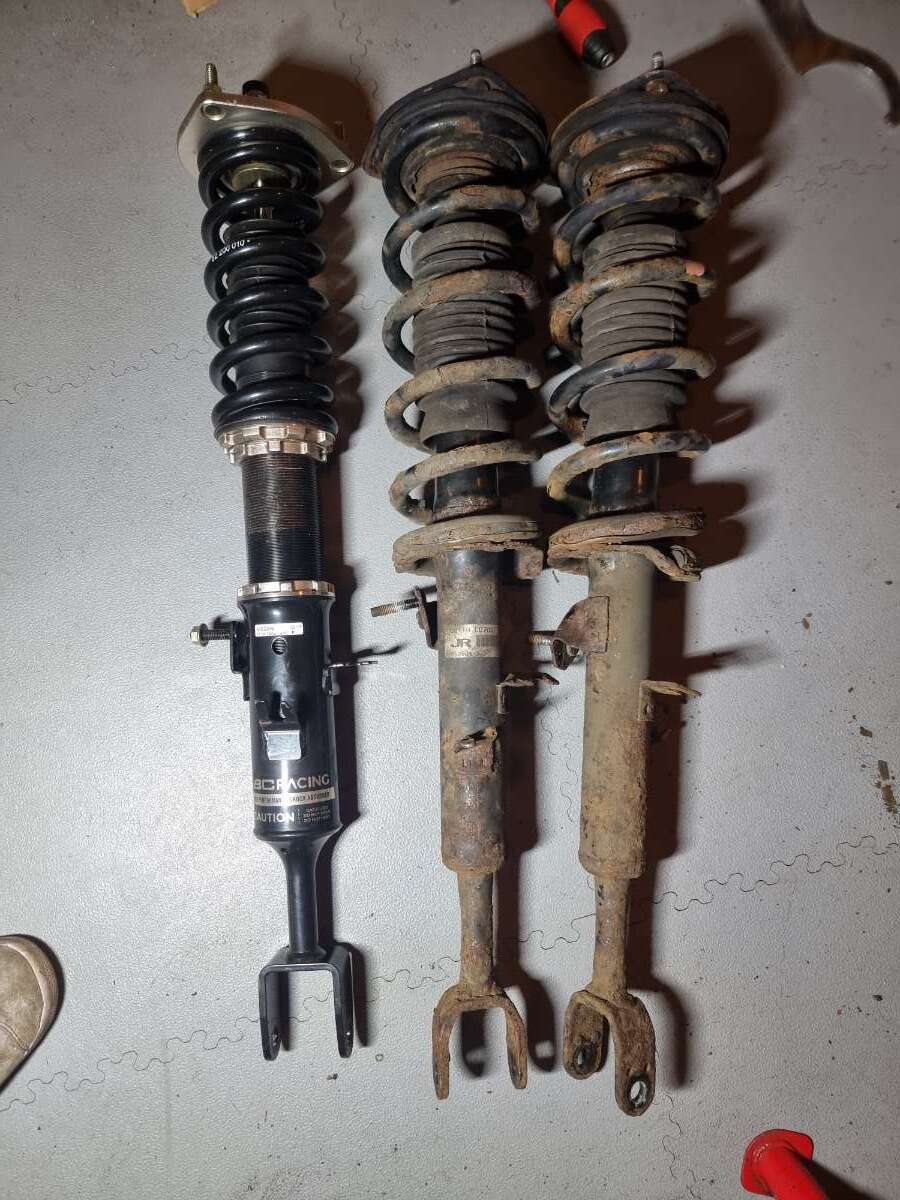
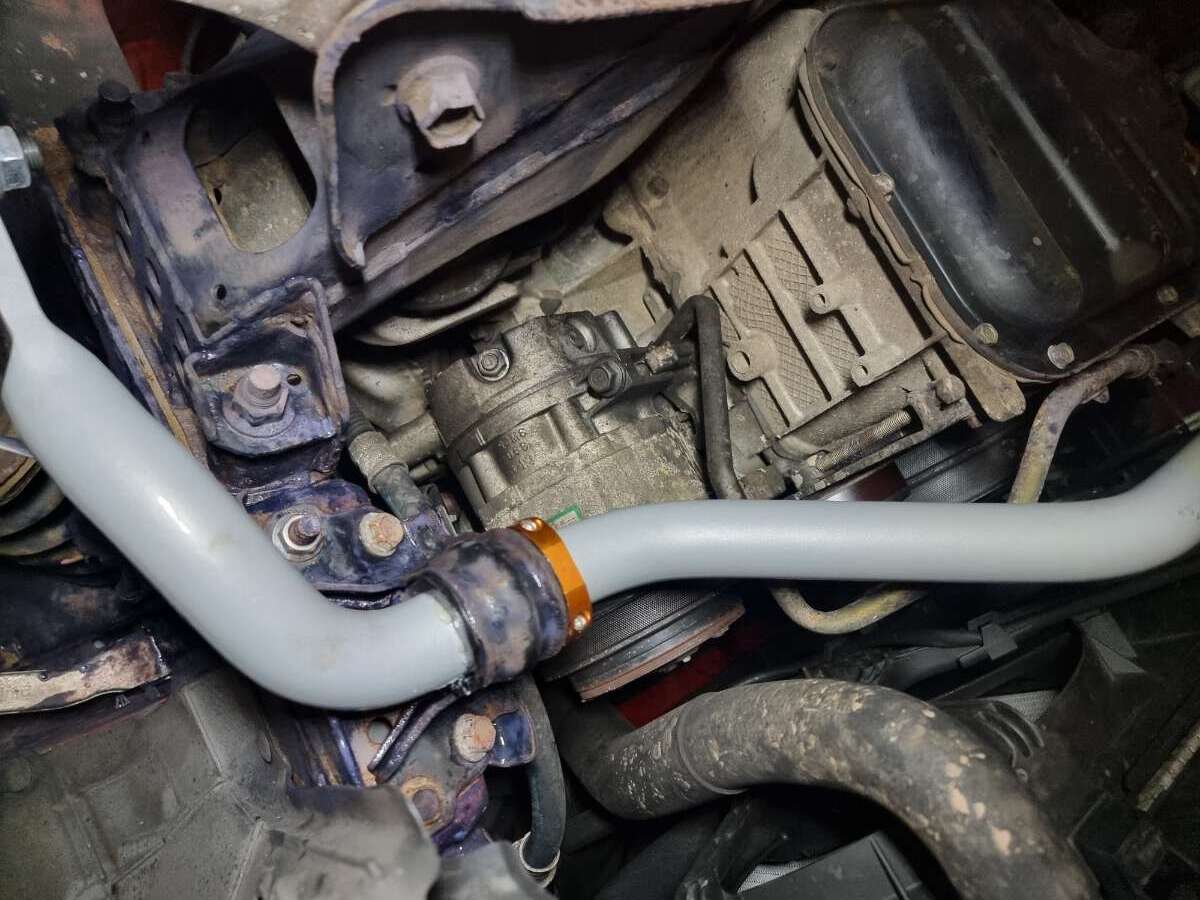
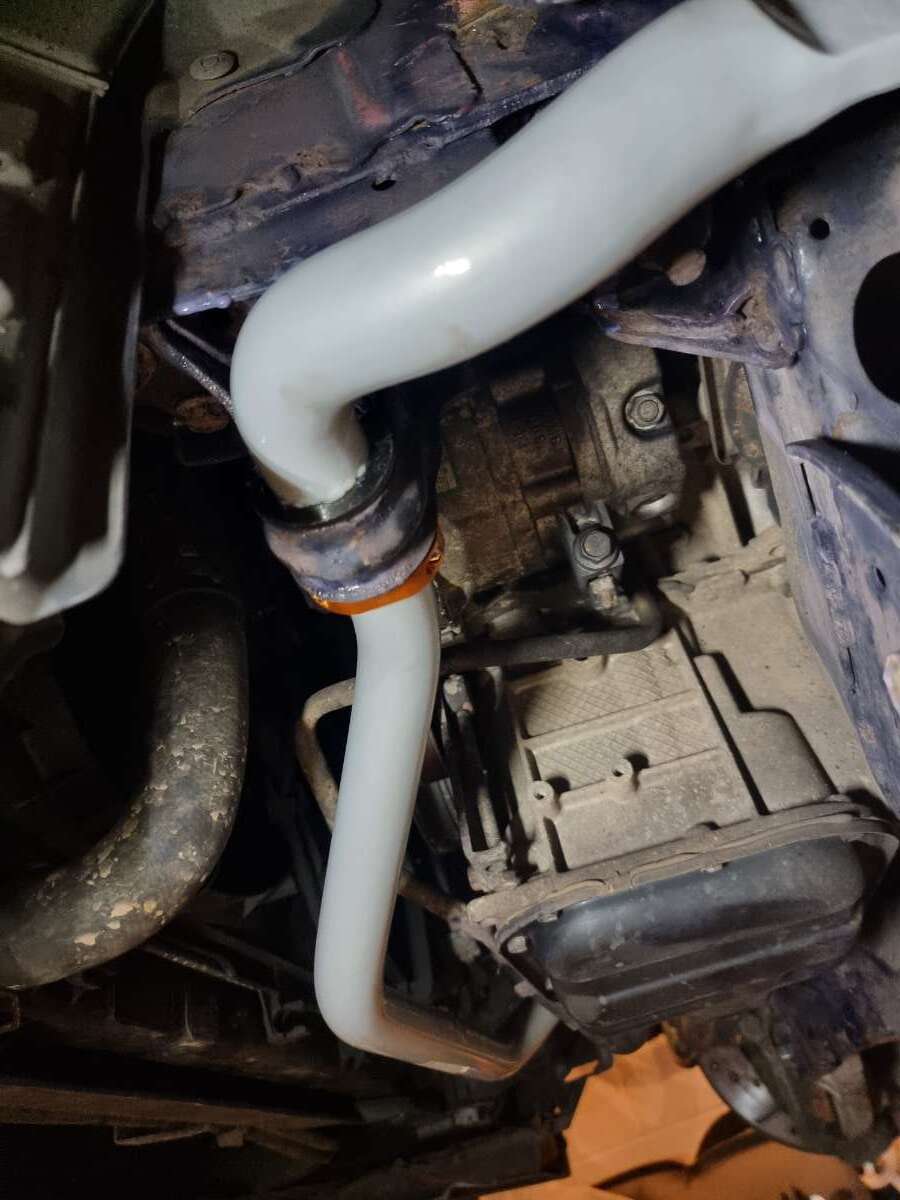
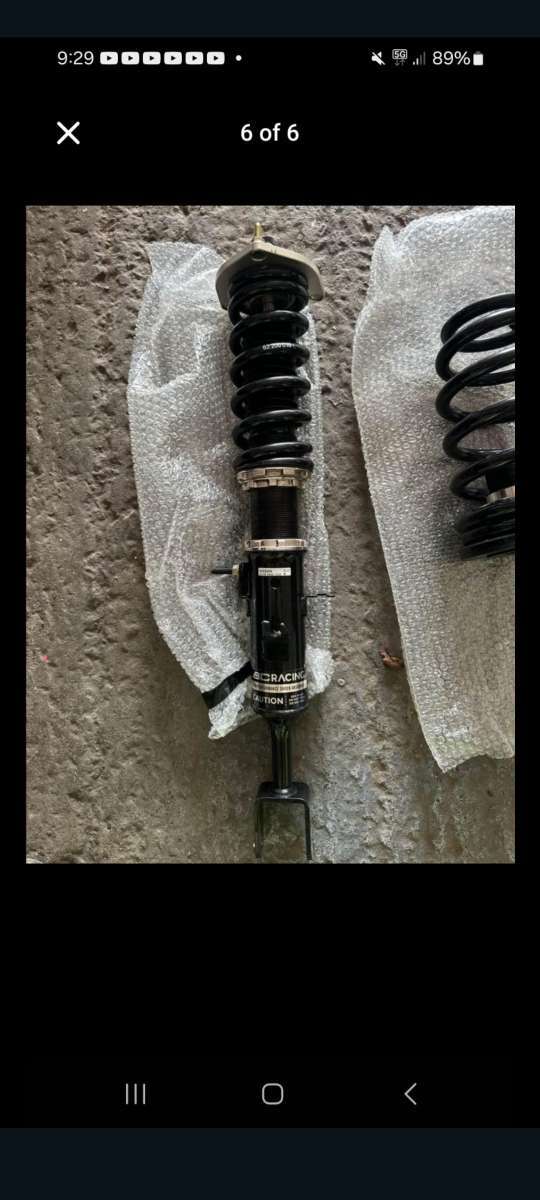
Next up was the front coilovers. All these Jobs by the way, I've never done them before. I'm just flying ahead here with a mixture of youtube videos, naivety and misplaced confidence. But so far things are going well. Electrics unclipped from the strut brace, Strut brace off. Disconnect drop link. Unbolt the old shock/spring tower from the top and the big bolt on the bottom. Not forgetting to disconnect the brake lines and sensor wires from the old shock. And lean on the hub to get it out. Installation was straightforward. But adjusting to the correct height. Oh my God. What a seige. Took about 4 times wheel off and on to get it near correct. At least I can measure now and just match it to the other side. As for the damper settings. I just set it to 16 of 32 (halfway) and will adjust as required.
-
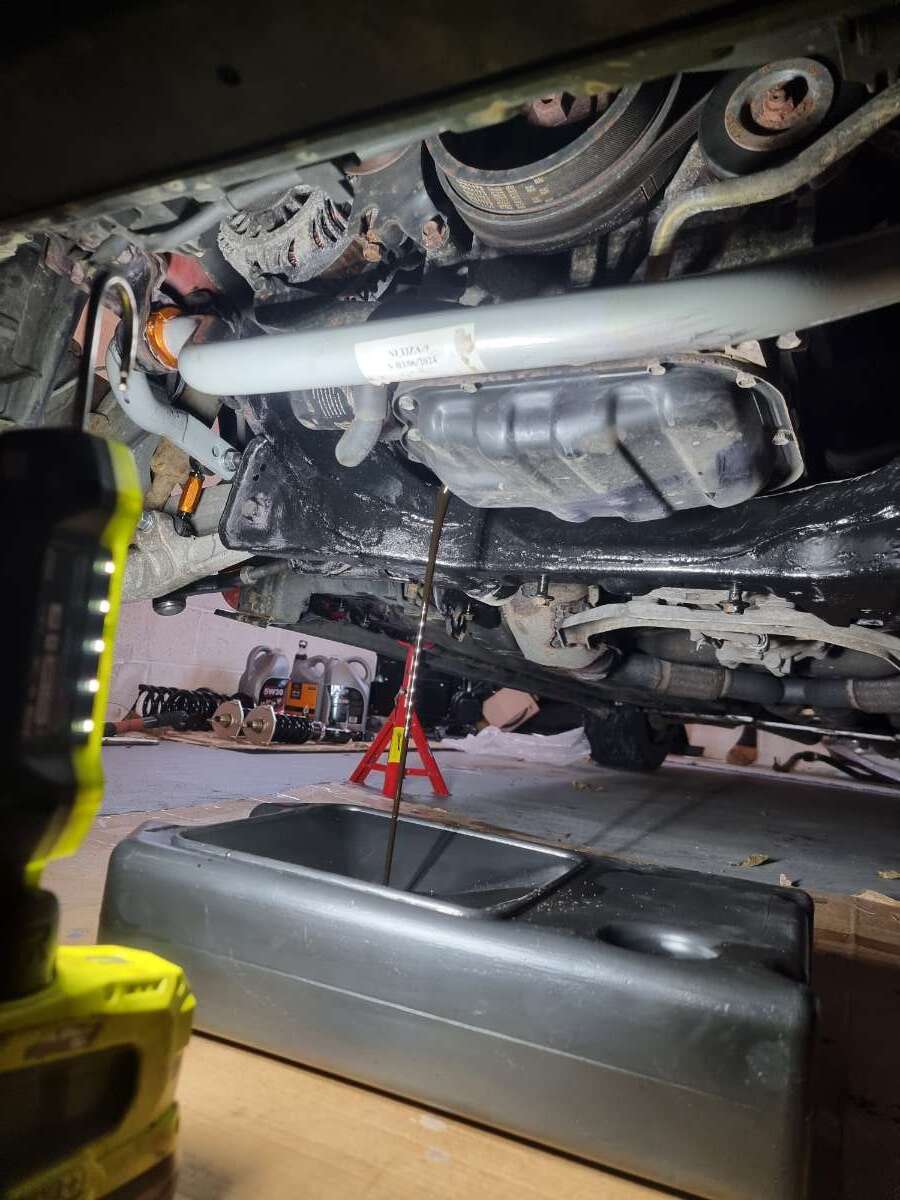
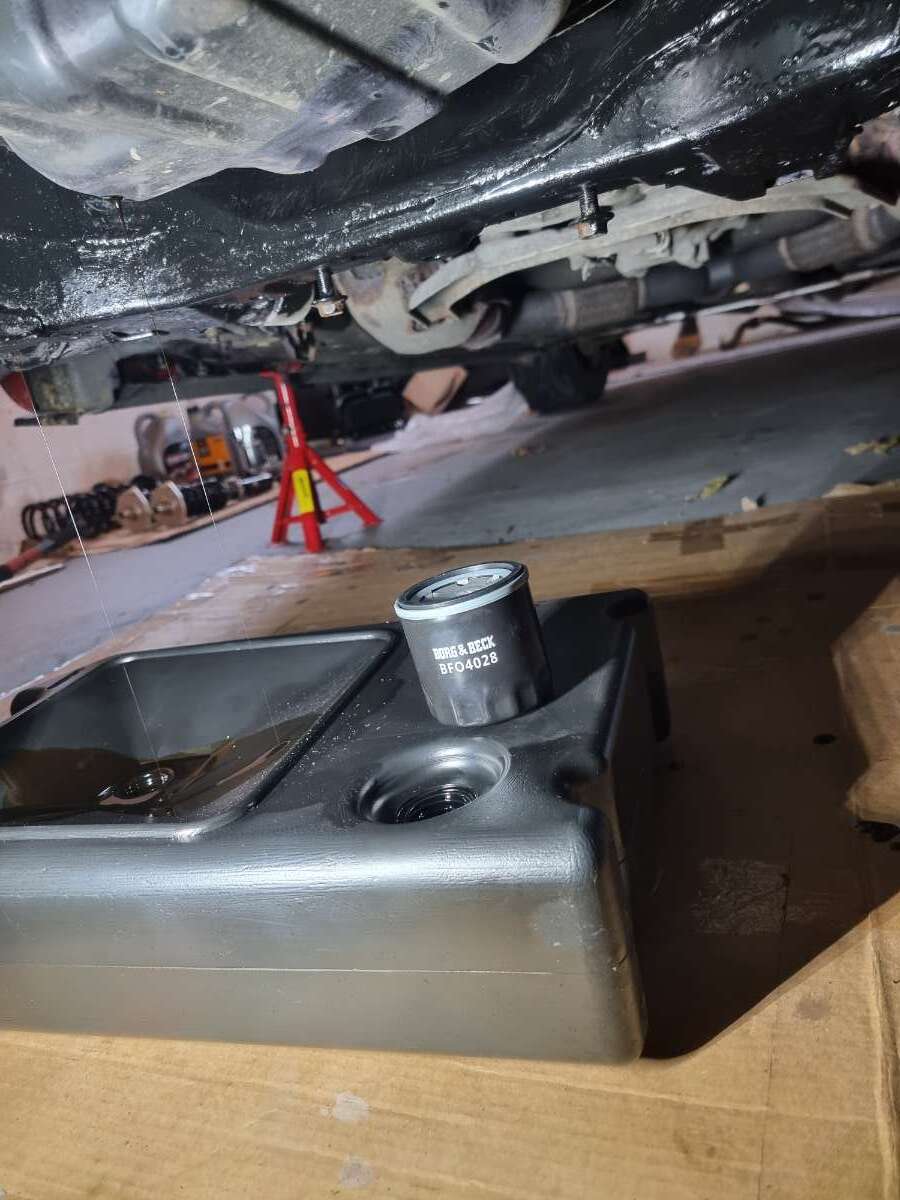
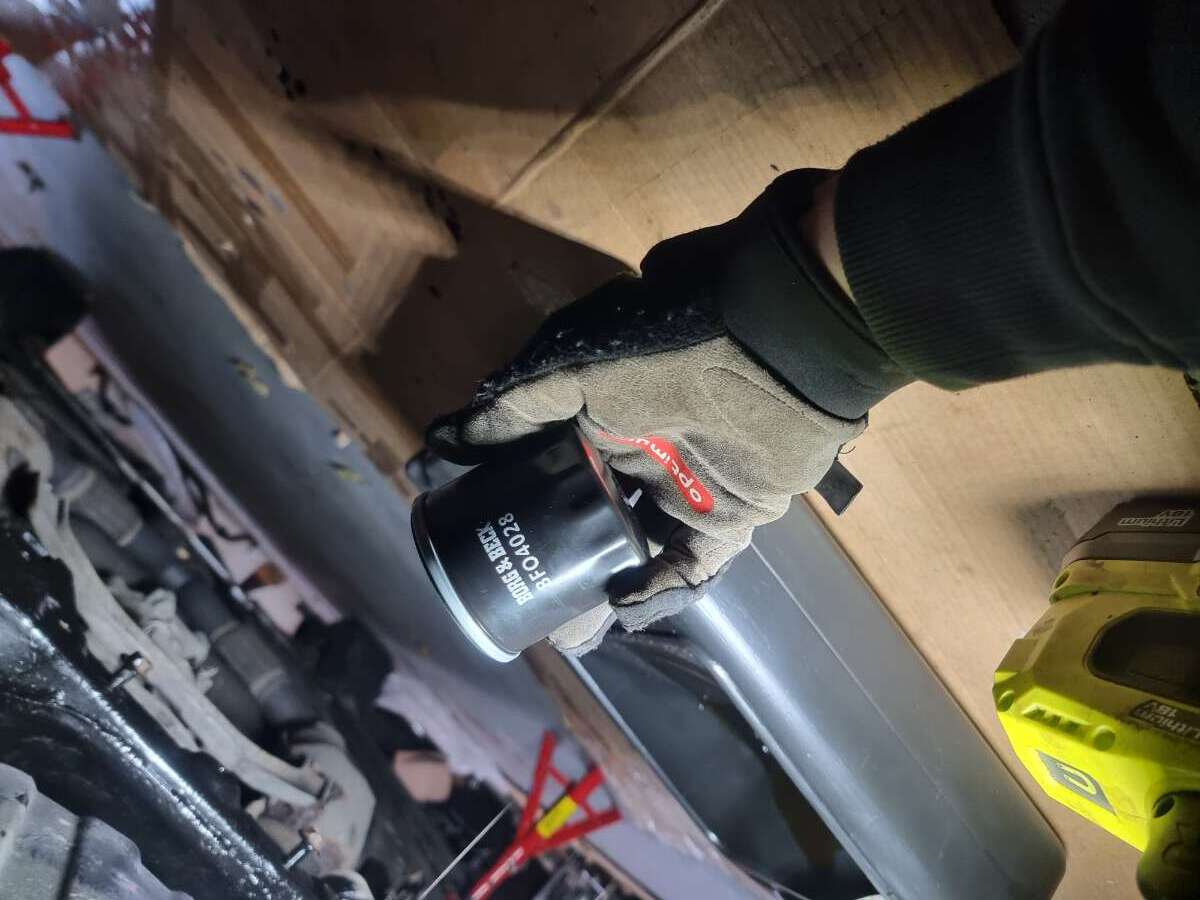
While it was up in the air. I treated the car to a quick oil change and filter change. Never ceases to amaze me how small the oil filter is. Added a red magnetic drain plug while I was at it.
-
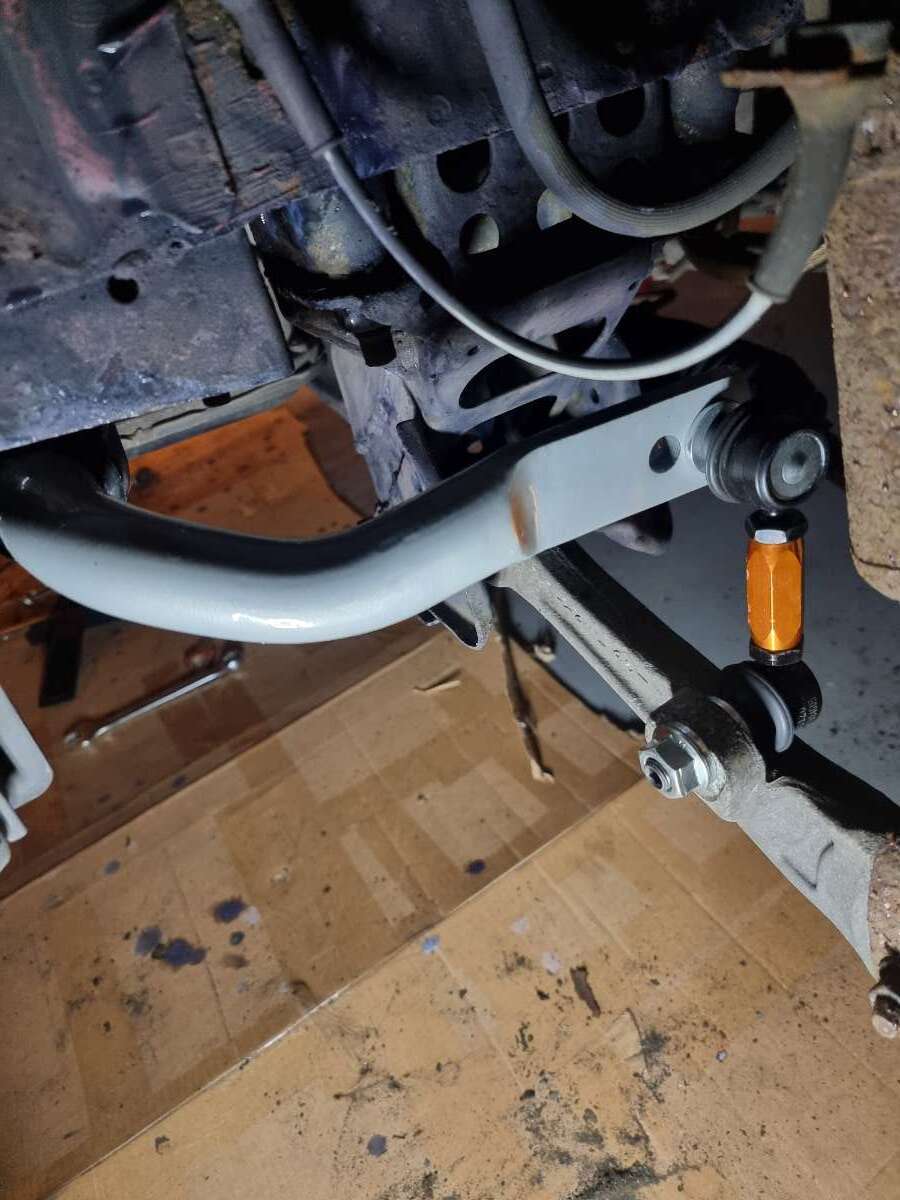
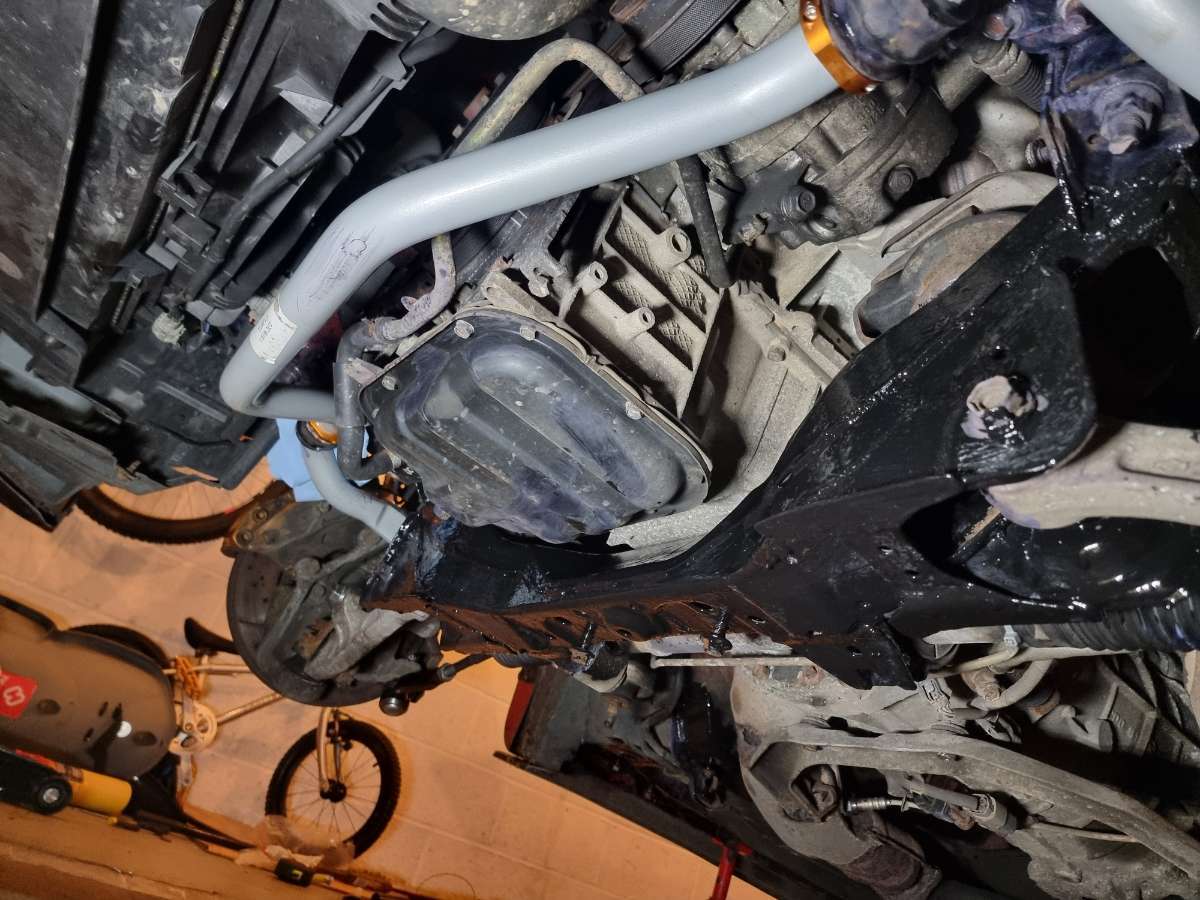
A few more bits done today. Still working on the front end. Suspension. Old drop links and anti roll bar off. New Whiteline ones on. Bit of rust converter painted on here and there too. And a lick of paint to the front subframe. Once it's dry the new ultra racing subframe going back on.
-
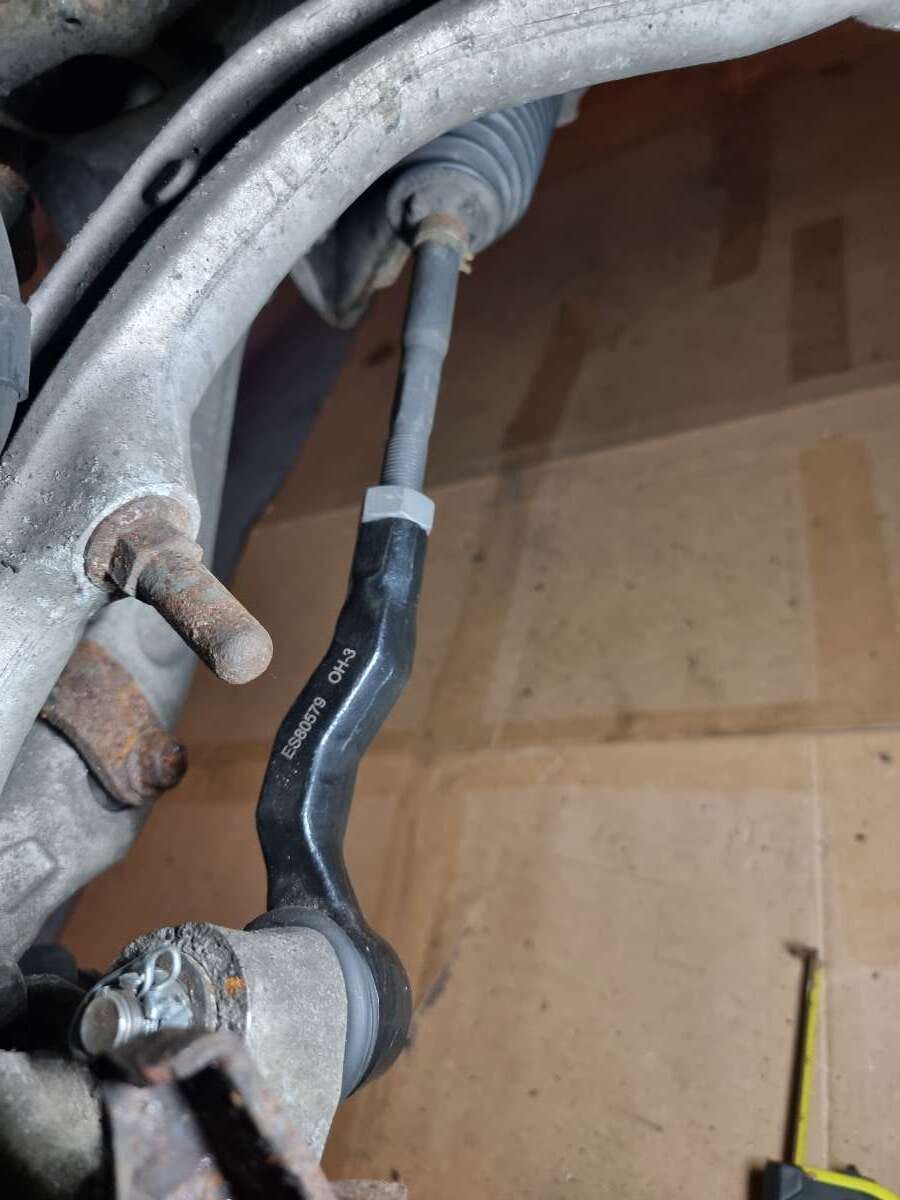
A mixture of Moog and Tarmac sportz brand. Moog for the inners. Tarmacsportz for the outers.
-
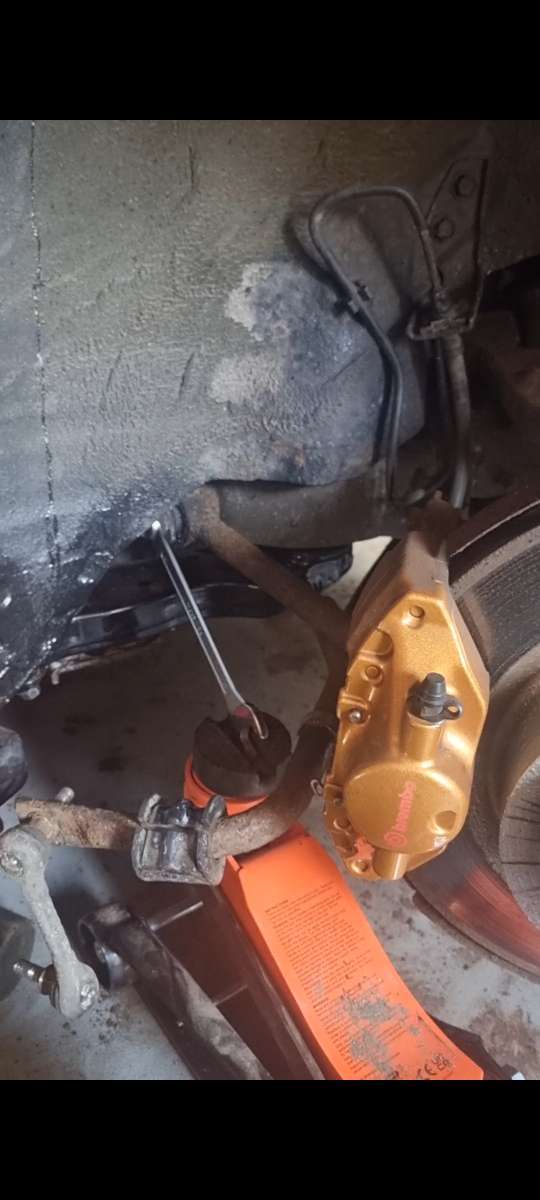
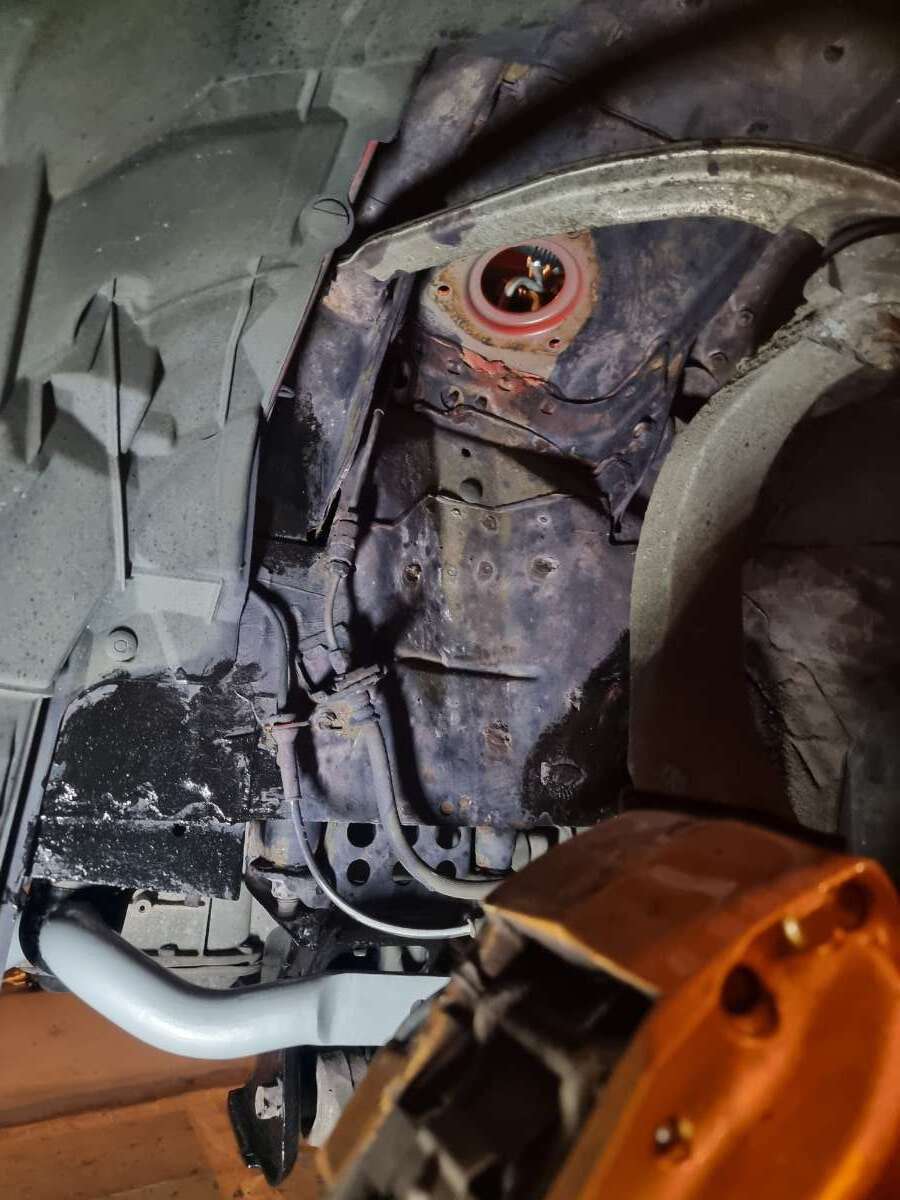
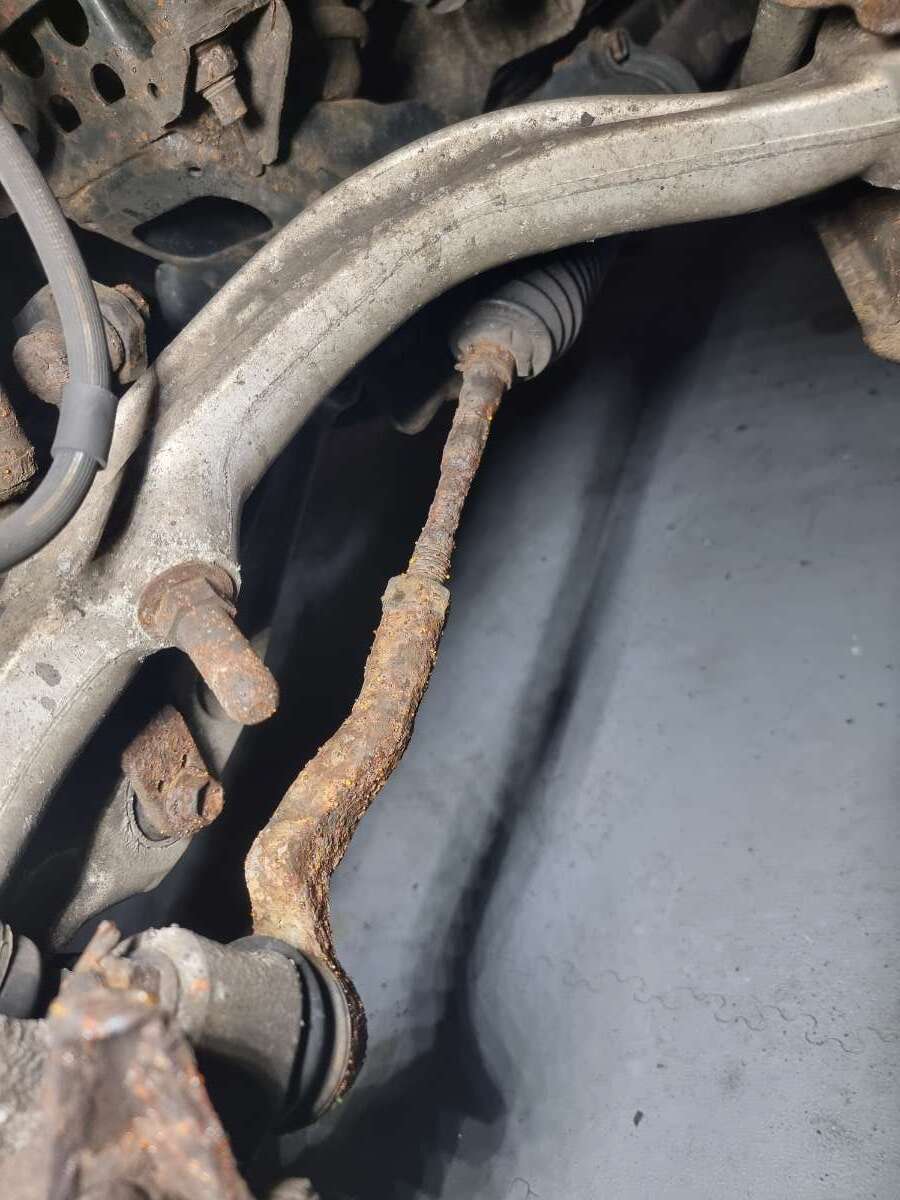
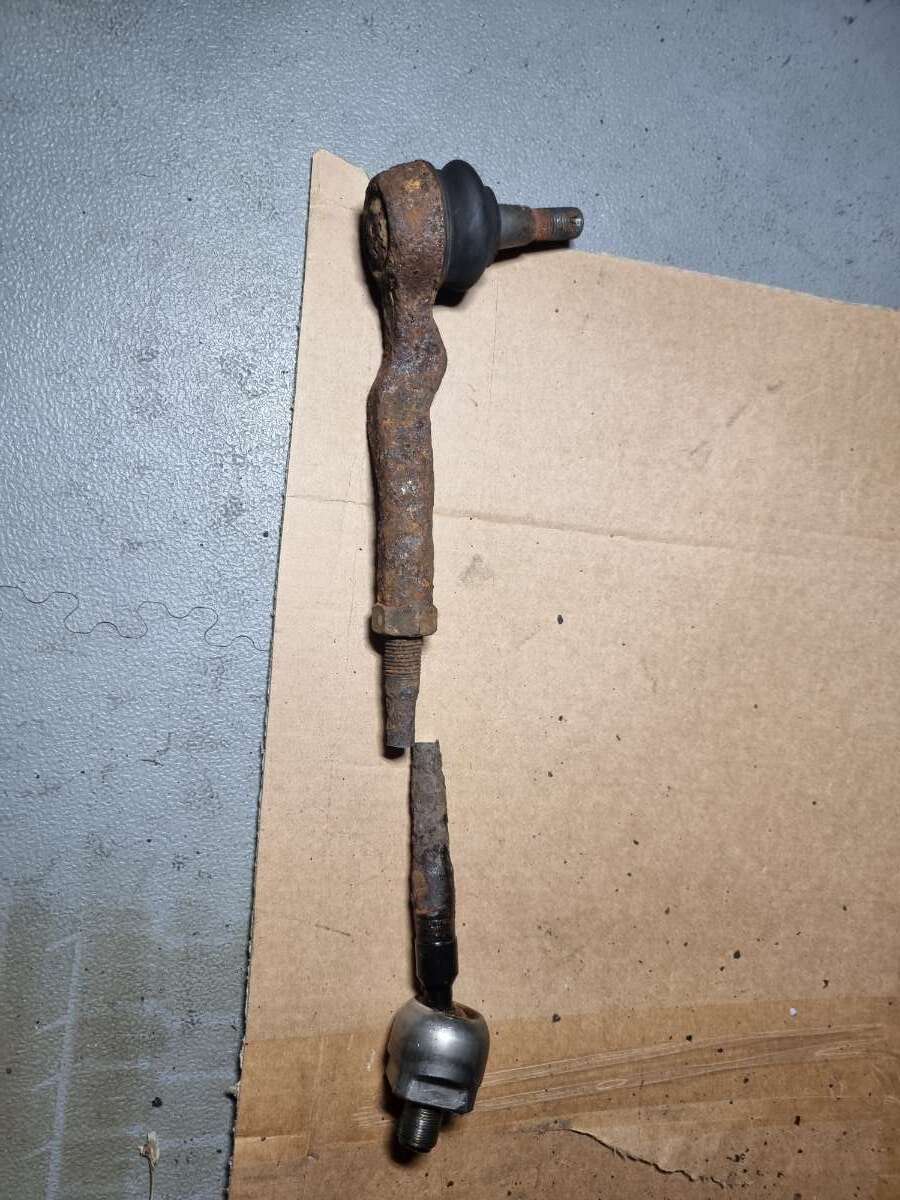
So In my standard fashion I'm still bouncing around a loada jobs. Finally got round to cleaning up some of the front subframe before final fit. Rust converter on. And while waiting for it to work and later painting it. I gave the inner and outer tie rods a change. The old ones were looking pretty rusty and not inspiring confidence. I had to saw the old ones in half to get the rubber boots off too. As they were so seized together as one. Once all the parts are on it get a propper alignment too. Just gauged length of them off the old ones for now.
-
Oh 100%. Most all moving parts down there need a refresh. Banana arms bushing seem ok. I think at least one has been replaced, before my ownership. The lower control arm bushing on one side looks a bit worse for wear mind you. It's probably going to be added to the list. (The list that never stops growing)
-
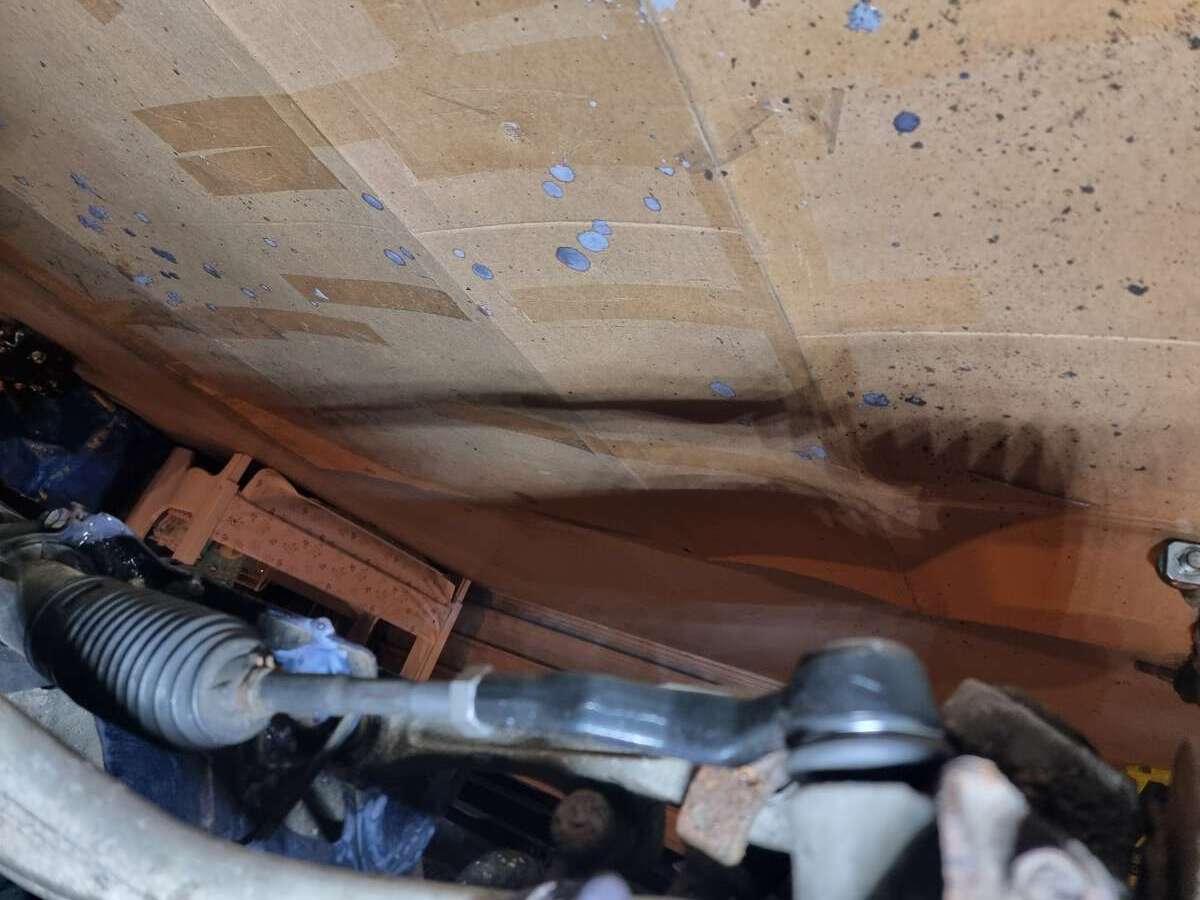
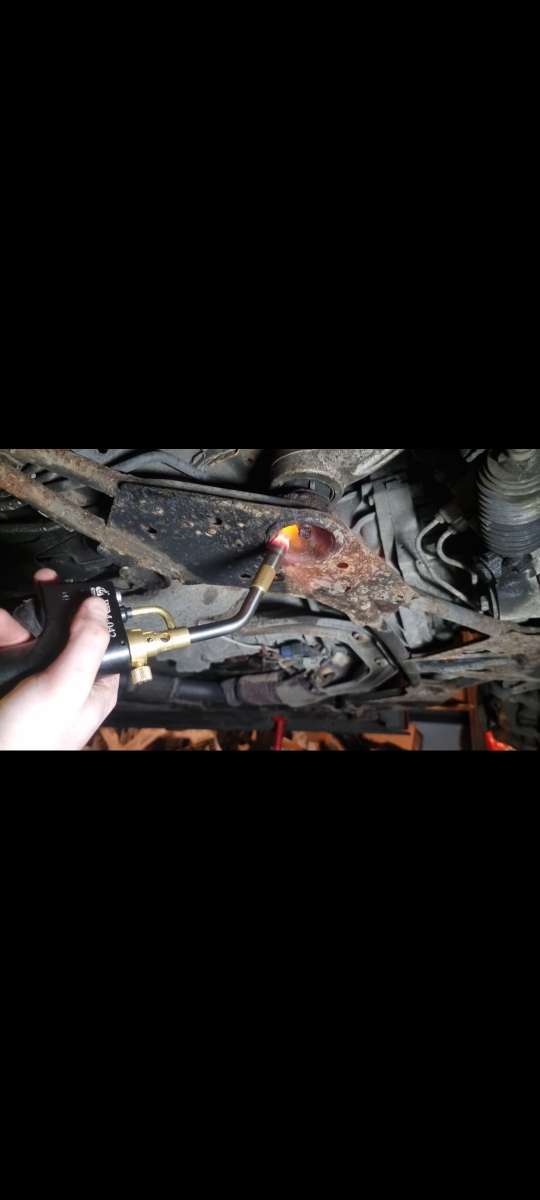
A few steps closer today. I managed to get the big m14 nuts off the front sub frame. Without breaking the captive studs. (They were really on there) required the blow torch and the big breaker bar to get them moving. The rest of the m10 bolts came off without too much bother. So front subframe is now off. The ultra racing one ready to go on. I bought new hardware too. For reference. You need: -two m14 nuts. 1.5 fine thread. -six m10 bolts with 1.25 fine thread. (25mm long) I've mocked up the new brace. But I'm going to brush up and go over some areas with rust converter and a touch of paint before full reassembly. Also I've ordered new inner and outer tie rods before anyone mentions the state they are in!(shocking really, how did they pass mot?)
-
Just a cheap brand off amazon. I think they are "Gunpla" so even more surprised they worked. But even if they are cheap. Couldn't fault them in this instance. I've had to order a blow torch as the big 19mm nuts are well stuck. I've heard about a few people breaking the captive threaded studs these attach to. So not taking any risks. Heat required....
-
I realise I'm jumping around a bit. A few half finished jobs on the go But currently the car is on axle stands with a few plans for winter fixes. So i picked up the ultraracing front brace and I'm halfway through removing the old rusty one. It was going ok untill I rounded a bolt. (Despite being really carefull, using 6 point sockets and a gently gently approach) Anyway, I had some extractor sockets from when I was doing the kidney brackets.(didn't end up using them there) and with out much expectations I hammered one on. Have to say I am soooo impressed. Hanging off it with the breaker bar. It held fast and removed the bolt. 100% my new favourite tool.
-
Looking sweet my man!
-
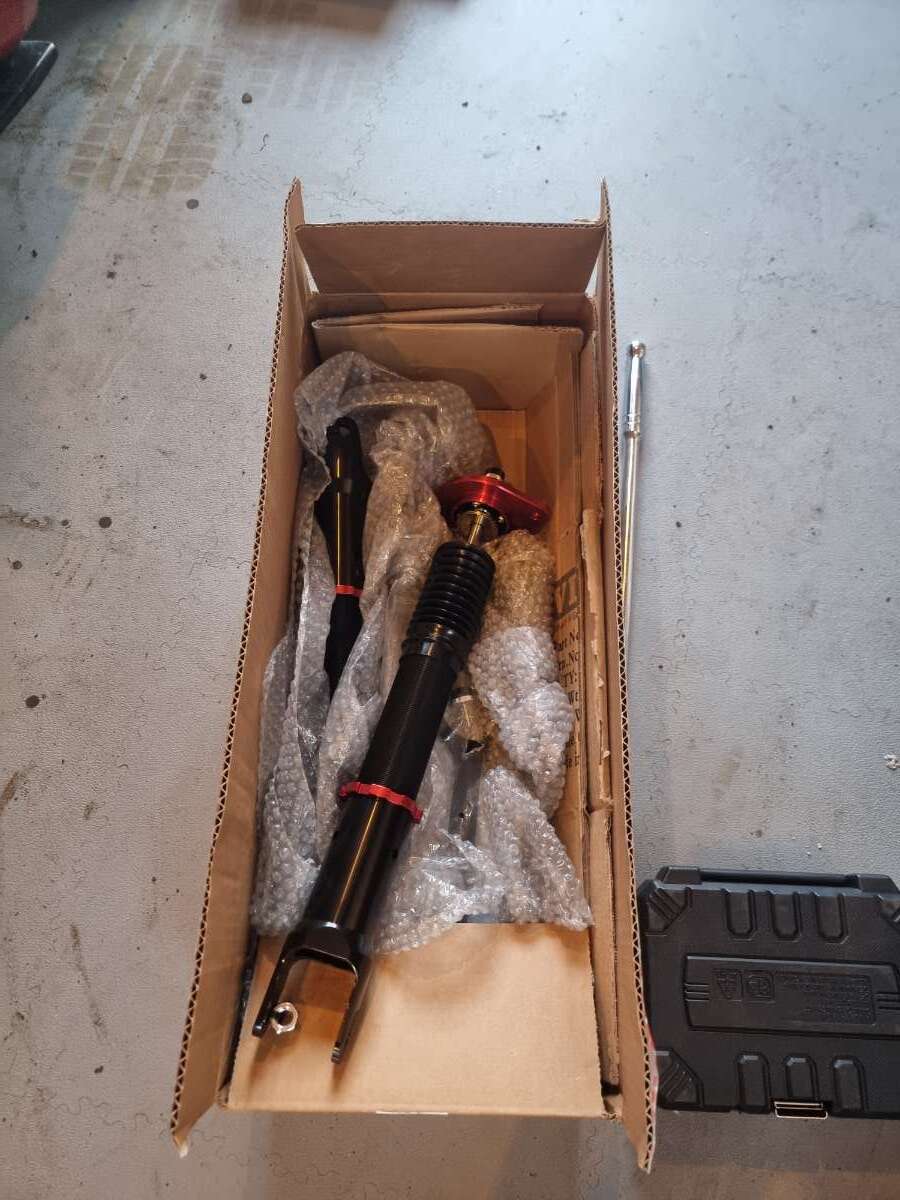
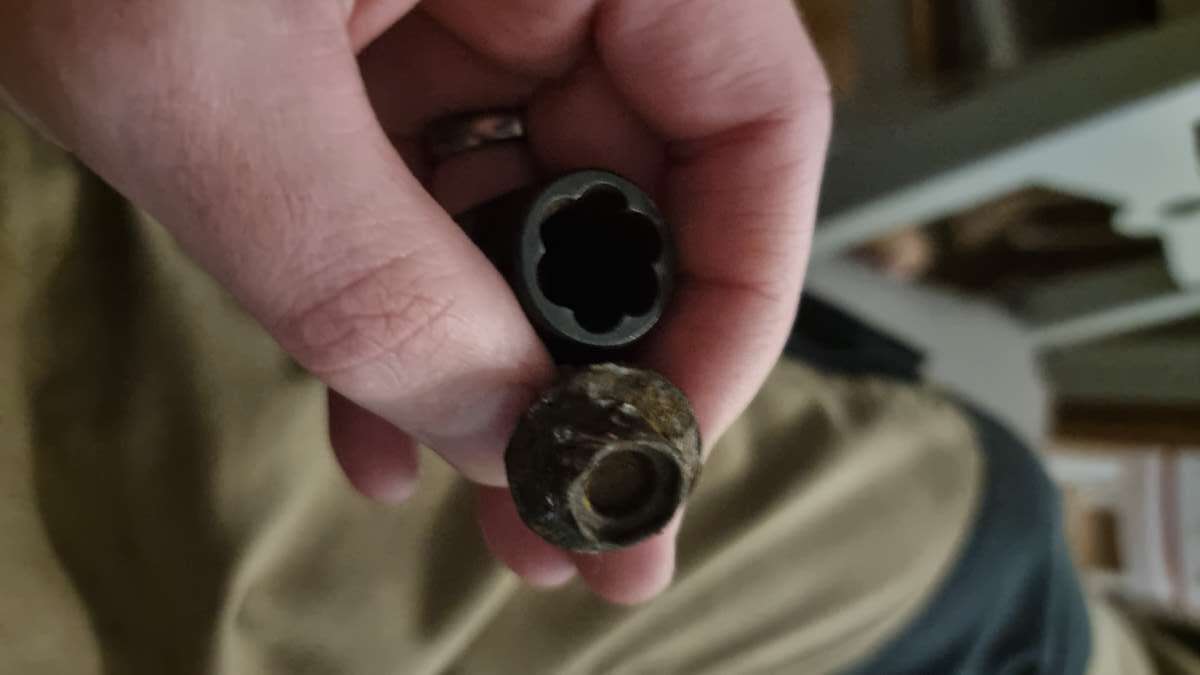
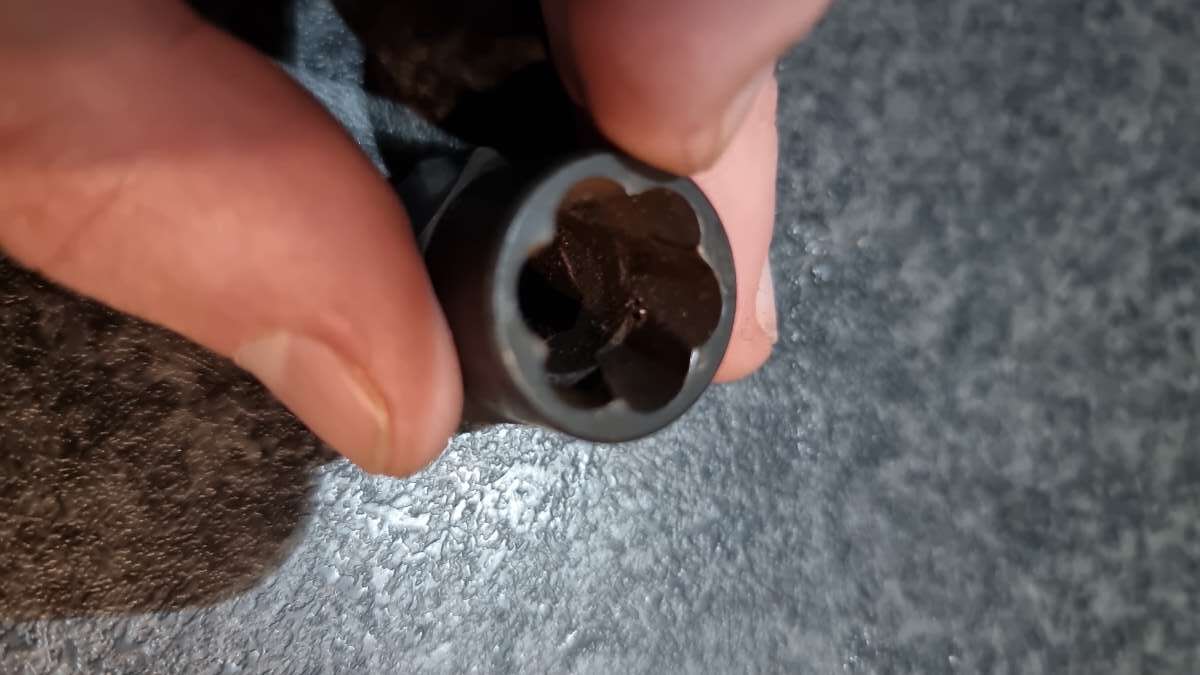
So I bought an ALMOST set of coilovers. A set of BCs for the 350z. They were going really cheap. But are missing some parts. Ie. the rear dampers! (Lol) I've got the adjustable rear springs and seats. Now I contacted bc to see if i could buy separately and they were looking well over 500 pound just for the rear damper assy (non true coilovers) So I was exploring other options, For rear damping. The Tein enduro pro plus seem to have a a rear damper that you can adjust too. And I can get a pair for like 300 euro. So I might go down this route. Any thoughts? Unless some random is breaking a set of BCs. ?
-
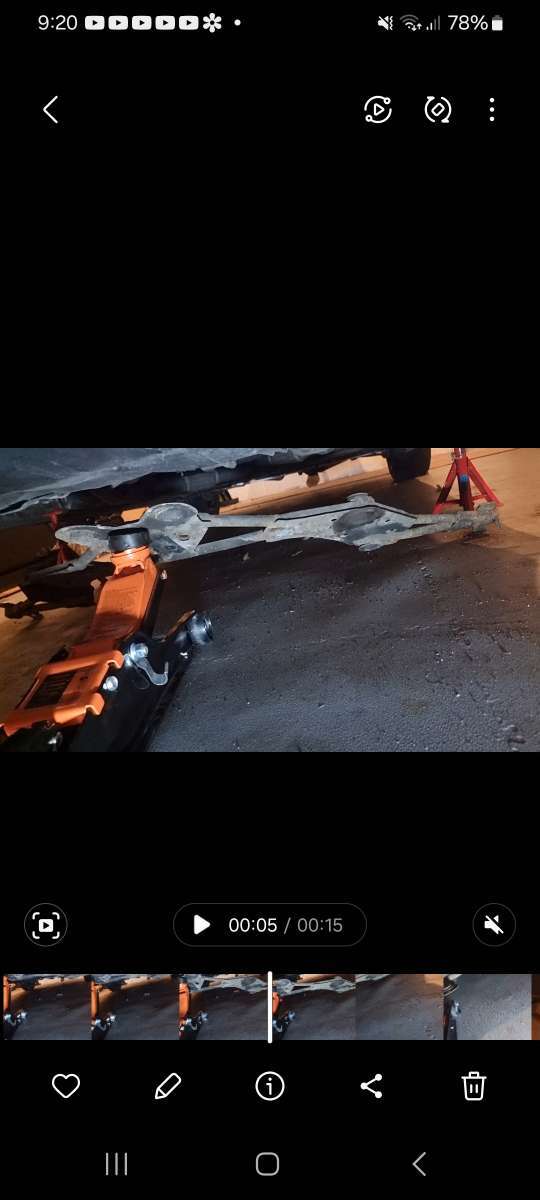
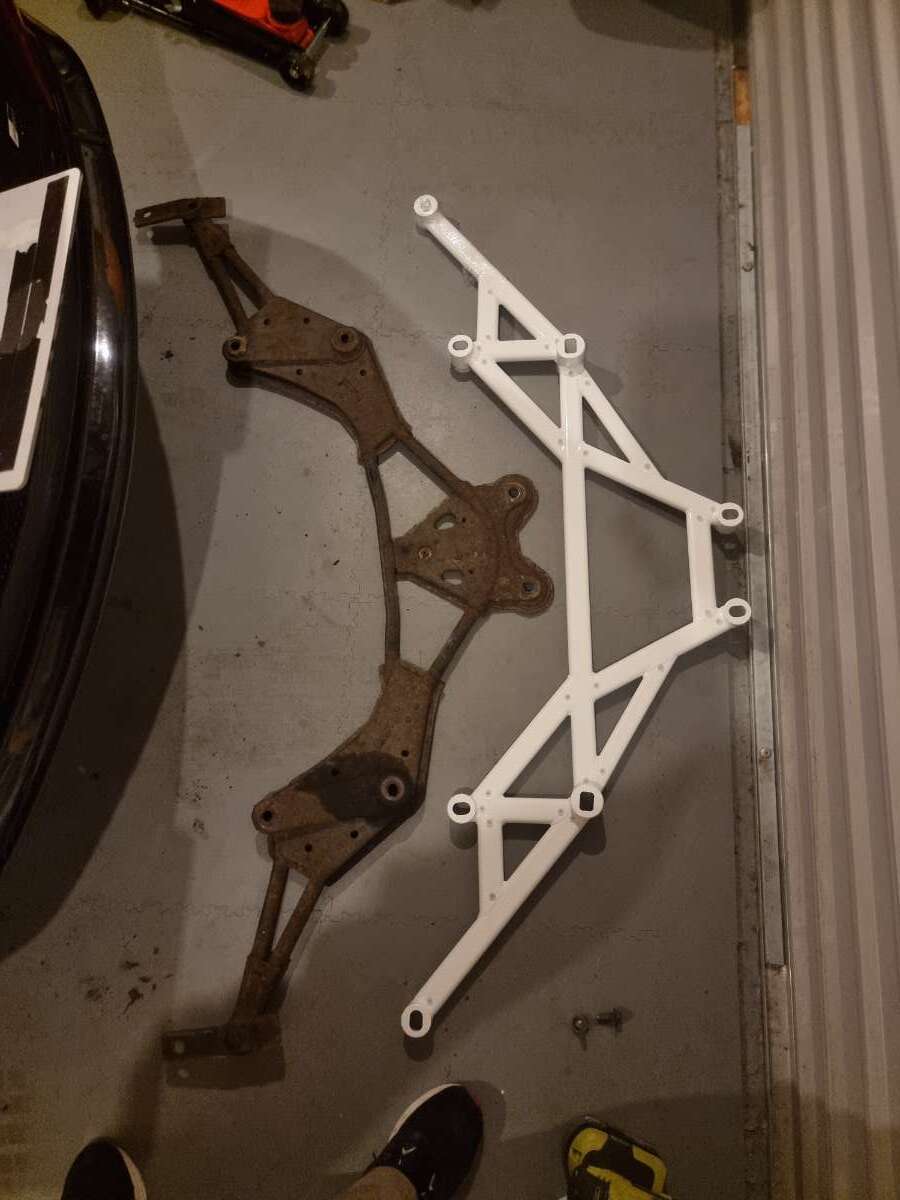
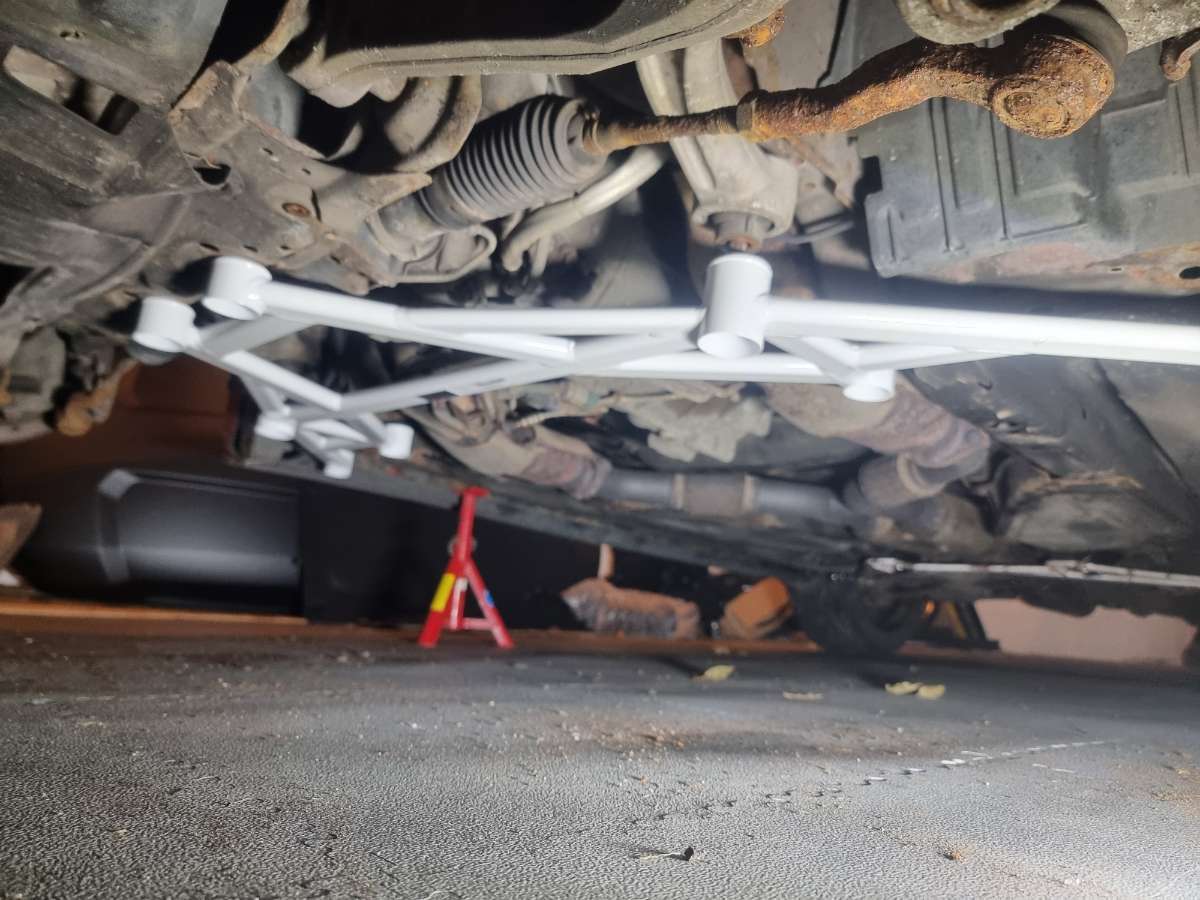
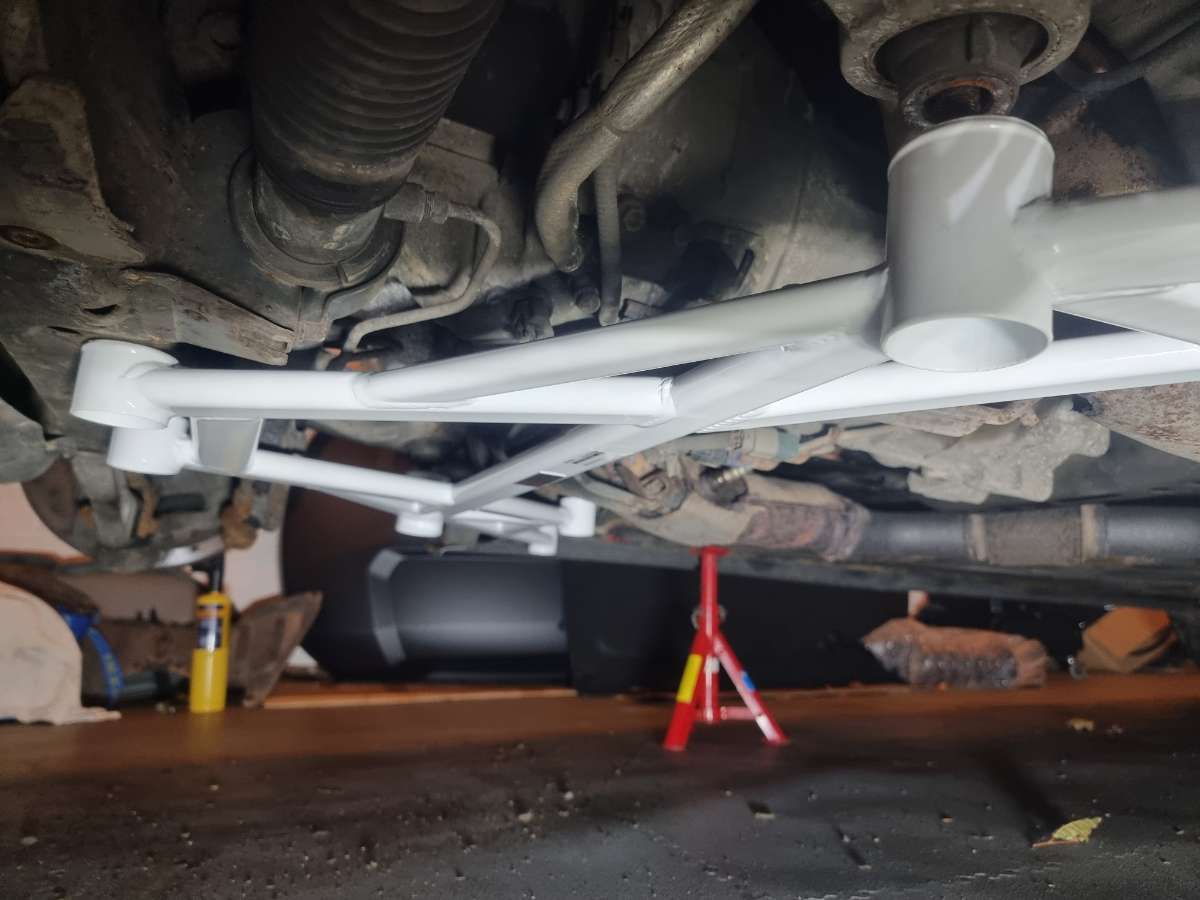
Yeah I'm in northern ireland so slightly different mot set up here. But I failed mine on the rear cross member mentioned. I bought a new one. But seen that it would be a mare to fit. So I just ripped the old one out and never replaced it. Fitted new kidney brackets and a whiteline w brace. And took it to a different mot test center. They have a look. They see shiny new parts. It's passes. Even if they've mentioned "rear cross member" most mechanics are not familiar with 350z. They can just see if it's rusty or not. If it ain't present. It ain't rusty. And it won't fail. Every 350z owner bins them.
-
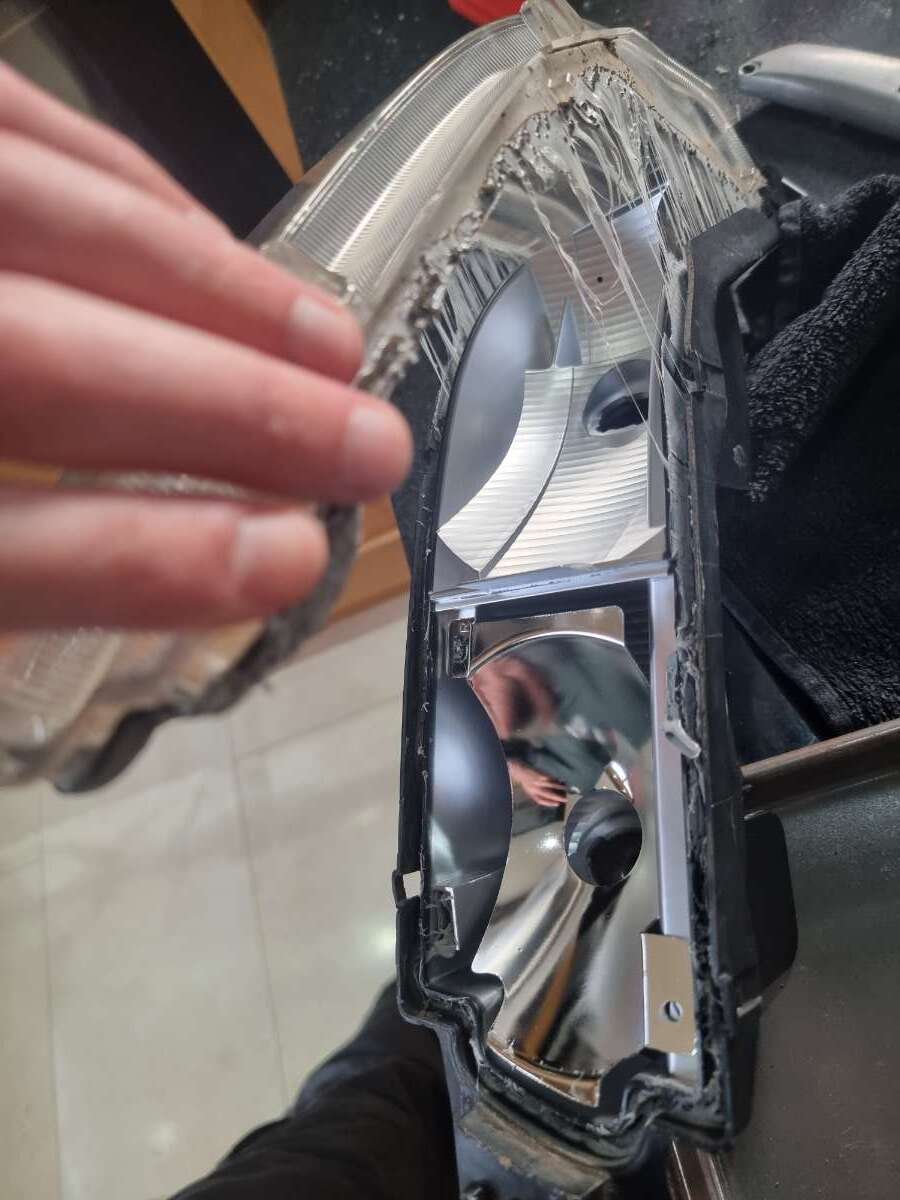
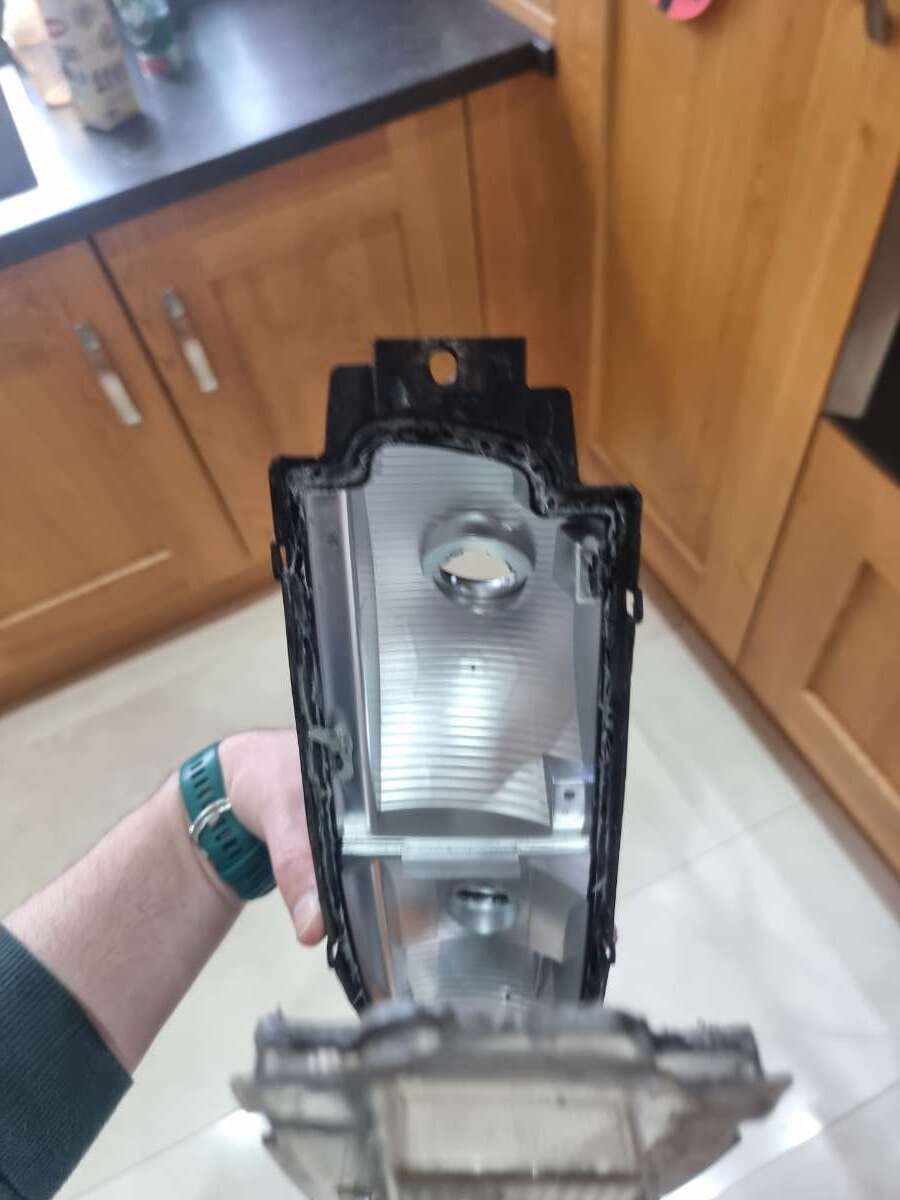
Heat gun might work better. I didn't have one. The glue however runs the entire perimeter of the lens. So I'm kinda thinking all the glue would need to be heated in unison to get the lens moving at all. So yeah maybe someone with a heat gun can try. But oven worked well. No melting of plastic or browning of the clear lens.
-
Yeah same here. It scared me a bit. But now having a spare light made me less fearful. Little to lose. Glue doesn't need long in the oven at all to soften. So risk of things melting is low as long as you leave it in for a minute at a time. My process I had it in and out maybe 5 times. The glue would get hard again quickly once out of the oven.


