ZaneDylan
-
Posts
62 -
Joined
-
Last visited
Content Type
Profiles
Forums
Events
Gallery
Store
Everything posted by ZaneDylan
-
This happened to my 350 before and I know it sounds silly but try a new set of pads - fixed it for me at least
-
Love this - where'd you get it from if you don't mind me asking?
-
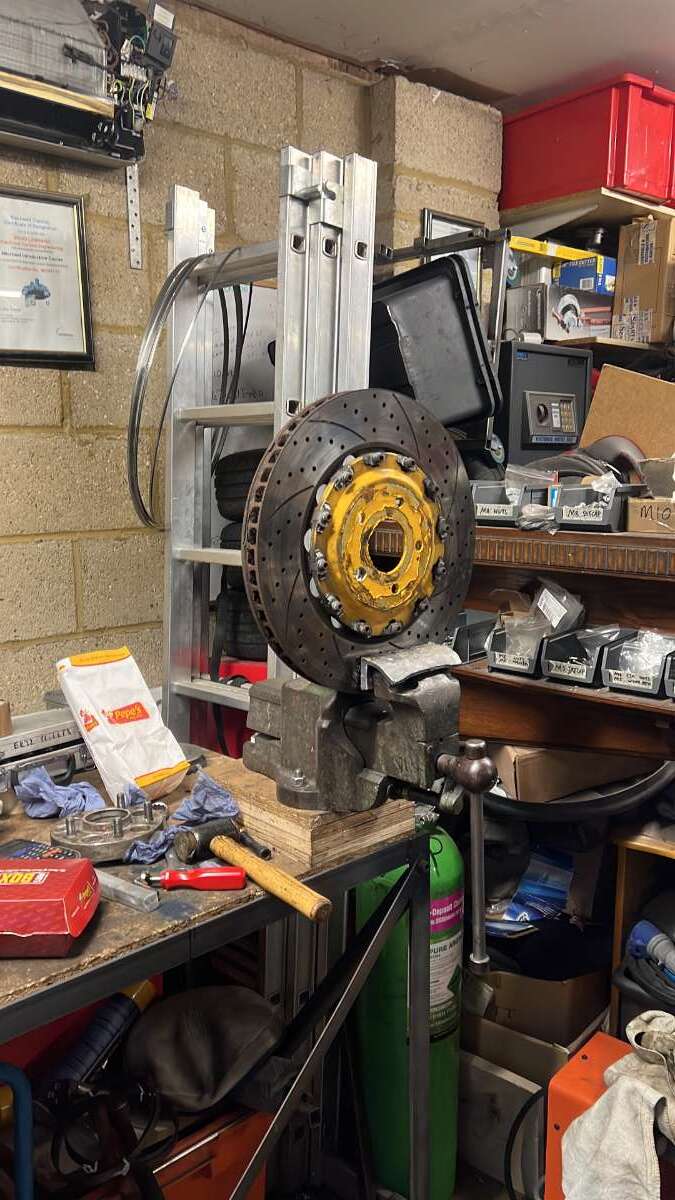
Finally gotten around to removing the welded on spacer - had the help of my friend @J.L.engineering (on insta). We used a dremel with a carbide bit and a small chilsel to remove the welds and threw a new stud in its place. Also got the discs off to have a look at condition - overall not bad at all - no heat marks, barely any lip - however there are some stress cracks around drilled holes on the disc (not significant enough to change them yet however will keep a close eye on them) The bell for the floating disc does have some damage caused by the welding - thankfully its not enough to cause issue
-
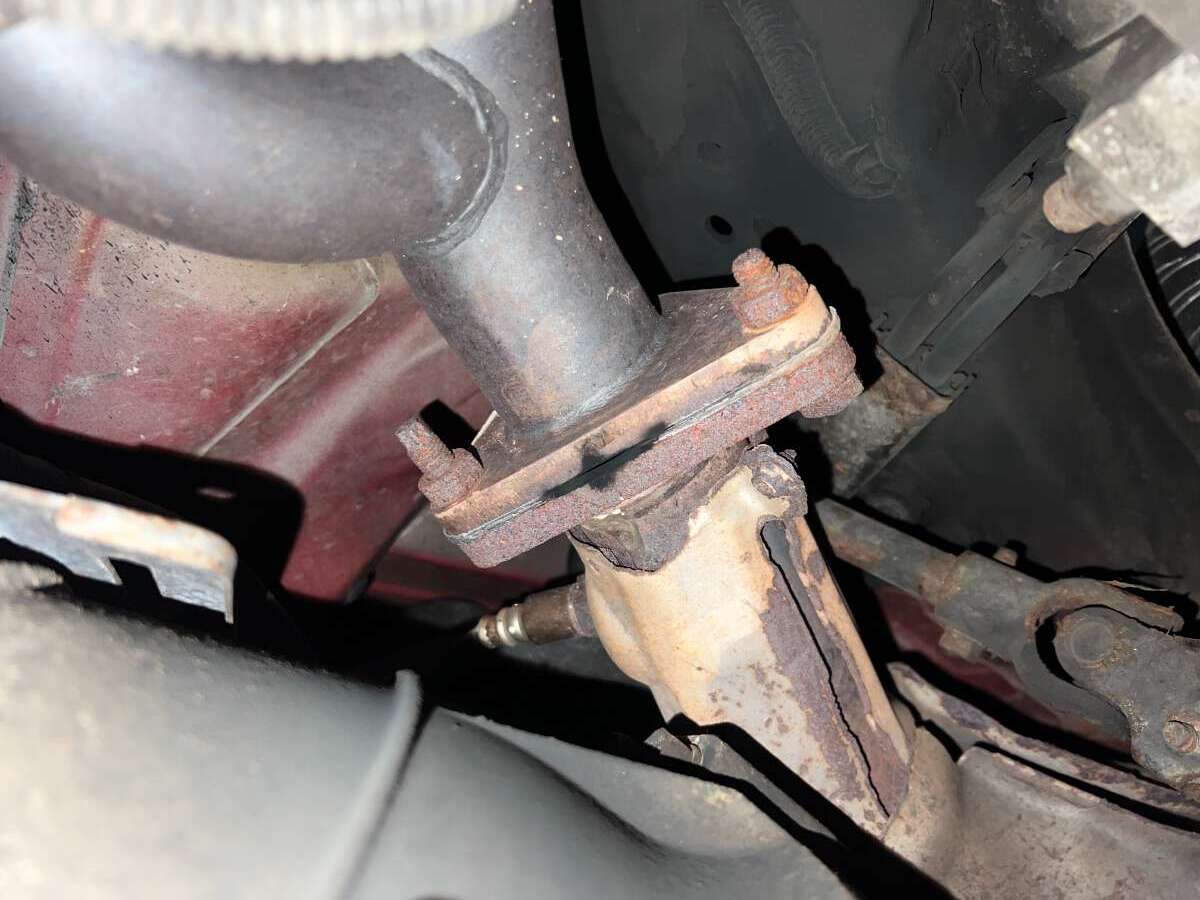
Found the cause of the exhaust leak - where the manifold joins to the "cats" the gasket appears to be non-existent
-
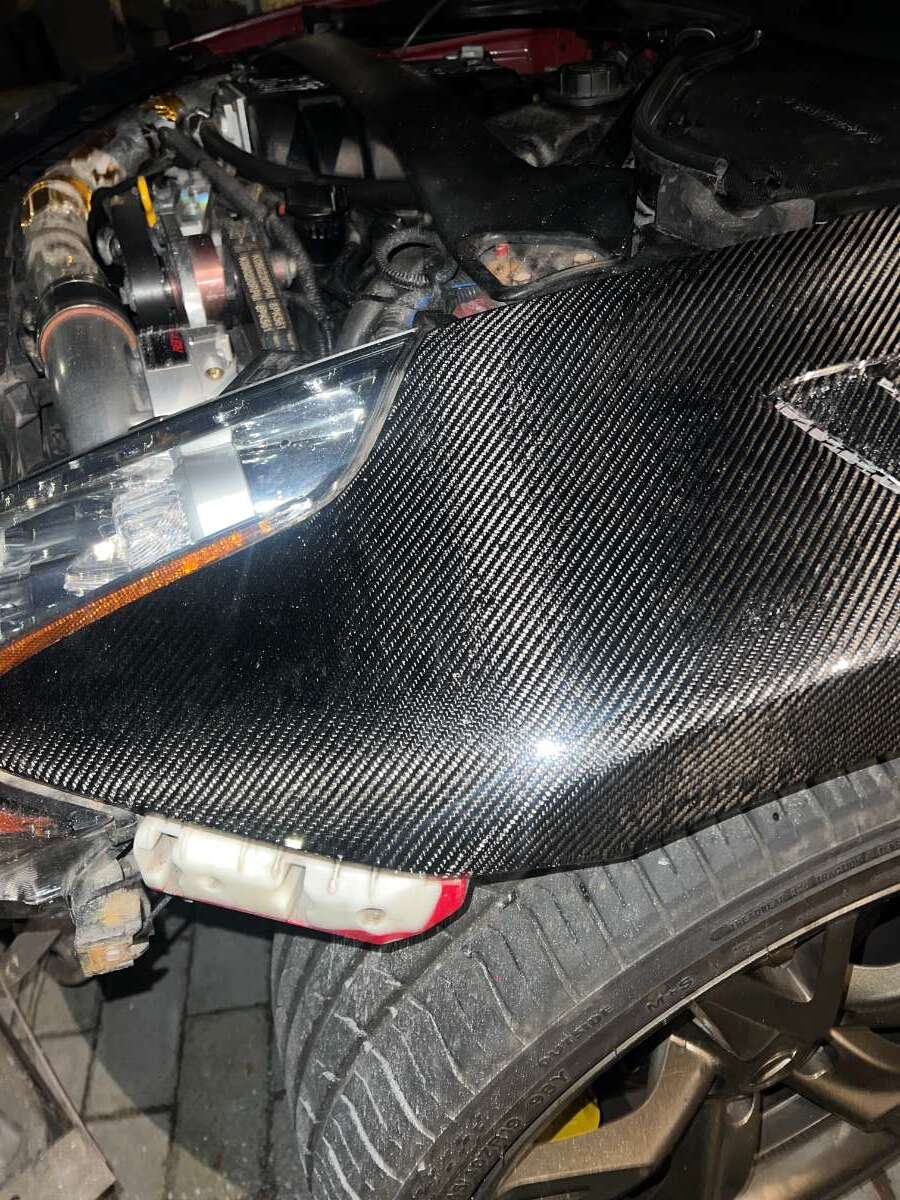
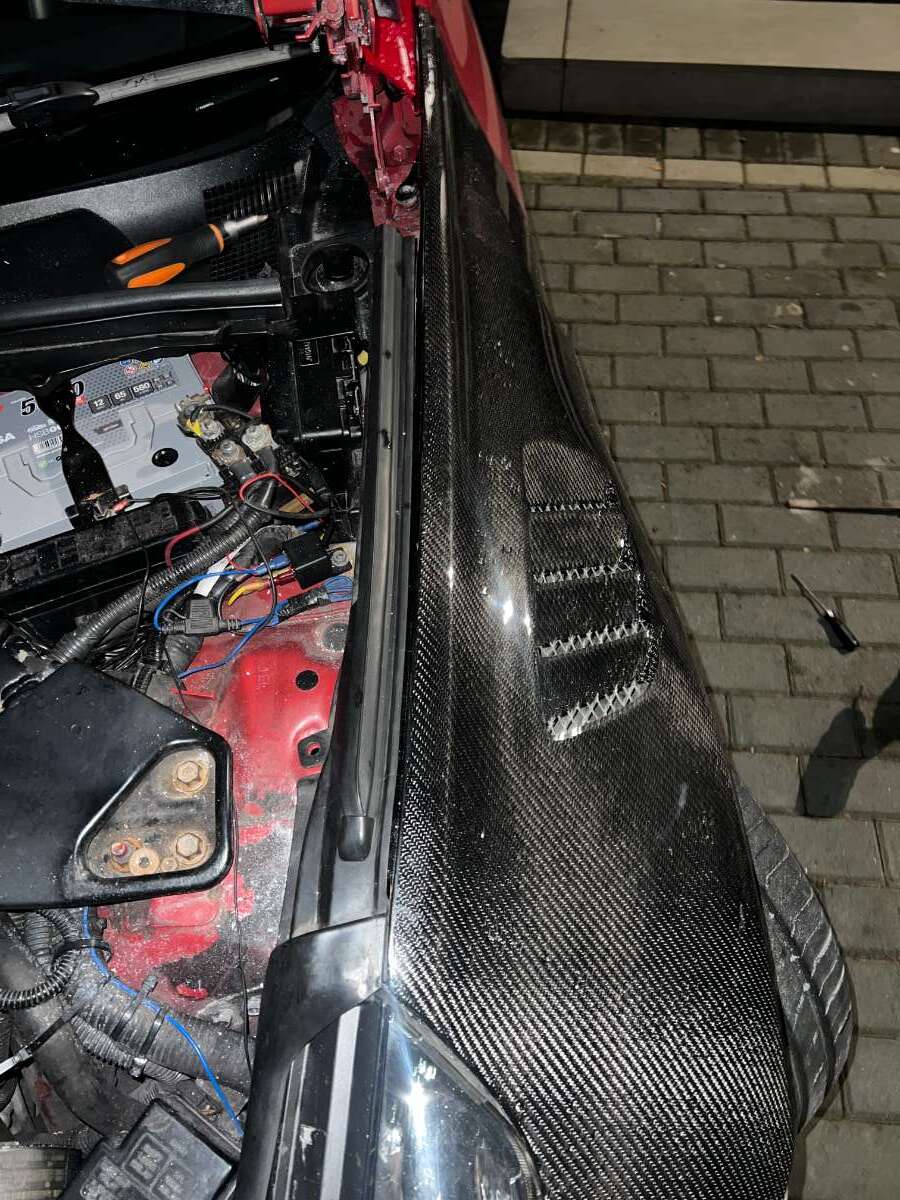
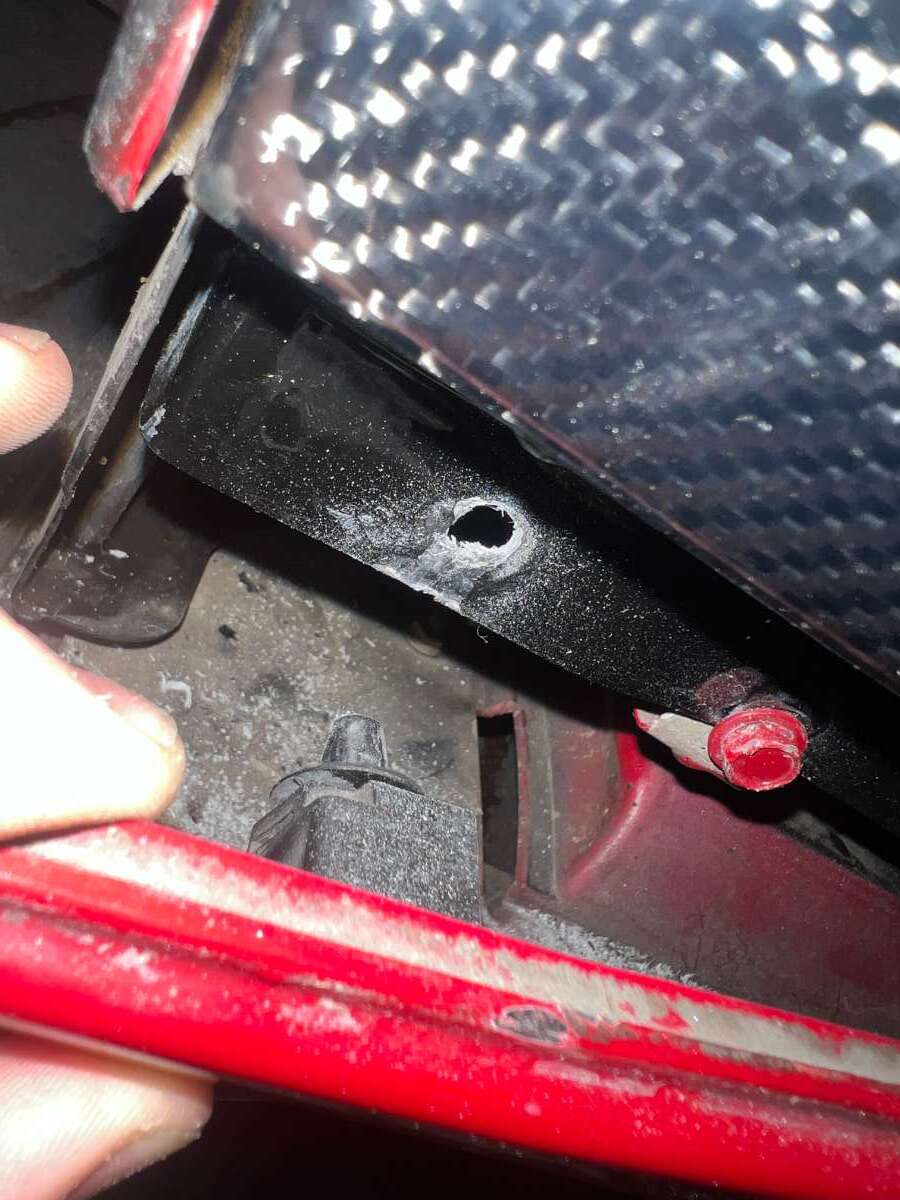
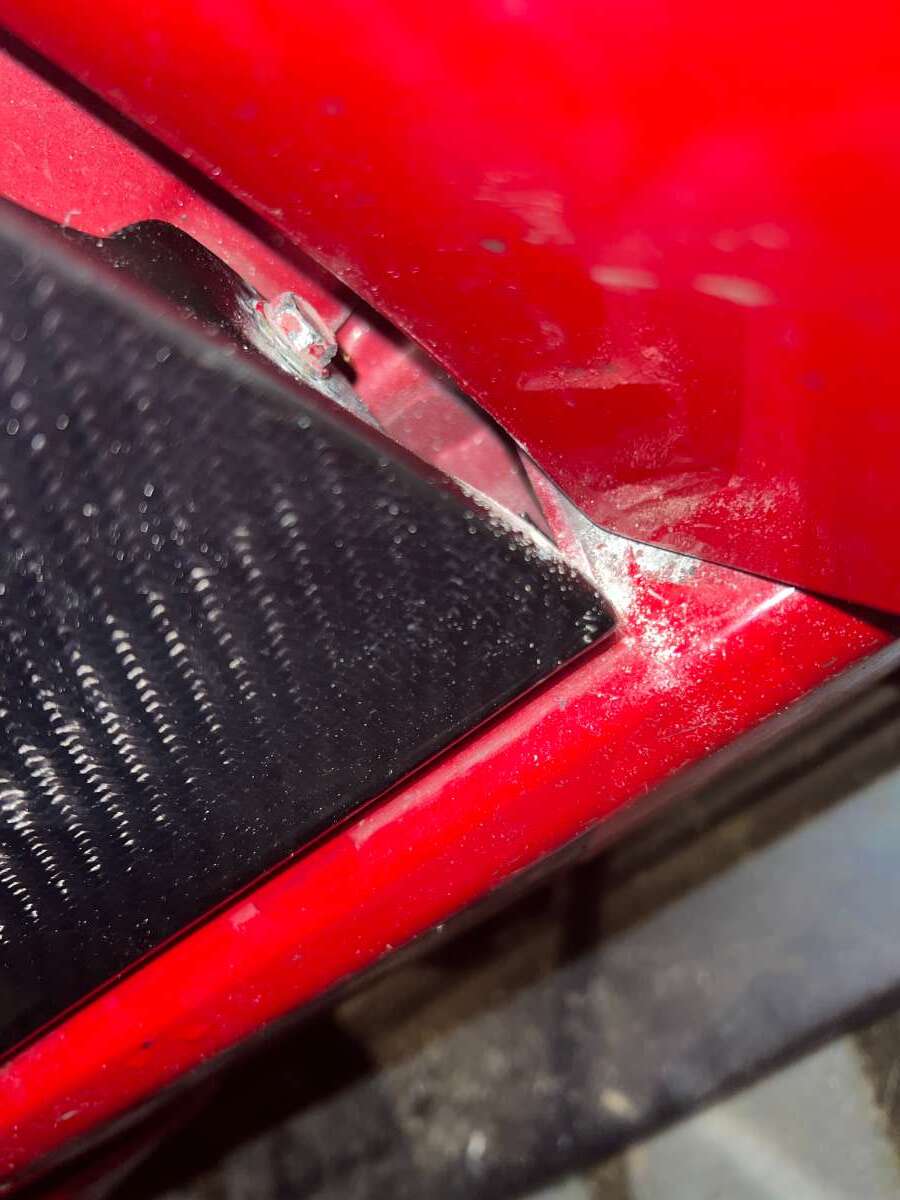
Keeping in the carbon theme the car appears to be developing I ordered a set of carbon front wings - with my 350 I was never much a fan of vents or carbon, but the way the 370 looks to me I think it suits it much more as its less smooth and has a ton of sharp aggressive angles. I wanted it to do a clean install so ensured to make holes for the stock bumper brackets to fit straight back on and reinstalled the weather stripping. (also found the right size to get the sideskirt clips to pop in without issue ) Due to fitment on aftermarket carbon parts not being the best I did have to file down the lower part of the wing as it was contacting the door - luckily its not visible from the outside and I gave it a little black paint to hide it further when the door was open I weighed the stock wings and carbon units and I'm saving roughly 2kg per side
-
MORE MODS - swapped out the fog light for this fancy LED unit that gives me a bright reverse light, also includes running light, brake and indicators (not one of those flashing ones as I severely dislike that kind of 4th brake light)
.jpeg.ac146232c9f05c5dd67e3b81b5b41a5c.jpeg)
-
This same week a carbon fibre duckbill I ordered turned up and I kinda love it but am still open to changing it down the line Sequential side indicators too
.jpeg.70611d1709408aea4d721f23f16c9546.jpeg)
.jpeg.bb3f1a86109441317d59df09cf7b8250.jpeg)
-
So that week I was both unfortunate and lucky enough to find two sets of wheels I really wanted, which means my impulsivity got the better of me and I bought both sets... I intend to strip and polish whichever set is staying on the car - opinions are welcome
.jpeg.f4da7dbdf772e258f2a34f67a8ab0e00.jpeg)
-
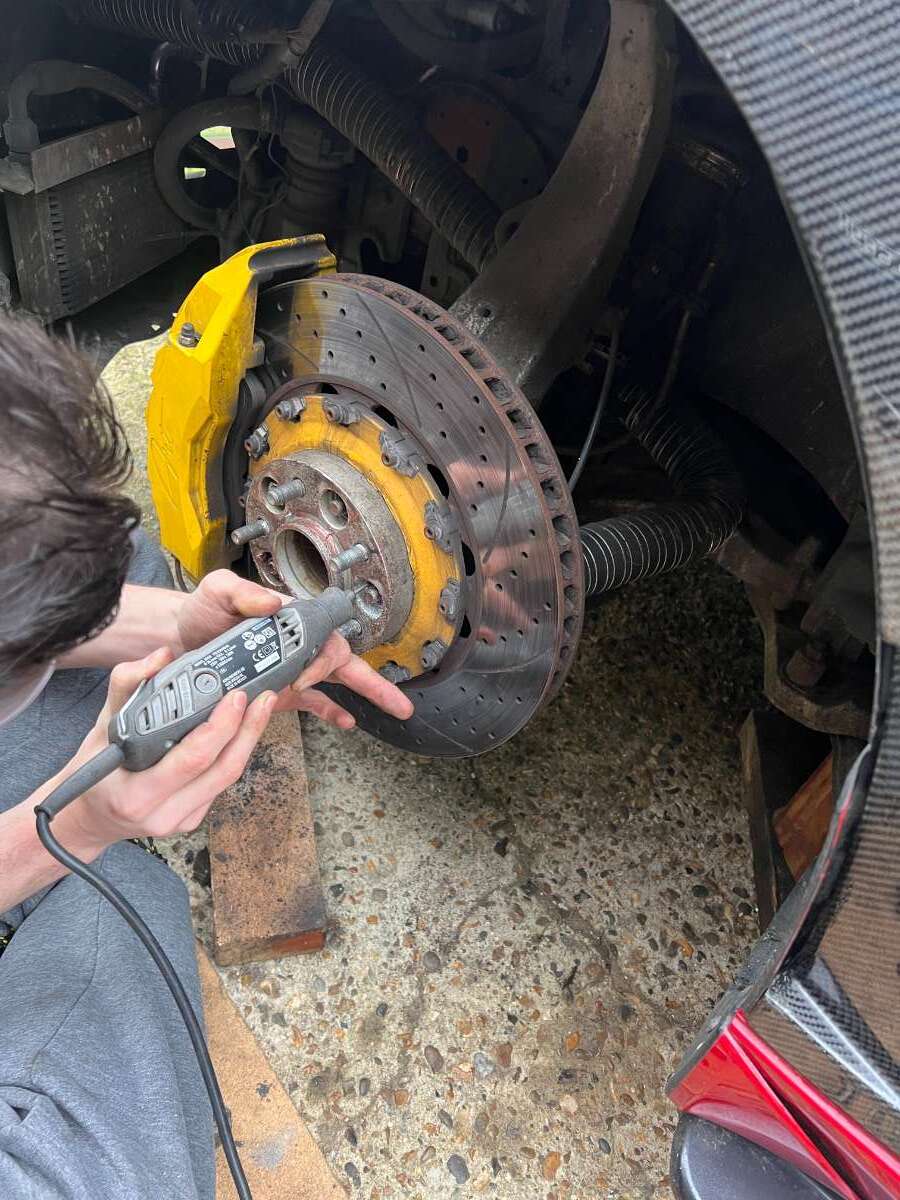
So addressing another issue that the car came with was wheel wobble above 60 mph and in braking. Took the z for a wheel balancing to hopefully narrow down the issue and by god did we find the issue (as well as some fun extra issues) The primary cause of my wobbly wheel is the state of the wheel that was on the car - it was buckled - great excuse to buy a shiny set I guess But it would've been naïve to believe that was the end of my woes as it was found that every spacer was missing at least one nut, with multiple cross threaded studs and the passenger side front spacer had been WELDED ONTO THE BOLT all of the techs in the shop and myself were gathered round to have a look at the pure ridiculousness of it
.jpeg.76057896e53bee45eb7a4b1e0df00b44.jpeg)
.jpeg.1622fe31440174f393617fd2846e8be6.jpeg)
-
The third brake light no longer fit in the Seibon boot, so I removed the bracket, crimped on the connectors with longer cables, used goo gone to remove the residue and used tint spray to make it fit the carbon boot a tad more
.jpeg.d7b8f80c36d76271cf2ebab09b739d62.jpeg)
.jpeg.eb74f3adb195621a4473ea64f69e6c69.jpeg)
-
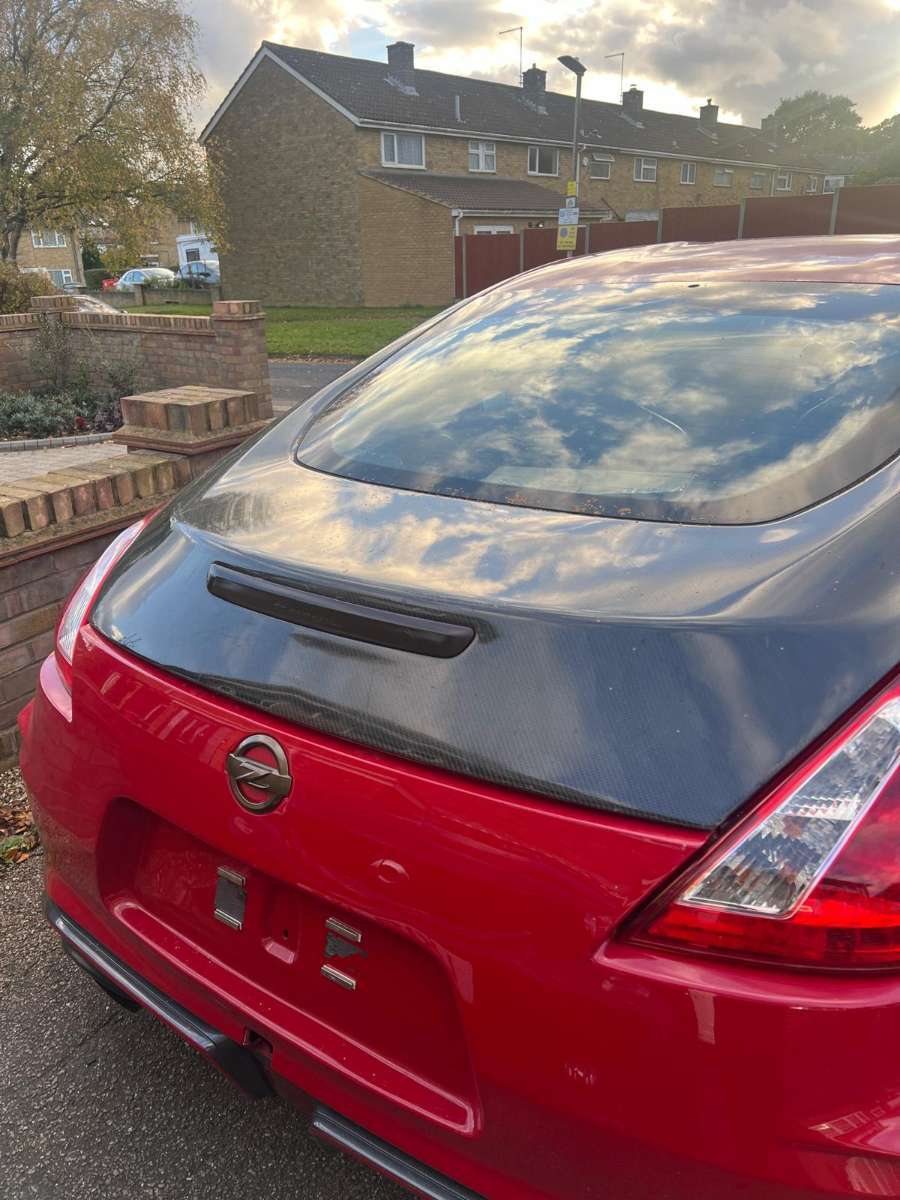
In the short time I owned the car before buying this next mod the hatches paint had a ton of defects and a badly covered spoiler holes and rear wiper hole. Luckily, this came up used on ebay. Called around local companies to swap the glass over. A genuine Seibon Carbon boot was not something I expected this soon into the build but I'm happy to have it - it's significantly lighter than the stock unit and a tad cooler looking
.jpeg.b047880687bc6a646d42424bd78fde4a.jpeg)
.jpeg.ea173e6ff7b9add70abff4cb555c46bc.jpeg)
-
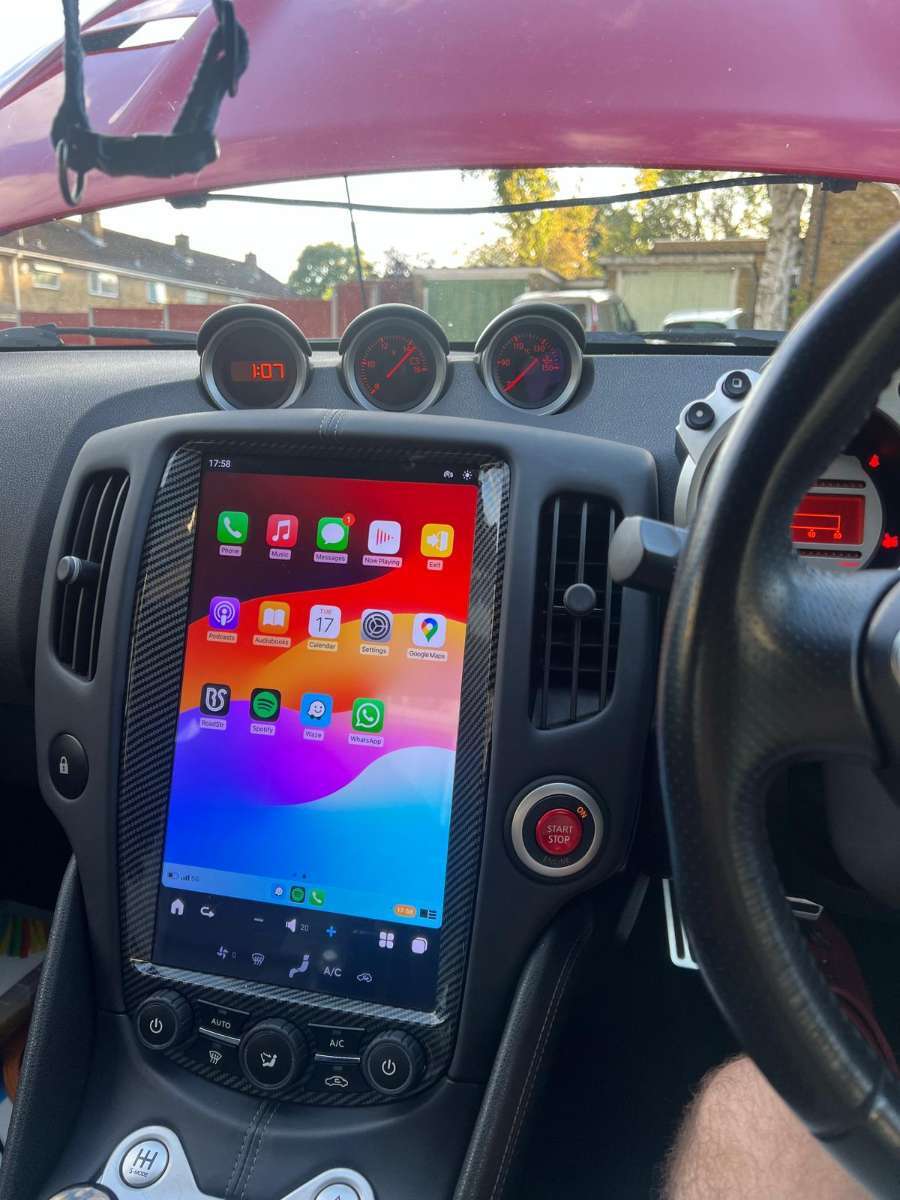
Time for mods! First up is still my favourite mod to this day as it modernises the interior, has apple carplay, retains steering controls and above all else - is massive This is the AuTech 13.6" Tesla style screen. It was completely plug and play however if you do this yourself I'd recommend extending the earth strap for easier install.
.jpeg.aaa3929dec834395fd5be9b68508ce40.jpeg)
-
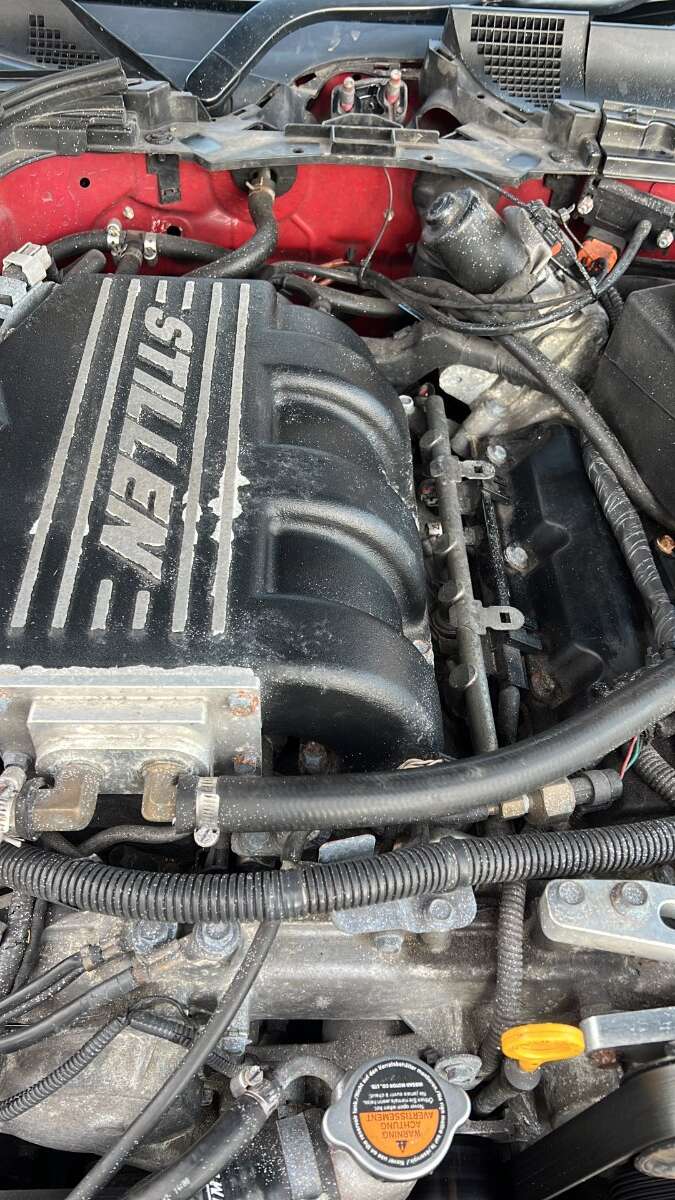
The next issue is a random/multiple misfire. So the z received a new set of plugs and coils . See the difference between the two 😮. I realised a good point of the Stillen plenum, lots of access to the coil packs and plugs without having to remove it
.jpeg.4891acf56c08e38e4275565fc2282f7c.jpeg)
.jpeg.a5706d97c90a67c30a94d5a73ba77b62.jpeg)
-
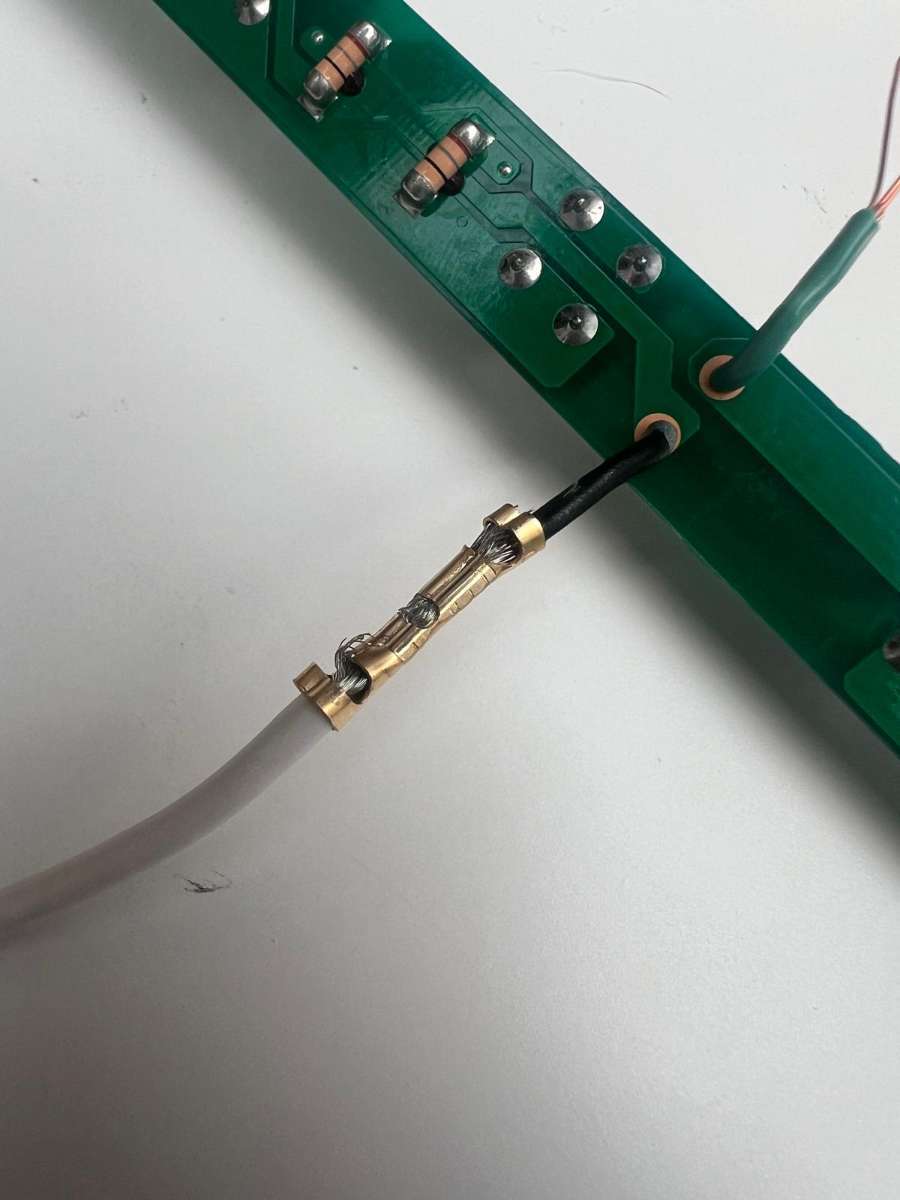
So the first issue (of many lol) with this was that the water charge cooler was killing the battery as it wasn't turning off once the vehicle was off, after testing with the multimeter I realised two things: the relay was bridged meaning that the cooler pump was receiving a constant 12V and the ignition line wasn't connected properly and was an intermittent signal. The fix was replacing the relay with a new Bosch unit and repairing the poor soldering job on the signal wire (with heatshrink for weather proofing)
.jpeg.d25650c00c33ea46b5182597918f2afb.jpeg)
-
The most obvious issue with the car on first inspection was the condition of the paintwork, very swirly, tons of scratches and looked incredibly dull all over. (not to mention clear coat burn on the rear quarter) So Ballistic350 and I gave it a two step correction and now it is much brighter and less of an eyesore
.jpeg.07e2a001cc0b502143e796c35c1dd795.jpeg)
-
This is the spec list that was posted on Market place when I bought the car: Engine: Stillen supercharger kit Stillen 9lb pulley Frozenboost charge cooler Mishimoto rad Spec-R dump valve MXP Catback exhaust Art Decat pipes Twin 15 row APC oil coolers Greddy large capacity baffled sump Vibra-Technics race engine mounts Uprev tuned by TDI North & Abbey motorsport - claimed 530hp (butt dyno says its closer to mid 400s lol) Transmission: Spec super twin SS trim clutch & flywheel Vibra-Technics race gearbox mount Z store heavy duty slave cylinder Braided clutch line Handling: BC Racing type ER - 3 way adjustable coilovers Eibach front & rear anti roll bars SPC Front upper control arms SPC rear camber arms SPC rear toe bolts Automek geometry Kenneth Brown Motor Engineering corner weighting Brakes: ART 382mm 8 piston Forged floating (front) ART 357mm 6 piston Forged floating (rear) ART Stainless braided lines Gulf competitions RF-1000 fluid Stillen cold air brake ducting kit Body: Nismo V2 front and rear bumpers Seibon vented carbon bonnet (painted red ) Tarmac Sports Side steps Ram air vents on front Bumper for brake ducting Ram air vent for airfilters Interior: Recaro heated leather seats from a lotus evora Nismo Shift knob
-
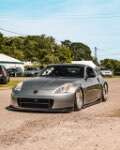
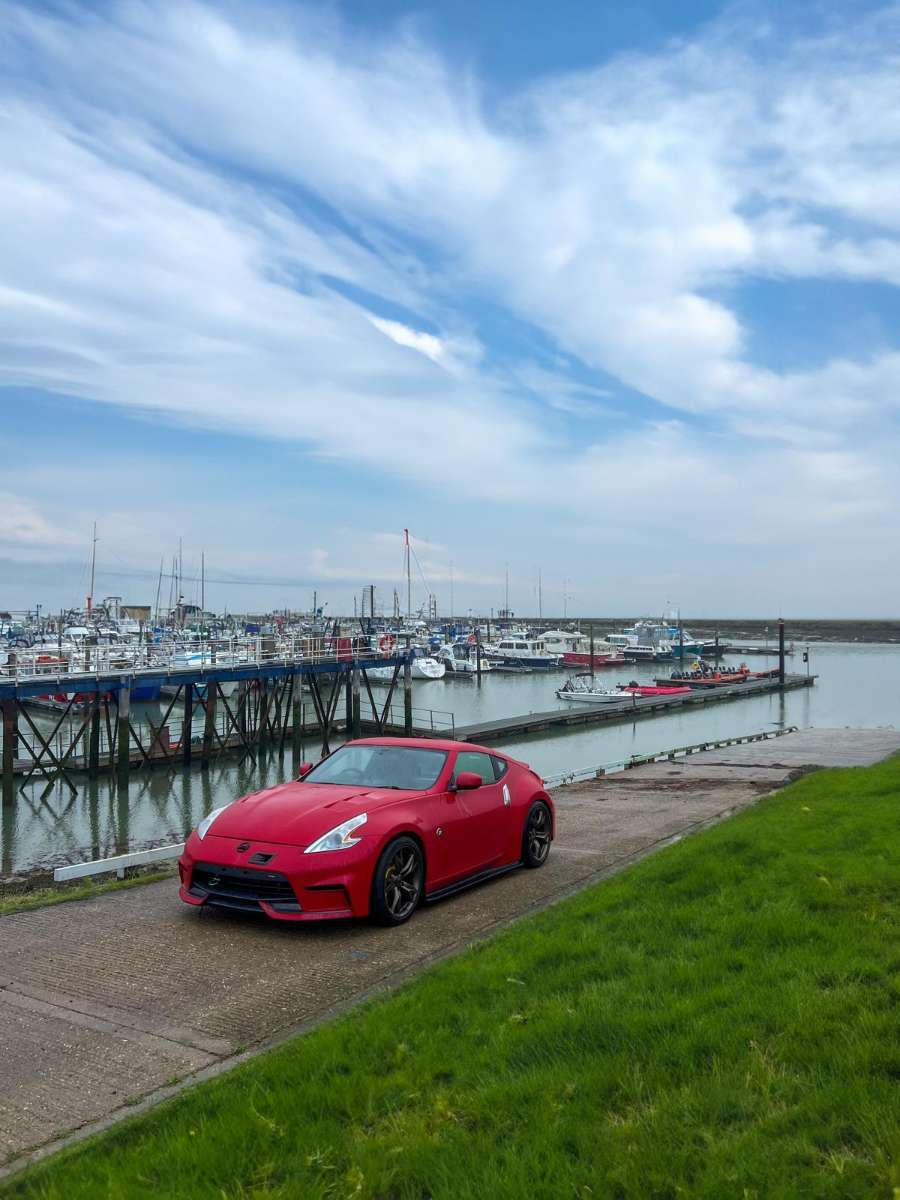
Many of you saw the unfortunate fate of my 350, but I'm back, with someone else's project as I attempt to both fix it and make it my own. Enjoy .
-
I have the 200 piece advanced set, just don’t have anything long enough unfortunately
-
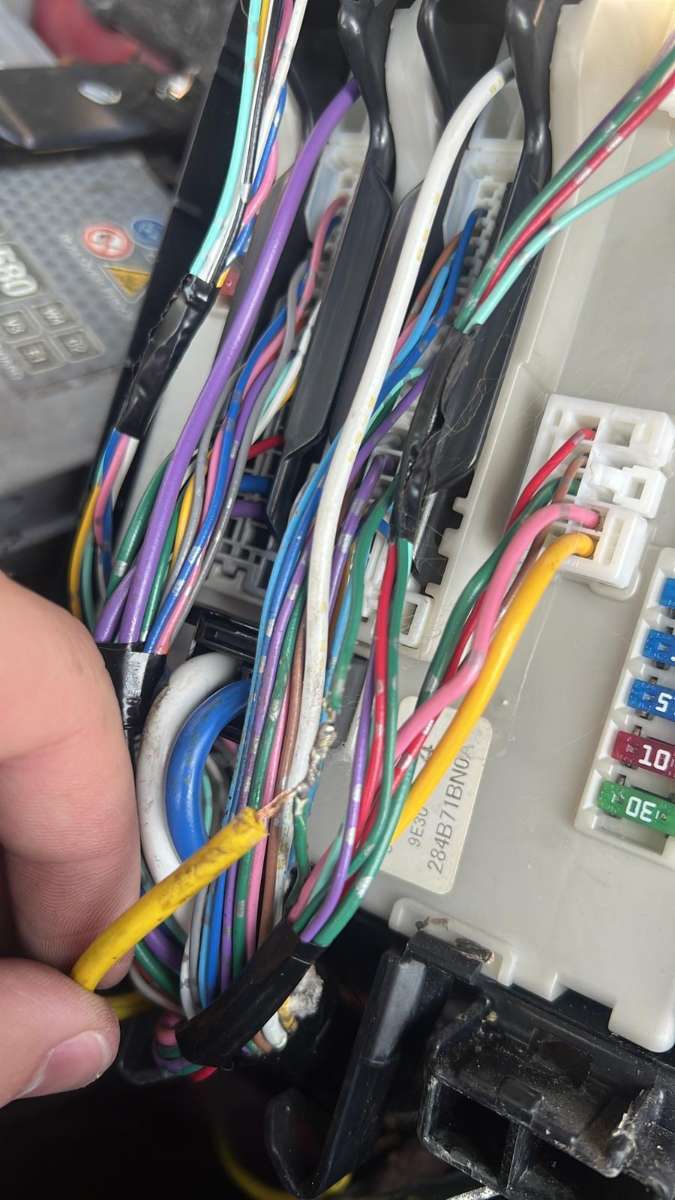
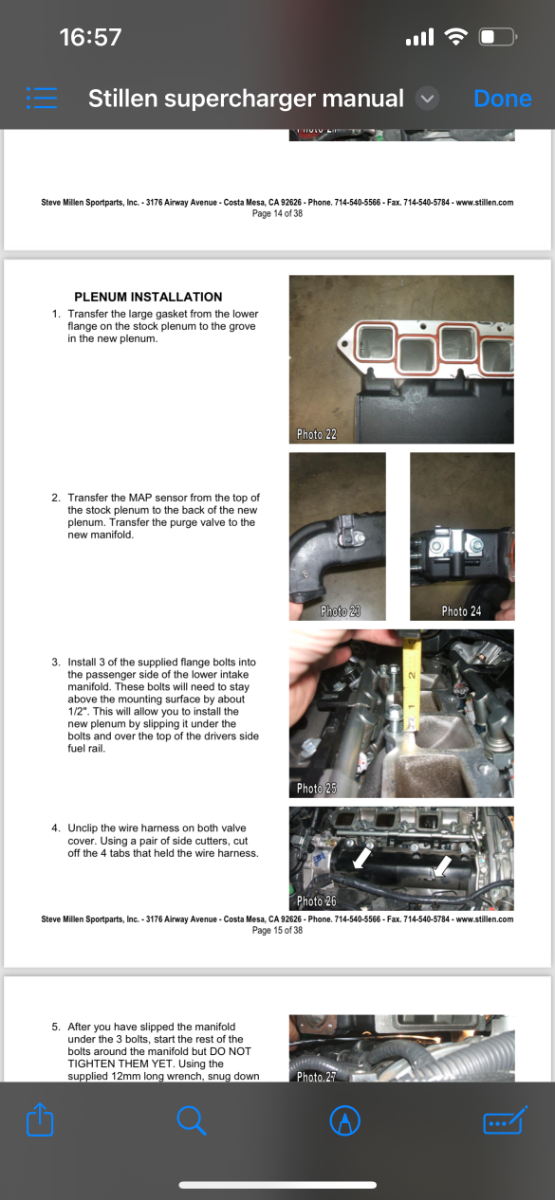
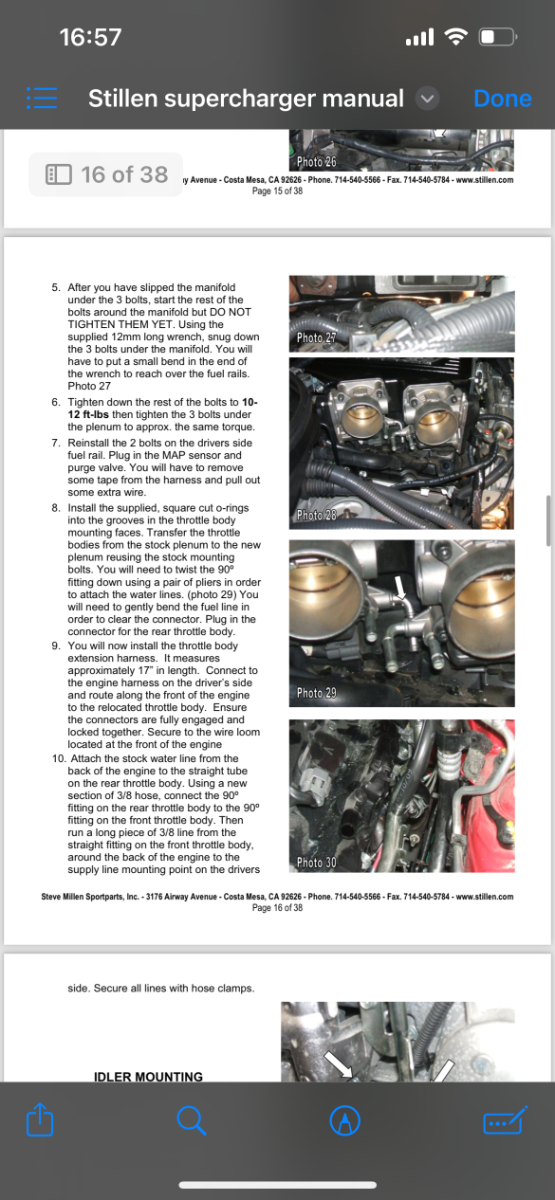
Hi, recently purchased a supercharged 370z and am doing some maintenance bits, realised I can’t remove the intake plenum with my current set of tools does anyone in the north ldn / herts region have a 12mm long enough to reach the bolts underneath the plenum? pictures attached
-
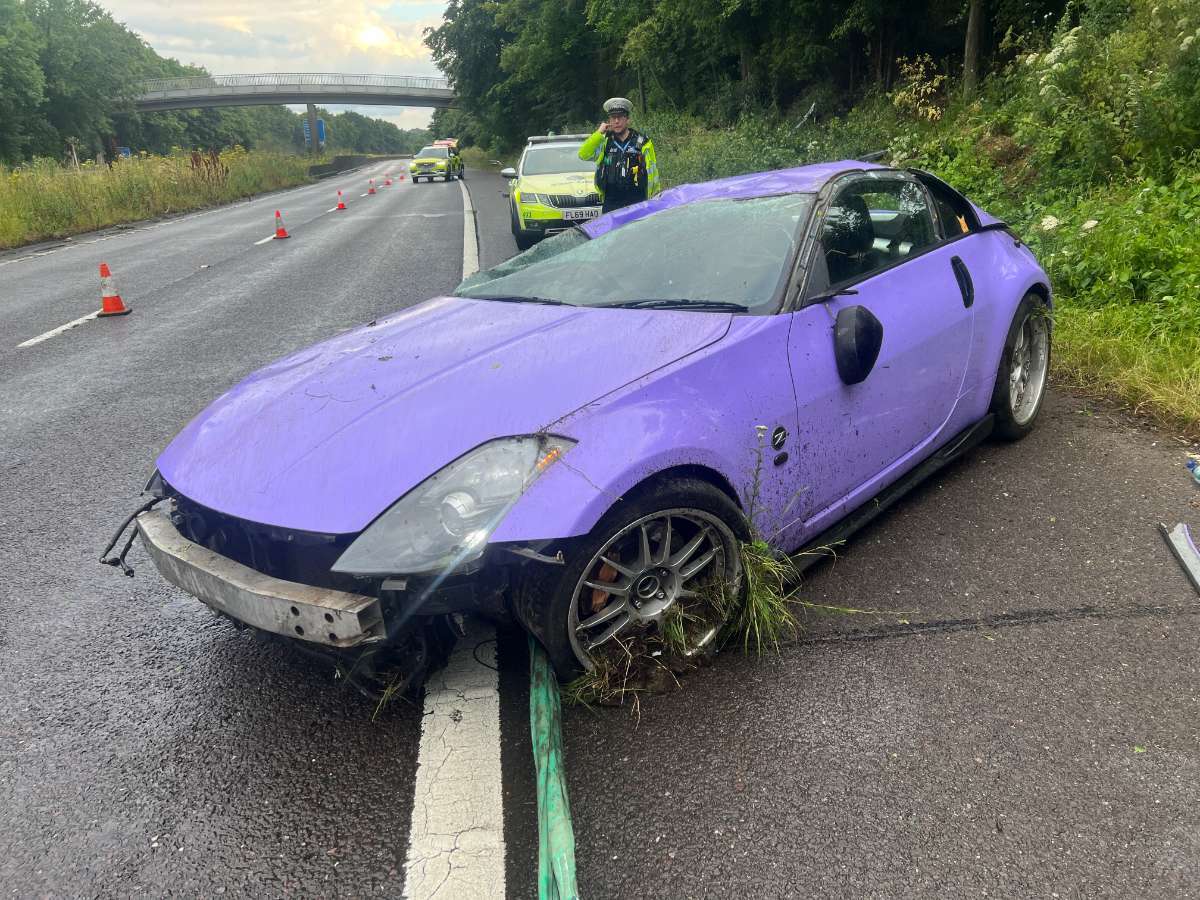
It is with a heavy heart that I'm posting this - on the way home from the rust repair - I aquaplaned into a bank and rolled the car. I've spent 4 years building this car and I can't believe it's gone now. I keep being reminded how lucky I am to have walked away from this alive but it's hard to feel lucky when I've lost something this important to me. I'm constantly reminded it's just a car but to me it was so much more. Suffice to say this is the end of this build thread. RIP Purp (I'd ask that anyone reading this remain respectful and keep any hurtful comments to yourself).

-
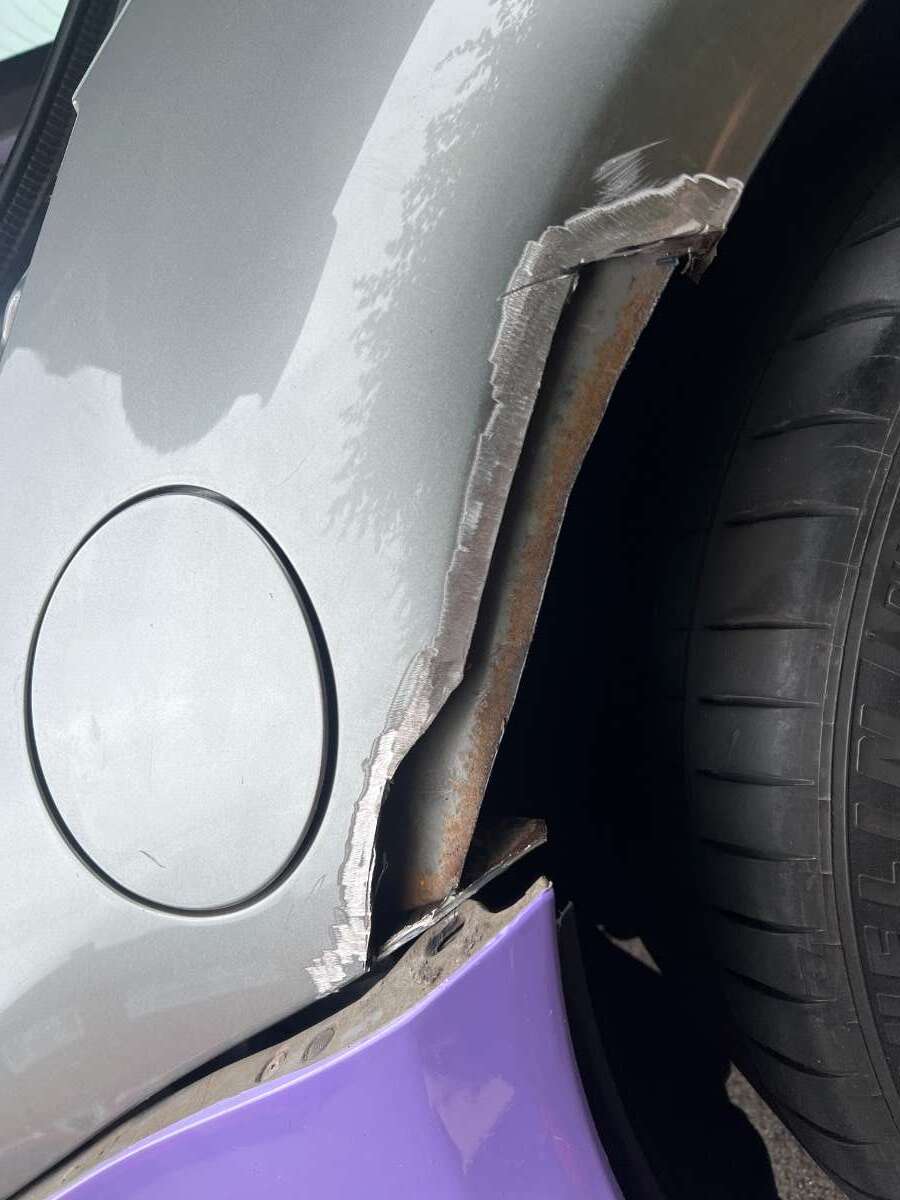
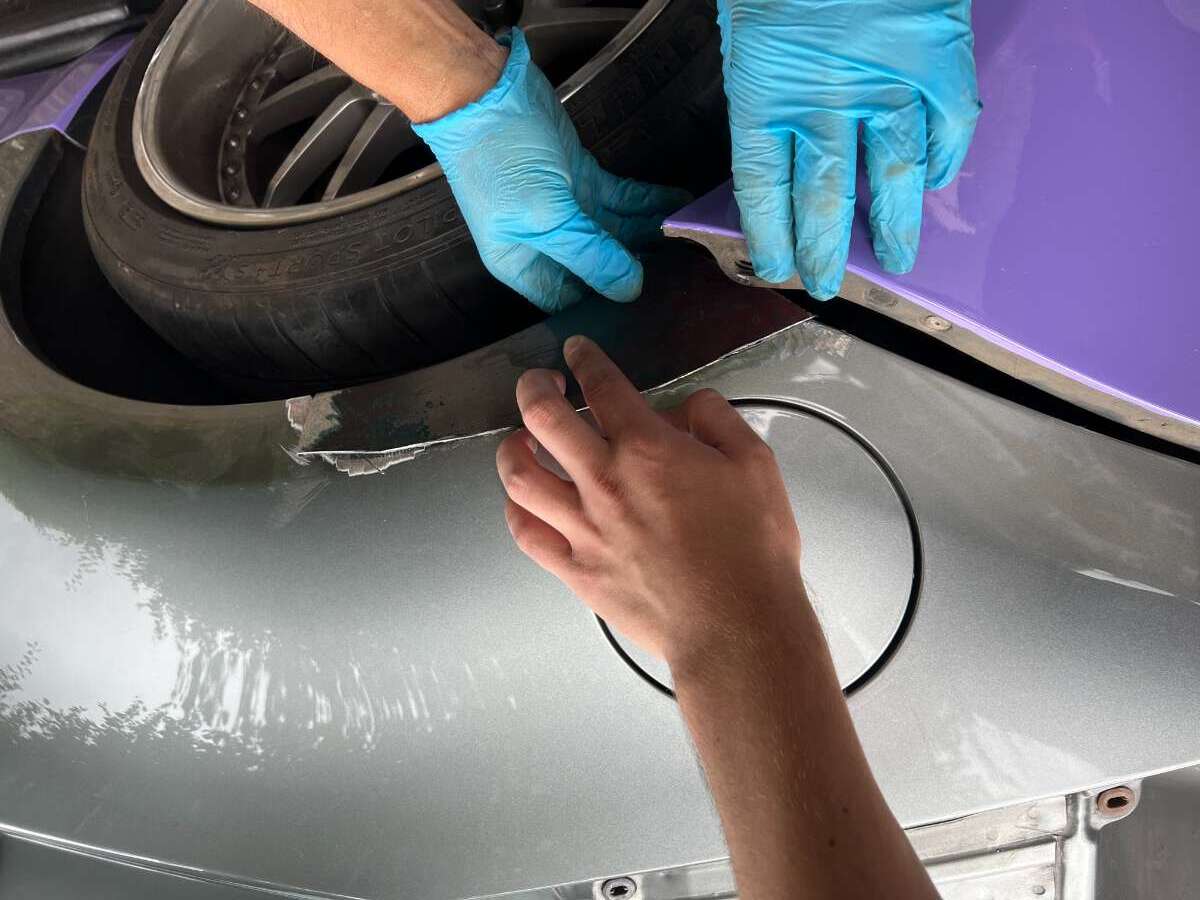
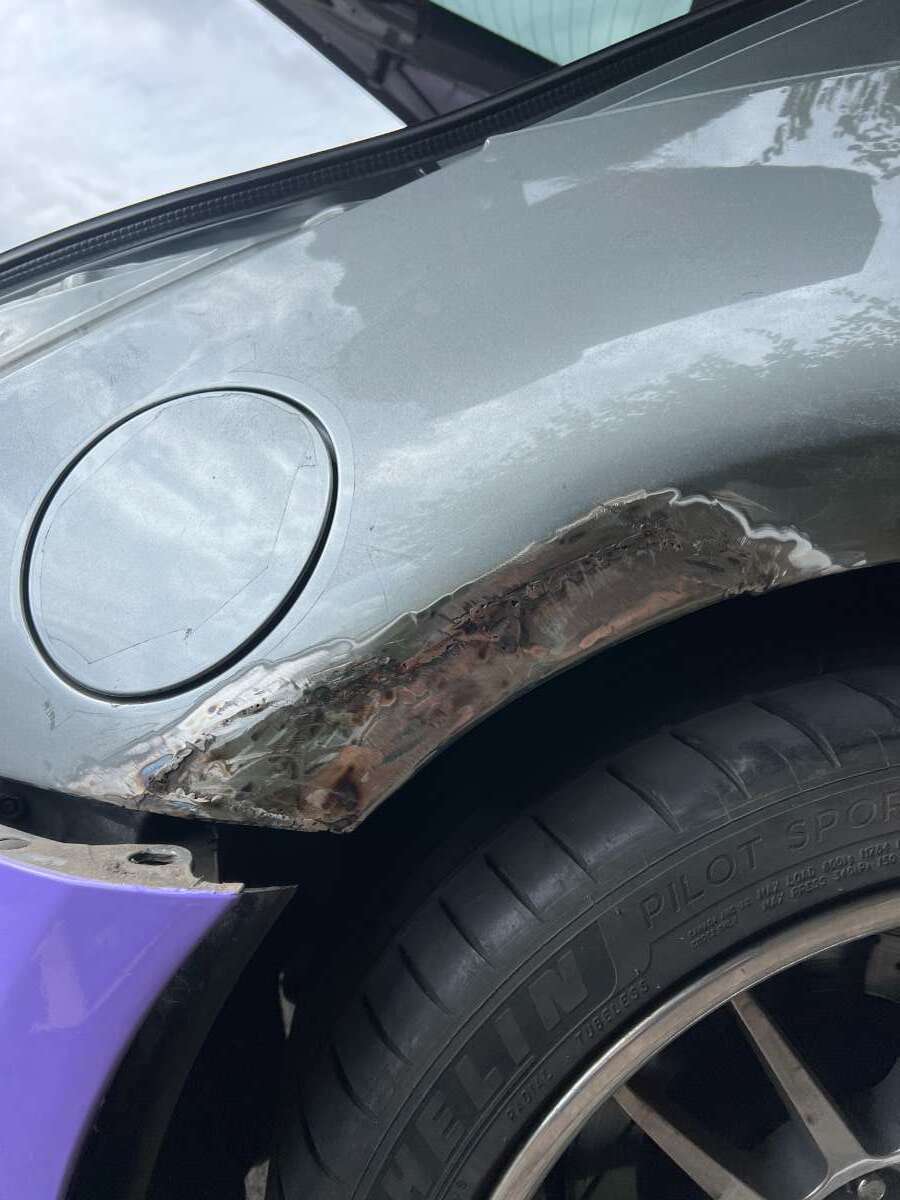
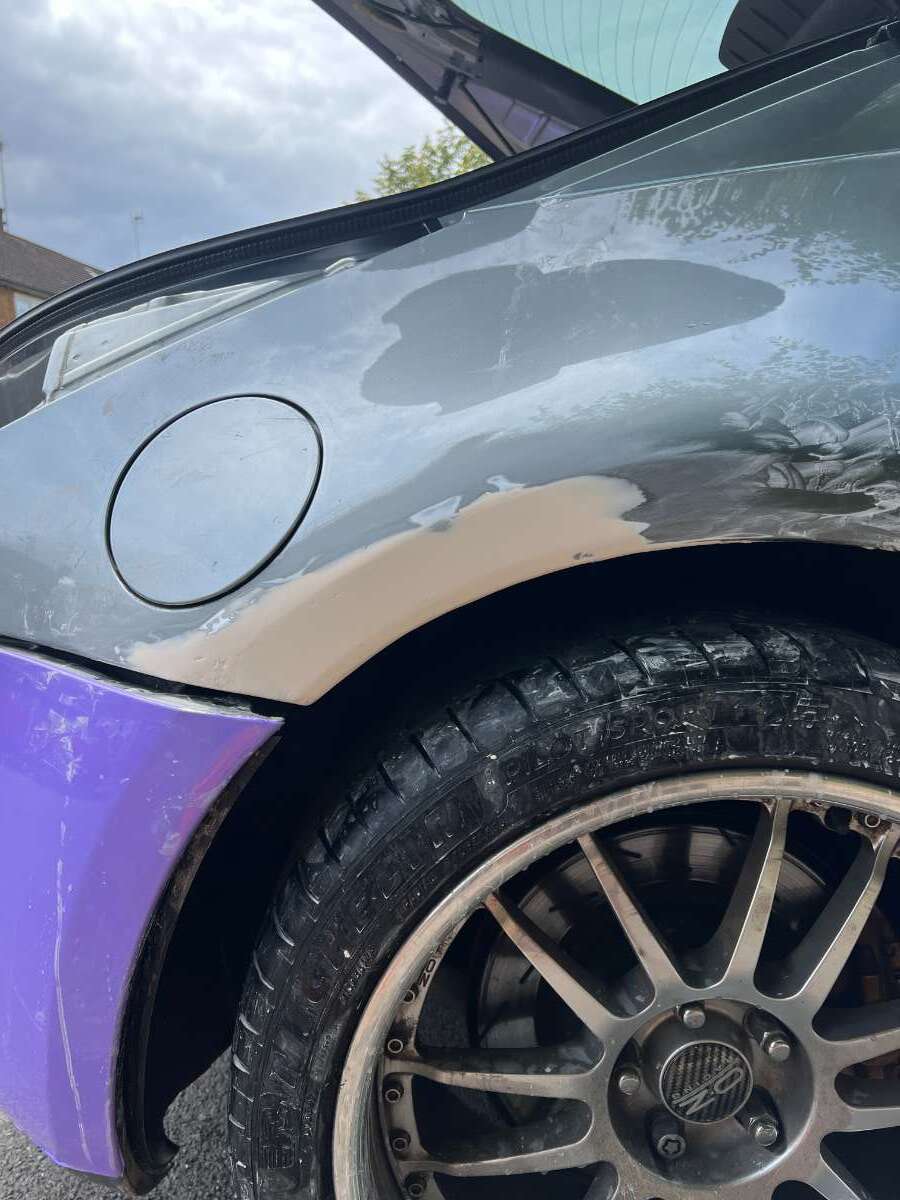
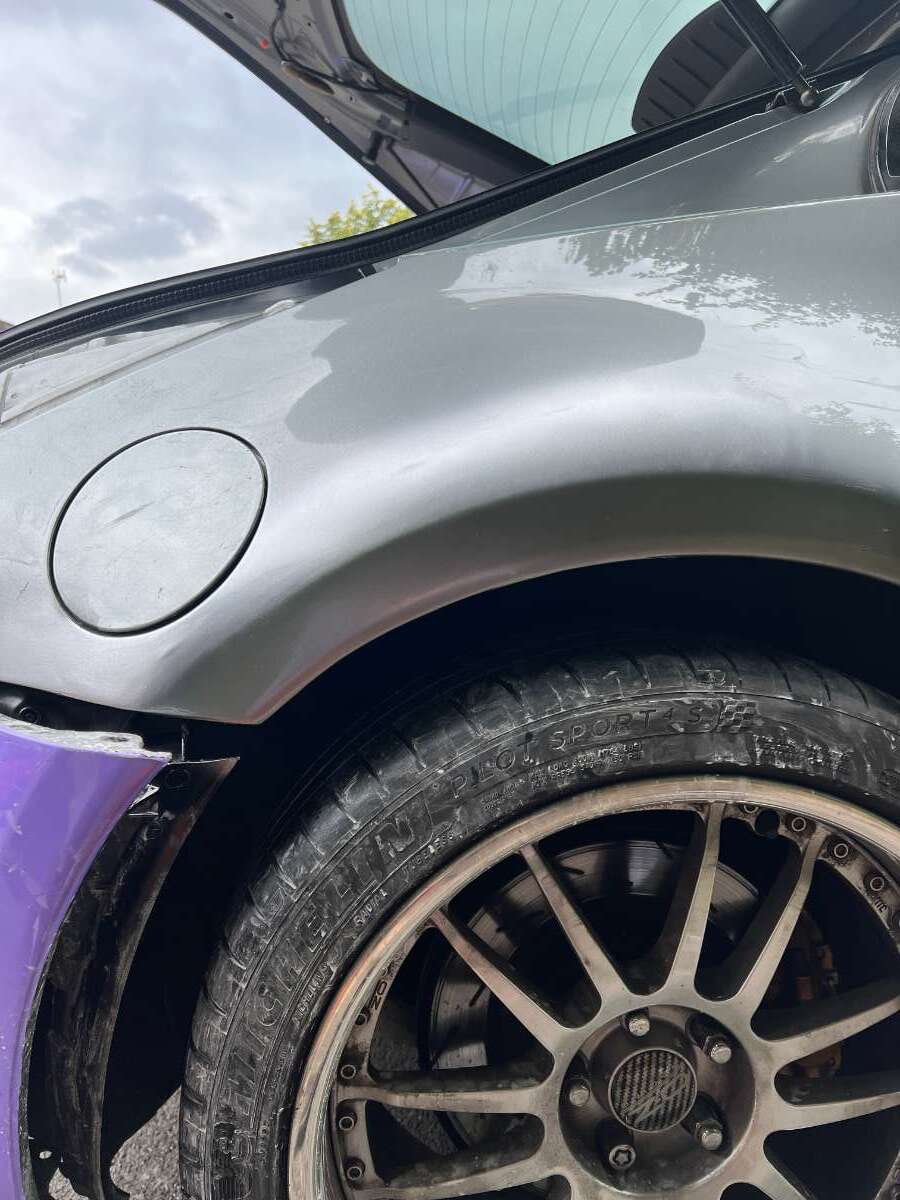
To finish up the wrap I needed to address the rust on the drivers rear arch First cutting out the plagued section Cleaning up the metal Welding in new sheet Filler to refine the shape and smooth it Prime Paint Clear Not bad for a DIY job
-
Really sorry to see this mate - GLWTS I'm sending a PM for some bits possibly
-