

.jpg.87a4f24e50a871c5b3627ab0177c7645.jpg)
dave_7
-
Posts
209 -
Joined
-
Last visited
Content Type
Profiles
Forums
Events
Gallery
Store
Everything posted by dave_7
-
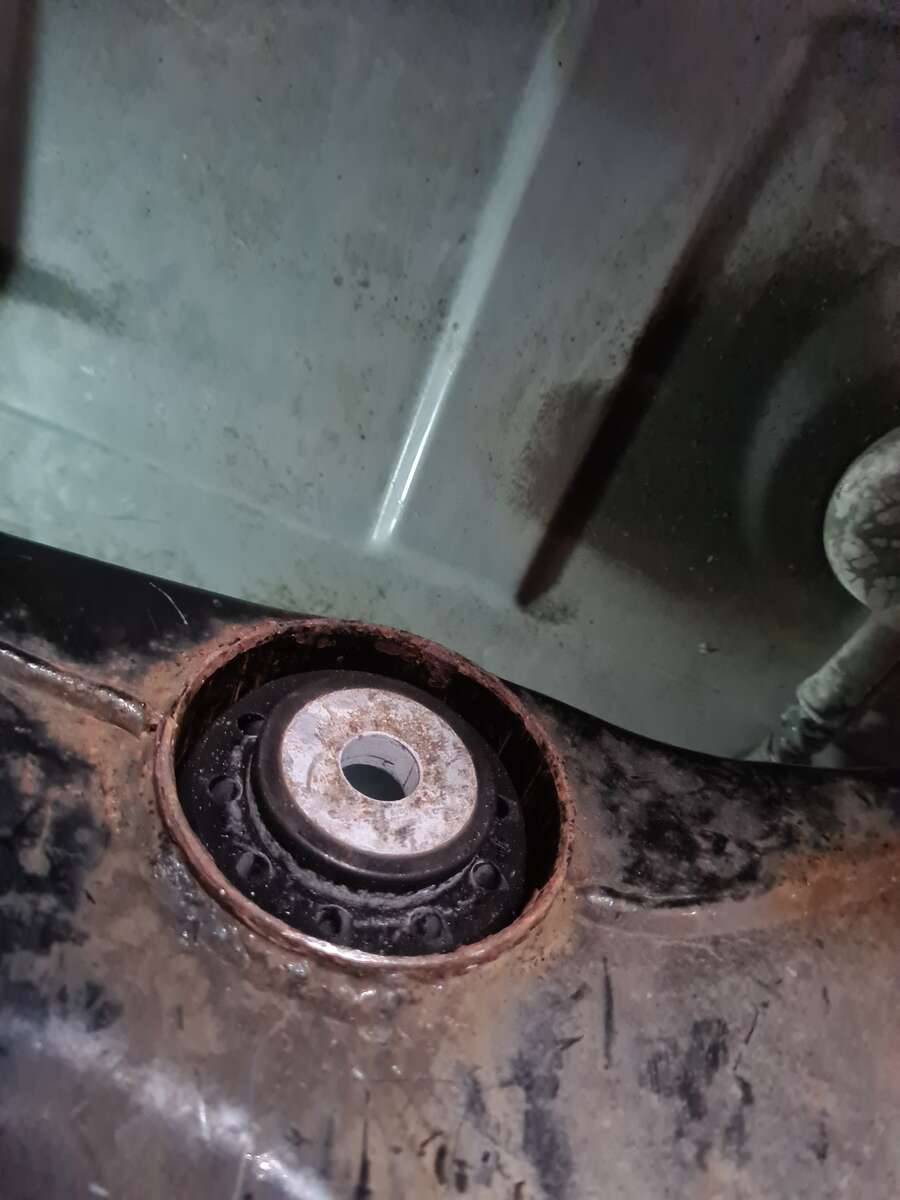
this has got me paranoid another spot to look out for is at the front of the rear wheel arches, there is some sort of plastic cover, that rather tha keeping the dirt out just acts as a muck trap and get filled with all sorts of muck. Its easy to pull it out they way and clear all the crap out when you have the wheels off. I'll try and dig out the pics of when i tackled mine during the first lockdown
-
https://www.nissan-cdn.net/content/dam/Nissan/za/Maintenance/370Z.pdf This is what ive been working off, either way I'd say every 2 years is about right. That's a great shout would be an awesome feature. I need to get my act together and get remapped with Ecutek soon
-
with the gearbox oil i never really notice any real difference after I change it, may say it feels a bit "slicker" but certainly nothing major if anything at all, but i do it regularly as I'd rather have it over maintained. Both engine and gearbox have both been perfect in the over 3 years I've owned it. On the Nissan service schedule for these it says every 2 years or 18k miles if that helps?
-
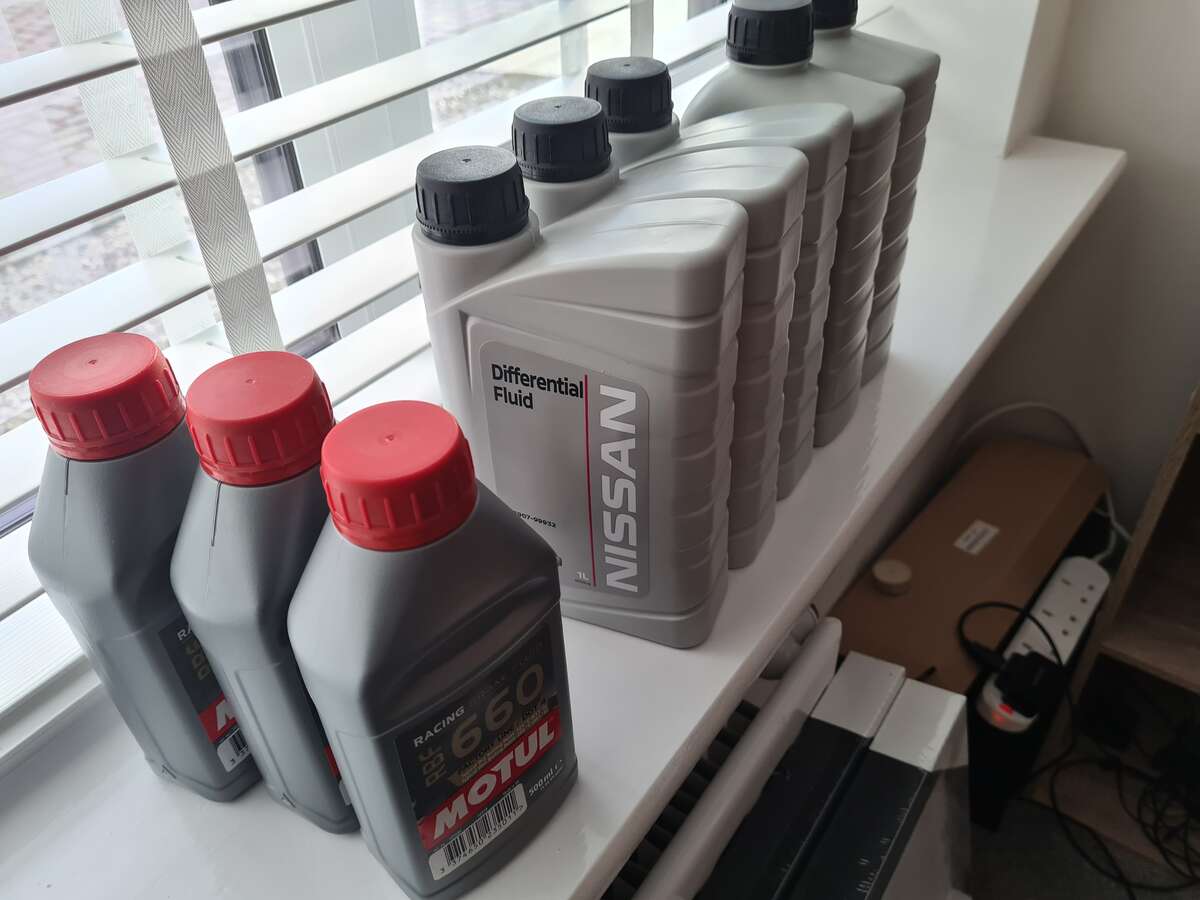
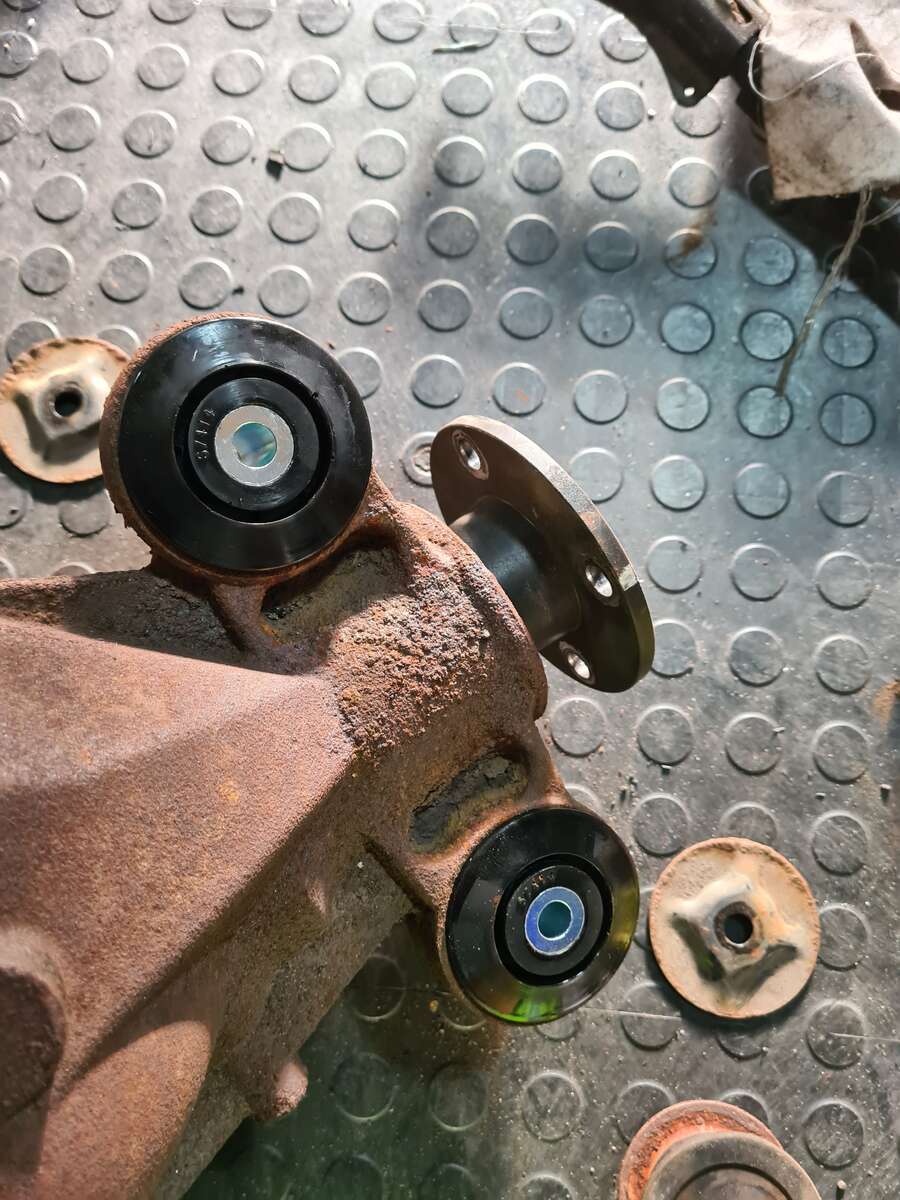
thanks mate... If i had a quid for every time someone has said "that's its now yous got a baby the car will have to go" I'd have enough money to actually finish the build haha. Thanks everyone that has chimed in on my wheel dilemma, its pretty much confirmed what i was already thinking that if i sold them Mk1 Nismo rays at some point in time i would definitely wish I hadn't. I also like idea of having normal road tyres on them and having a less compromising semi slick on the new wheels, that way I fit whatever suits my needs at the time. Also after changing the diff oil, there was no sign of swarf or metal fragments in it that has put any fears of the diff being mis-aligned to bed after the whiteline bushing went in.
-
Sorry, for the lack of updates with this... we had a baby so so both time and money are at a premium at the minute. Only real update is fresh gearbox, diff, brake and clutch fluid going in at some point this week. For those who are interested i give the Motul rbf660 hell and track and it never lets me down (swap it out every 4 or 5 track days) Have been toying with the idea of getting a set if 18x10.5 wheels as the square setup with plenty of tyre at the front as it would be far better for me than the 19" staggered setup. Plus more good semi slicks are available in 18" and are far cheaper, and being able to rotate tyres would be a massive bonus. Dilemma I'm having is do i sell the mk1 nismo wheels, (which i absolutely love the look of) and get something proper top shelf like some TE37s, CE28, lmgt4 Omori factory spec etc..... or do I keep the nismo wheels and get some cheaper but still light wheels like some Enkei RPF1 or Rays gramlights. I'm not sure why but i only really want to sell the Mk1 Nismo rims if they're getting replaced by something equally a cool otherwise i feel like i am depreciating the car for some reason I am in no rush to decide as i still have tyres left and there are other parts of the car that need addressing first and i don't have infinite cash money, but anyone with any useful input on this let me know
-
.thumb.jpg.a3970ae2b233ba9aff18504d81a6fd97.jpg)
370Z Nismo 2018 Grand Touring / Mild Track Build
dave_7 replied to Stan_370's topic in Member Build Projects
thanks for the extra detail, looks a really good set up. And its great to see another 370z used in anger round a racetrack I really like this car and you clearly only fit the best parts. If money was no object for me my car would end up something like this! I suffer with burning up the dust boots in the front calipers alot. I spent 2 days stripping the front caliper down and replacing them along with the seals while I was at it, only to burn them up again on the next track day! Which was annoying to put it mildly! I actually find the the stock calipers very good with the right pads and brake fluid in and they take the abuse really well, however extra cooling would make this even better. Plus if the titanium shims can keep some heat sway from the caliper its self that great for the caliper and the fluid. Apparently most track guys in the US don't even run with dust boots anymore and many manufactures of aftermaket calipers aimed at track/race use dont have them in either as they just cannot take the heat. I currently take the pads outs the clean inside after every trackday to keep any crap from getting at the seals. Key is to never push the caliper pistons back in until its all clean in there, that ways you never draw any muck into them and reduce the risk damaging the seal or piston. Its not perfect but i did inspect all the pistons when i did a full strip down to replace the seals and they were all still perfect. -
370Z Nismo 2018 Grand Touring / Mild Track Build
dave_7 replied to Stan_370's topic in Member Build Projects
This is absolutely incredible Do you have any more info on your brake cooling set up? And did the titanium shims make much to difference? Also are you running the stock nismo rear arb along with the hotchkis front bar? -
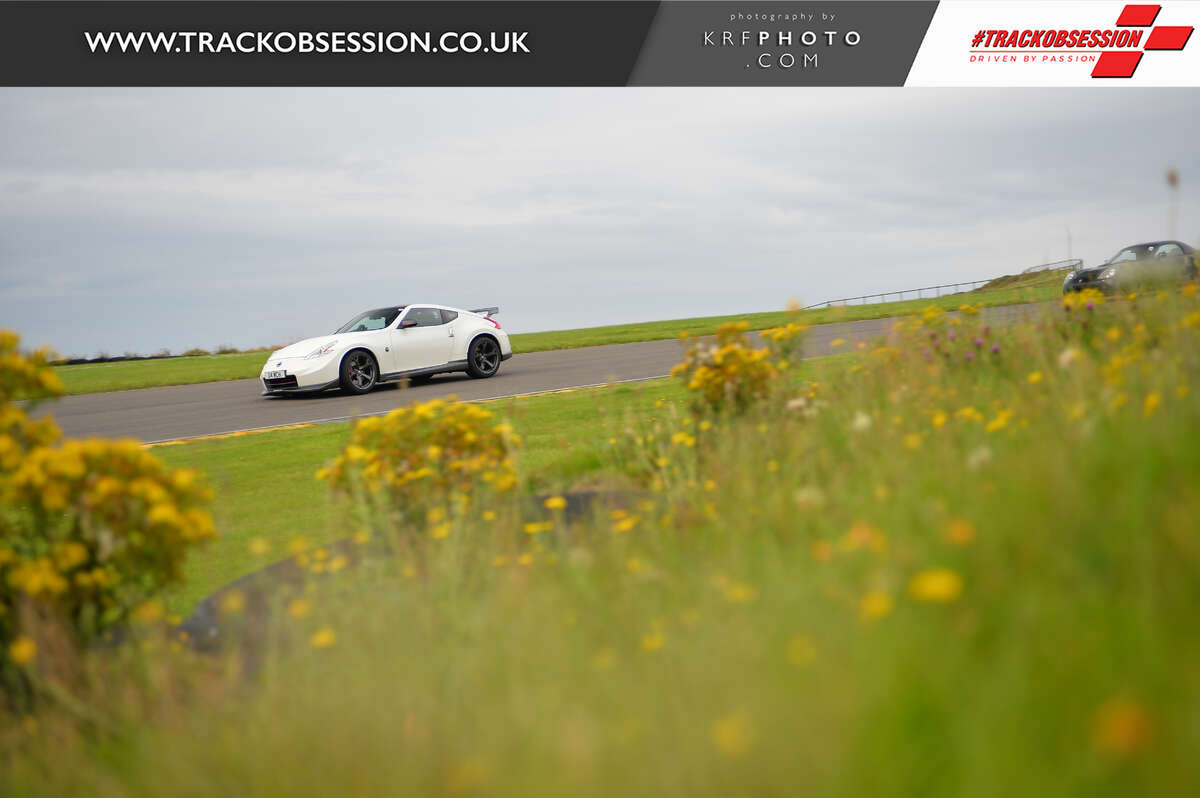
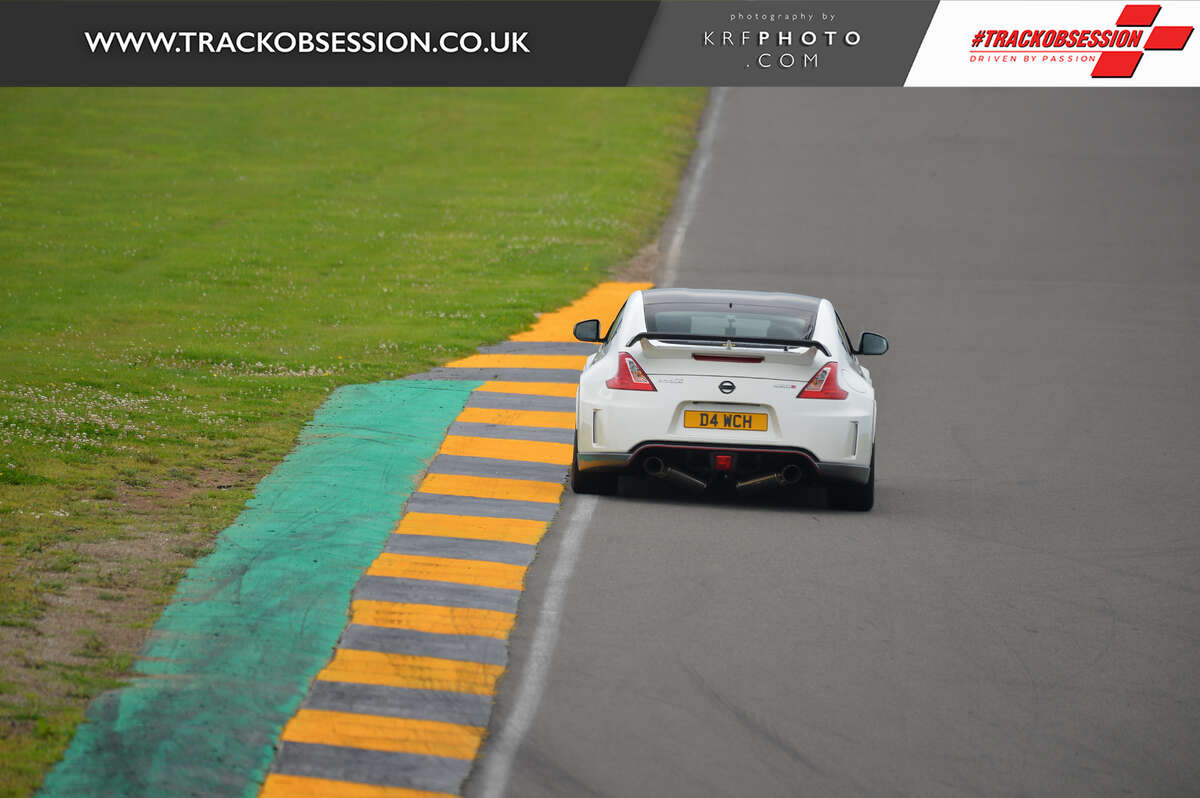
A few shots from last weekend at Anglesey. Awesome day and stayed dry all day. Only 30 cars allowed booked on due to currently local restrictions which meant loads of track time and only 1 red flag all day!! Also my undertray decided to commit suicide on the way there, so it was cable ties and duct tape to the rescue. Its only the access panel that cover access to the upper fixings (its a different layout to the other 370z undertrays) so I will just remove it for now but will be looking for an aftermarket aluminium one as the plastic one is crap. Unfortunately Z-speed are the only manufacturers who do one for a mk1 Nismo and the price is extortionate. I heard rumours that Z1 have on in the pipeline as they already do one for the mk2 so i may hold out for that. Failing that i will have to CAD on up and get it laser cut myself. https://www.z1motorsports.com/undershroud/speed-performance/speed-370z-performance-aluminum-undershroud-09-14-nismo-p-11891.html


-
That looks so much better! you can see just looking that they sit a fair bit lower than the stock seats. Plus the weight saving from taking those heavy stock seats along with electric motors is a bonus!
-
Looks like our end goals are very similar. Its a real shame they've discontinued the AD08R, as their predecessor - the AD08RS sounds a bit poo from what I have been hearing about them 100% agreed about the seat, i run a CG lock which is a big help but no substitute for a proper fixed back bucket seat. For me one of the main issues is going to be getting an aftermarket sear to sit lower than stock. I'm 6ft 5 so my helmet rubs on the roof liner. I'm not fussed about having rails so will probably mount directly to the floor pan as long as I can find somewhere to fab me up a sub frame. I have also looked into DIY brake cooling ducts, piping from cutouts in an aluminium under tray. Never got anywhere with it though. Car needs them though the dust boots in my calipers are toast and even after a cool down lap my brakes can still be billowing when i come back into the paddock
-
Well now i want one even more!! It does sound like a big improvement and you aren't the only person to say so. What other suspension/handling changes have you made if you don't mind me asking? It's always good to hear from someone with similar end goals who is further down the line The wish list for this car is never ending. I had better try and save some pennies over the winter
-
Its on my wish list but like you said not a cheap bit of kit by a long shot, do think it would make a difference though. The stock vlsd is not horrendous by any means but at the same time isn't great either. I feel it will become a must for me further down the line. Which diff did you go for? Does it live up-to the hype?
-
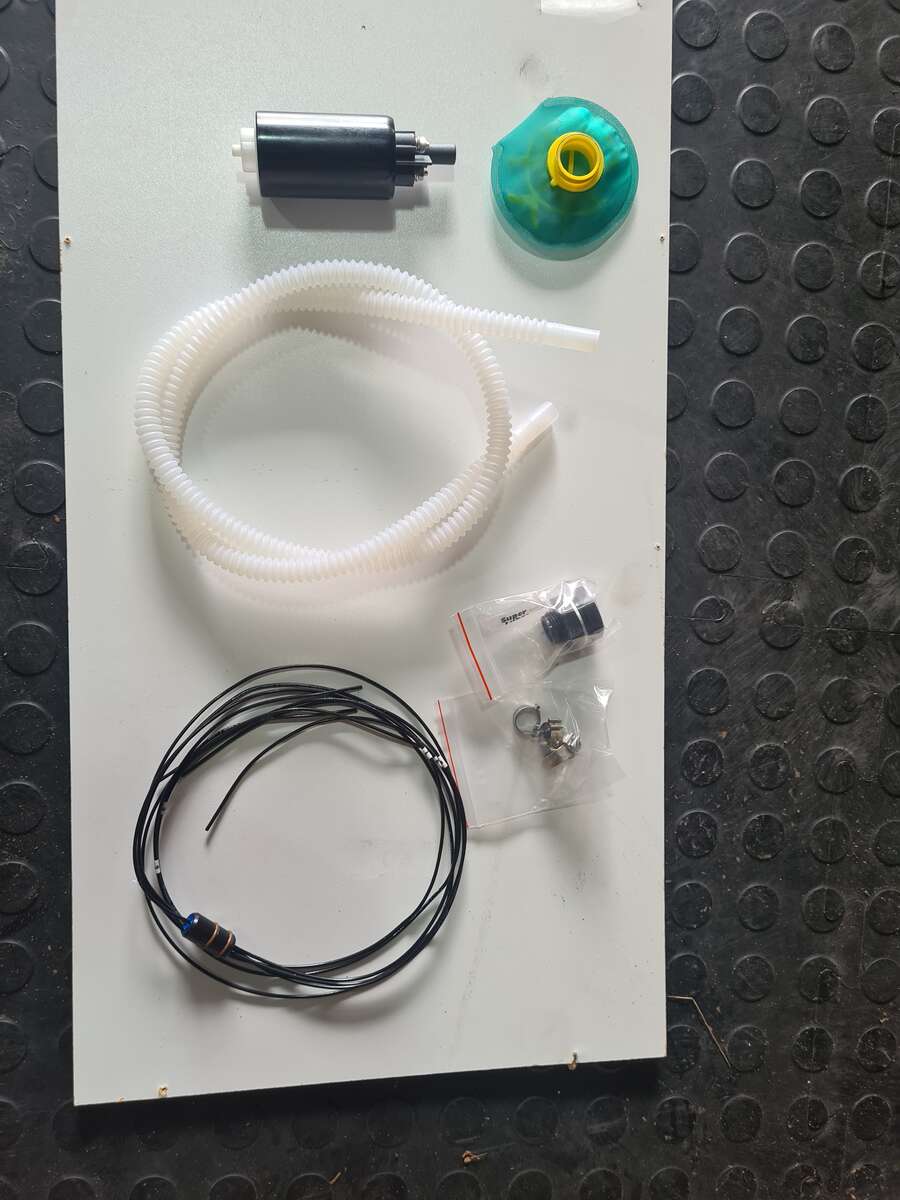
Also additional fuel pump was a huge success, managed to run down to use over a quarter of a tank with zero issues! I am confident you could run it even lower if you wanted too. Make a big difference not only shedding a bit of weight but not having to top the fuel off after every other session. Really pleased with the outcome with it would 100% recommend for anyone else with the fuel starve issues!
-
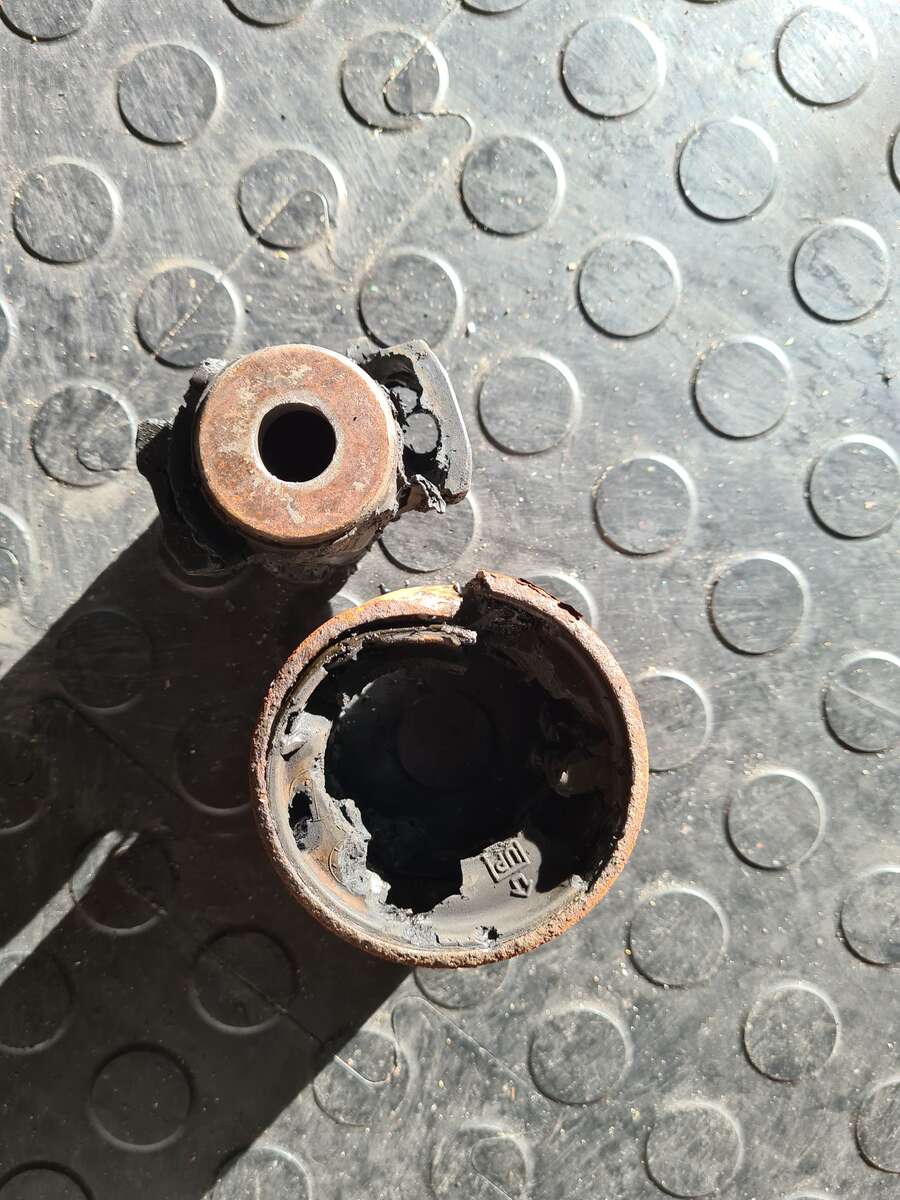
Cheers for the heads up on this. Luckily, after much digging, looks like I may have them the right way round. Like we said earlier I am gonna manually measure the old bushing and compare to the new next time I am under the car. Then also change the diff oil and if there is any sign of metal shavings in it i know something is not right. I am fairly confident its is right going off all the digging I've done on the US forum but you can never be too sure! http://www.the370z.com/engine-drivetrain/100343-rear-diff-bushing-top.html Oh yes it has made a huge difference. Another thing that was noticeably better at Anglesey yesterday is when the car does oversteer and step out the feedback from modulating the throttle is bring it back into line is so much crisper. Real confidence inspiring stuff! At one point i even managed to catch a slide going down the corkscrew there, I will have to dig out the footage
-
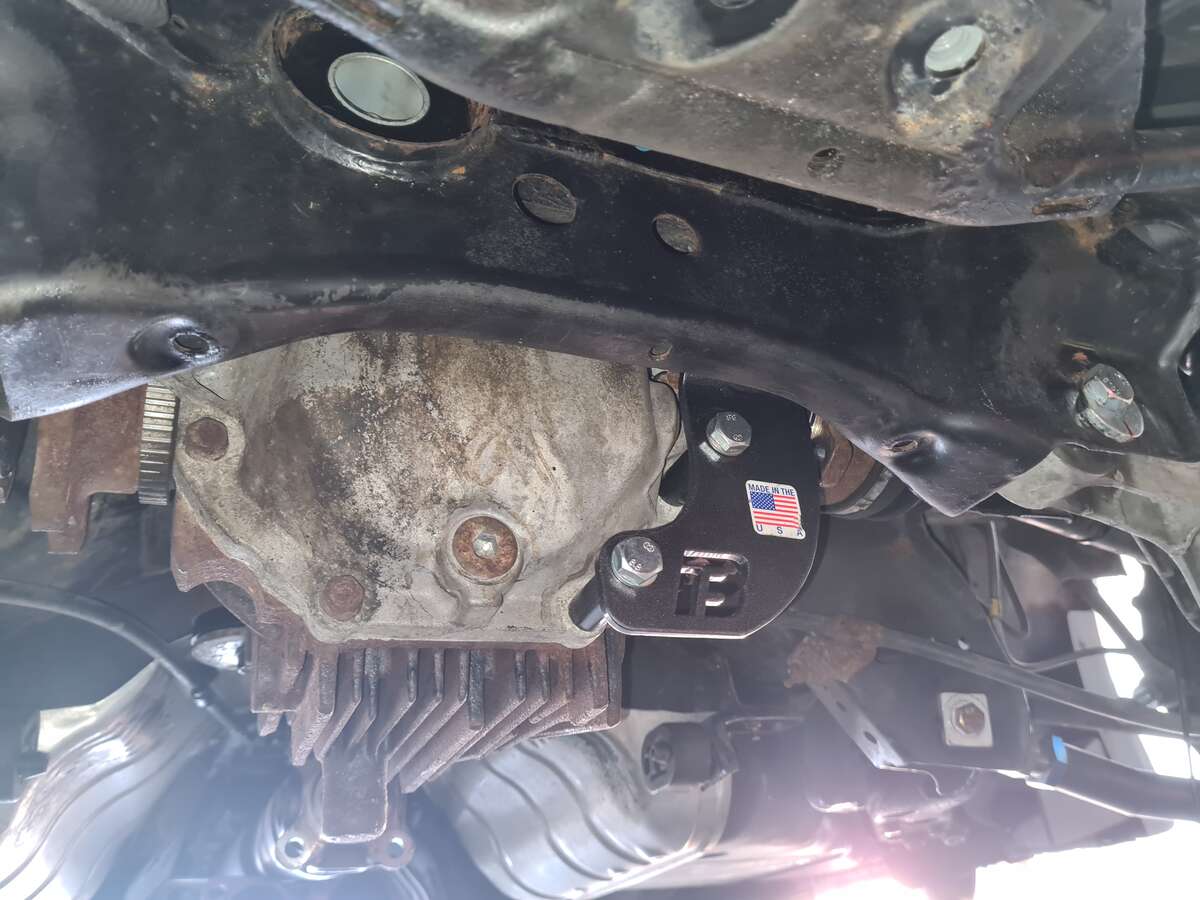
update part 2 is basically the fitment of: white diff bushing kit z1 rear subframe collars bell raceworks diff brace as expected, the diff bushing in the subframe was a bish to get out. 50mm hole saw, 8mm drill, recipricating saw and a big hammer. Took just over an hour for it to surrender. fitting the new bushing was a 5 minute job on the other hand. I lobbed them all in the freezer the nigh before so they all flew in. The diff brace was not as simple as its made out to be. I got it to line up just about but that's with the diff in loosely and all shafts disconnected, if you where to just over this up to your diff with everything bolted up you'd have some trouble I'd imagine. Also there is a nut with locating boss welded to it that is the top mounting point (not seen in the picture), which needs to be fitted from the inside face of the subframe which was a bit fiddly even which the entire rear end disassembled. Still very doable though. last up was the subframe collars, once everything is off the car these slip in nicely. Now obviously i can't comment on the difference all these things have made individually, but as as collective I am absolutely blown away by the difference they have made. I wasn't expecting to feel that much of a benefit on the road but the difference is staggering. Its a very difficult thing to describe but basically feels like you're right foot has a much more direct connection with the back end. You can pile the power on much sooner and at a quicker rate because the way its delivered is much smooth so unsettles the car less. Its also stopped the intrusive TC system kicking in at every opportunity because the diff isn't waggling round like a turd in a bucket. Honestly wasn't expecting the difference to be be this good but this has left me pleasantly surprised! A proper hardcore diff needs to get added to my wishlist now!
-
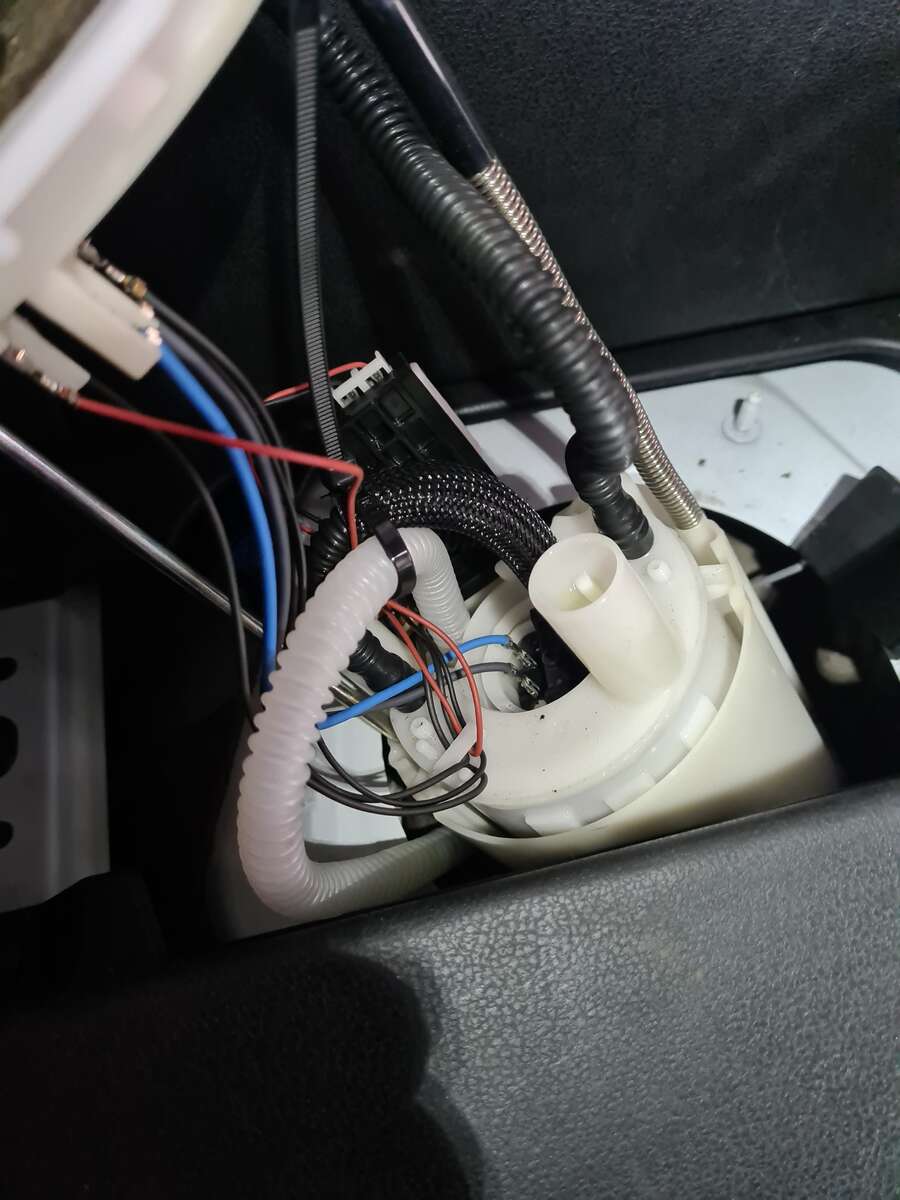
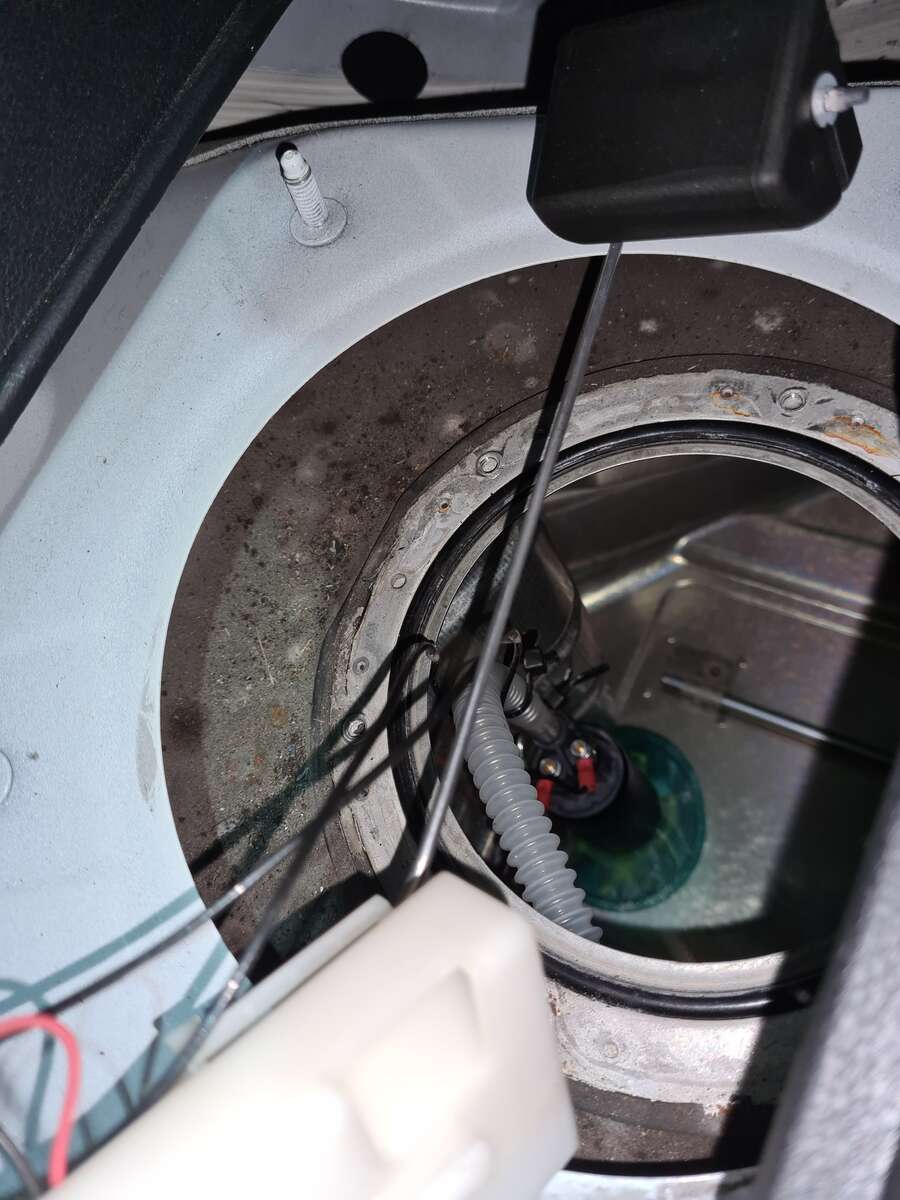
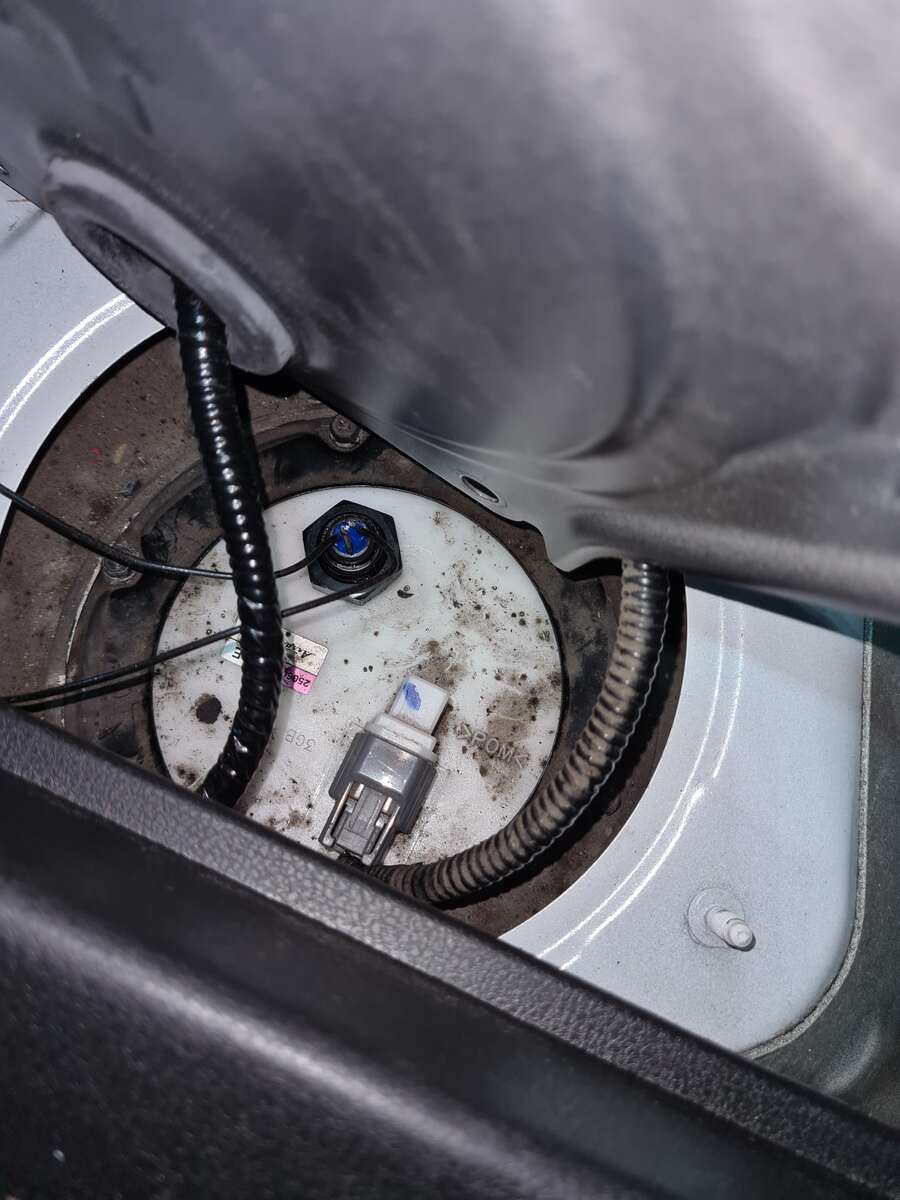
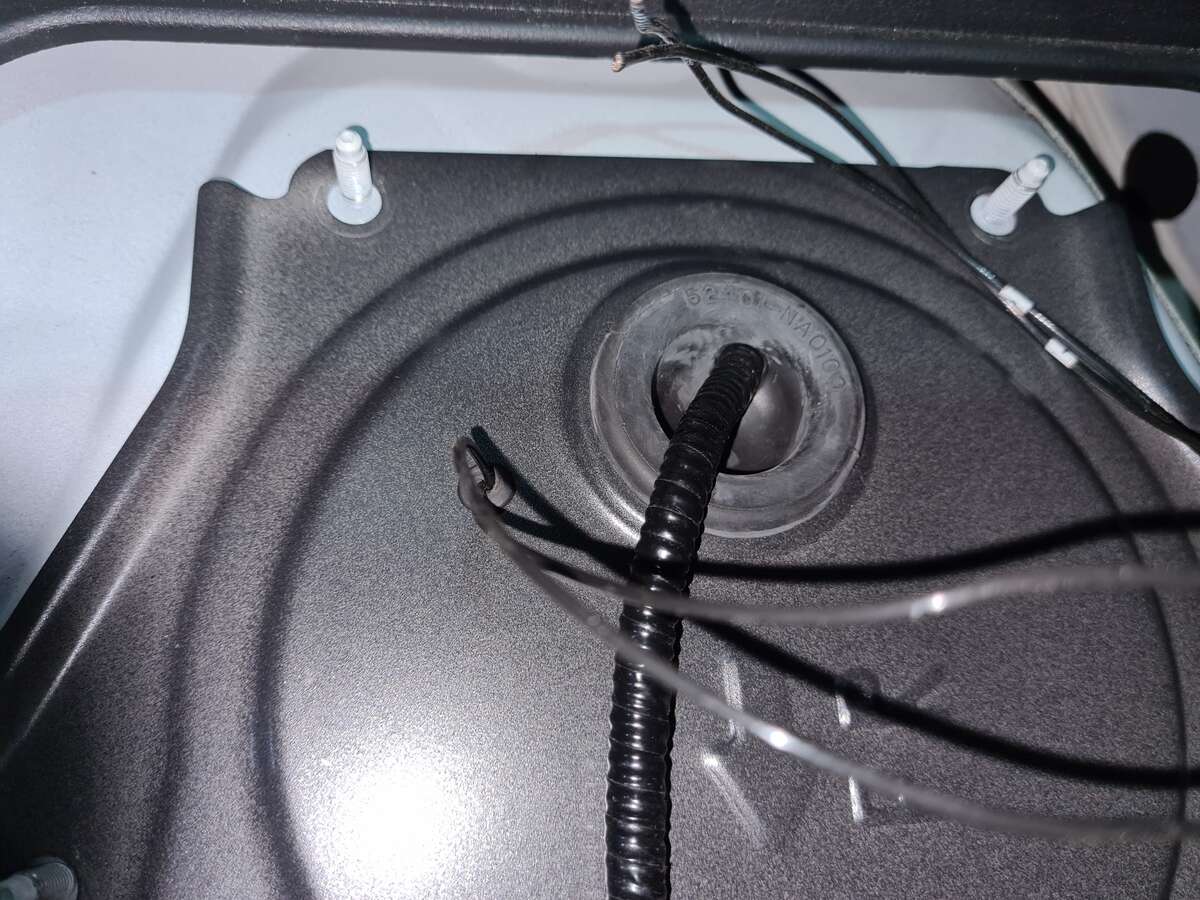
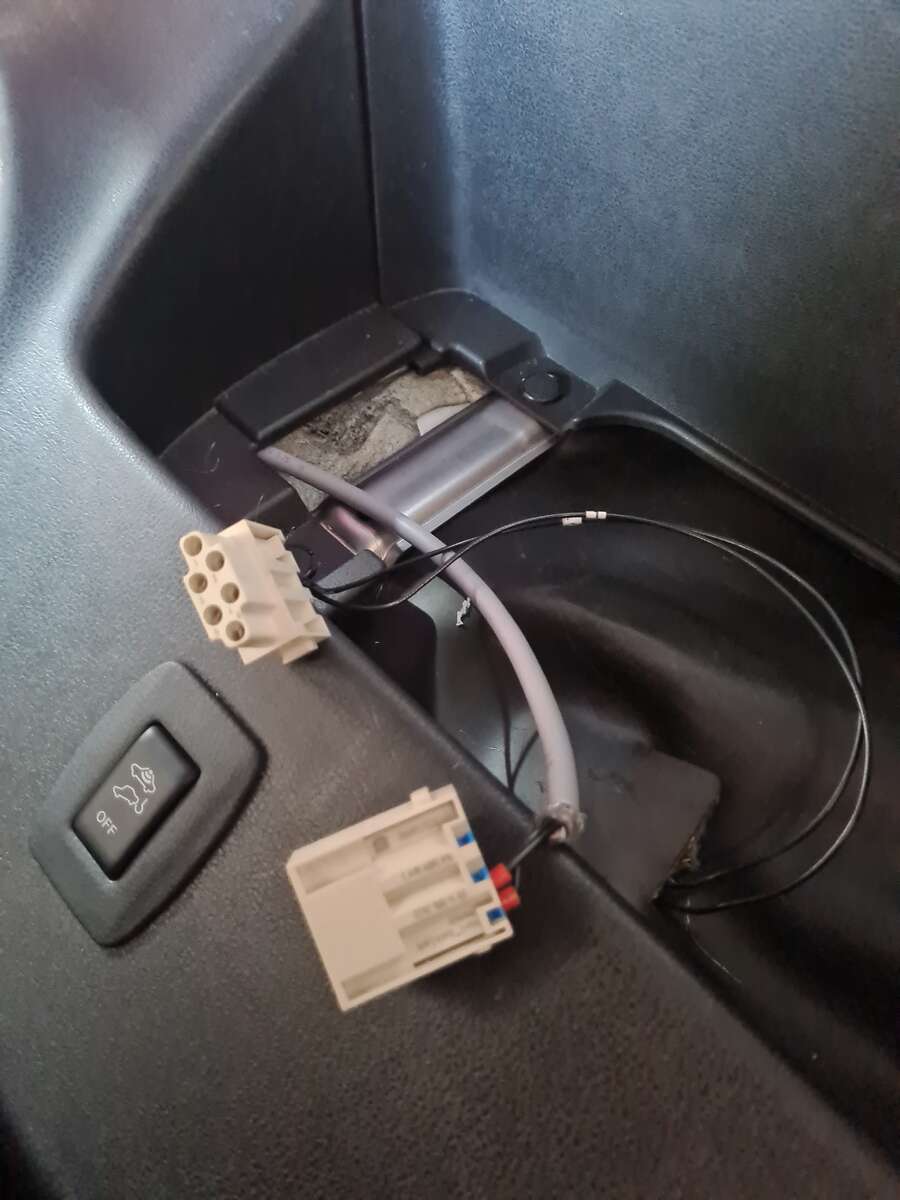
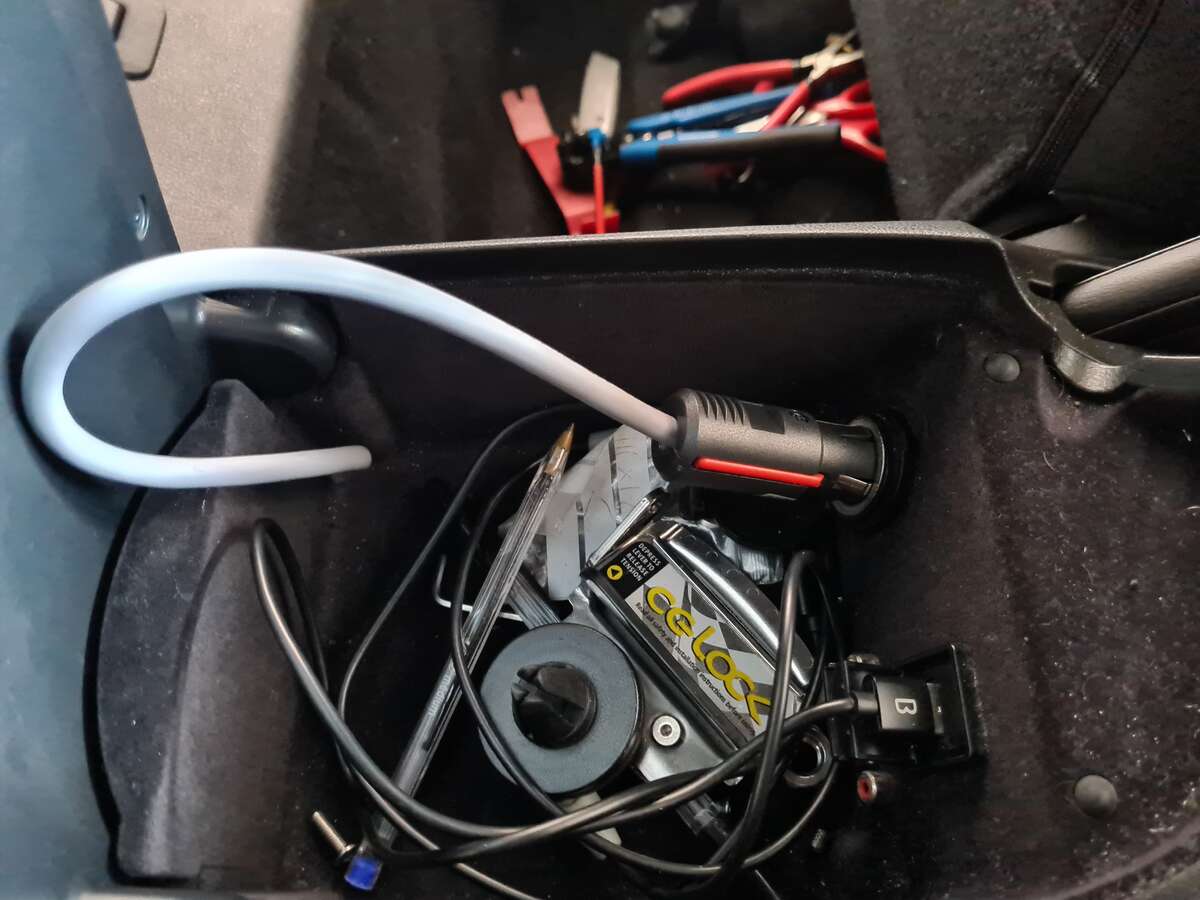
2 part update today from a load of work i did last week. Part 1 is the home brew fuel starve kit to overcome the fuel starve issue on track, car currently starves on long right handers even with 3/4 of a tank and constantly refuelling through the day gets old quickly. Credit to @nissanman312 for pointing me in the right direction with this one and being on hand to answer my questions as obviously anything fuel related is more daunting that the usually job! Basically uses a low pressure protec fuel pump mounted at the bottom of the passenger side portion of the fuel tank to pump fuel from that side, over the hump into the tank and into the stock fuel bucket in the drivers side where the stock fuel pump is. Fuel pump is mounted to the structure inside the tank using cable ties with the filter as close to the bottoms as possible. Obviously doing this on as emptier tank as possible is a must. Submersible fuel hose is routed from the Protec pump outlet over the hump in the tank and into the top of the opening in the top of the stock fuel bucket, again held in position with cable ties. Bulkhead rated for use with fuel added to the top of the fuel sender unit cable routed through the access panel via a rubber grommet i added a plug at this point so i could split the loom without issue, if i ever need to take the sender unit out again and for now Ive routed some 4 core armoured cable into the the armrest and wired to a 12v plug so the plan is plug the pump in whilst on track days and i can unplug it on the road so as not to run the pump dry. when you plug it in with the engine off you can hear the pump whirring away in there so i know it work. the setup is basically what Z1 offer in their fuel starve kit without the hydromat and without splicing the power for the pump into the stock fuel pump loom (meaning its on at all times). I am on track day Sunday at Anglesey which will be ultimately be where i find out if this was worth all the trouble!
-
massive improvement, looks great!
-
New wheels you say? Exciting times mate. I can't wait to see whats next!!
-
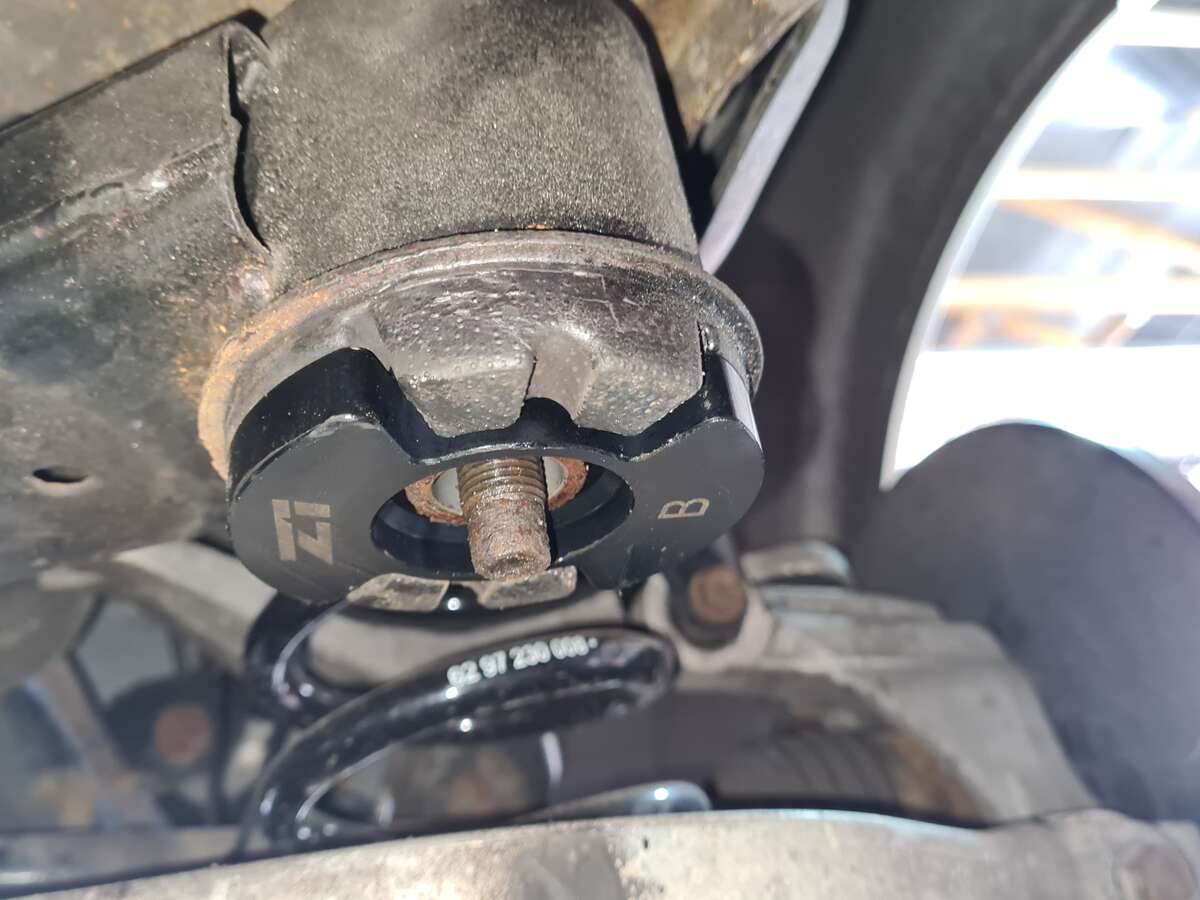
Don't wory, the vibratechnics gearbox mount is high on the to do list. Bank balance currently is on life support after the kicking its taken over longdown! These cars are real wallet laxatives!
-
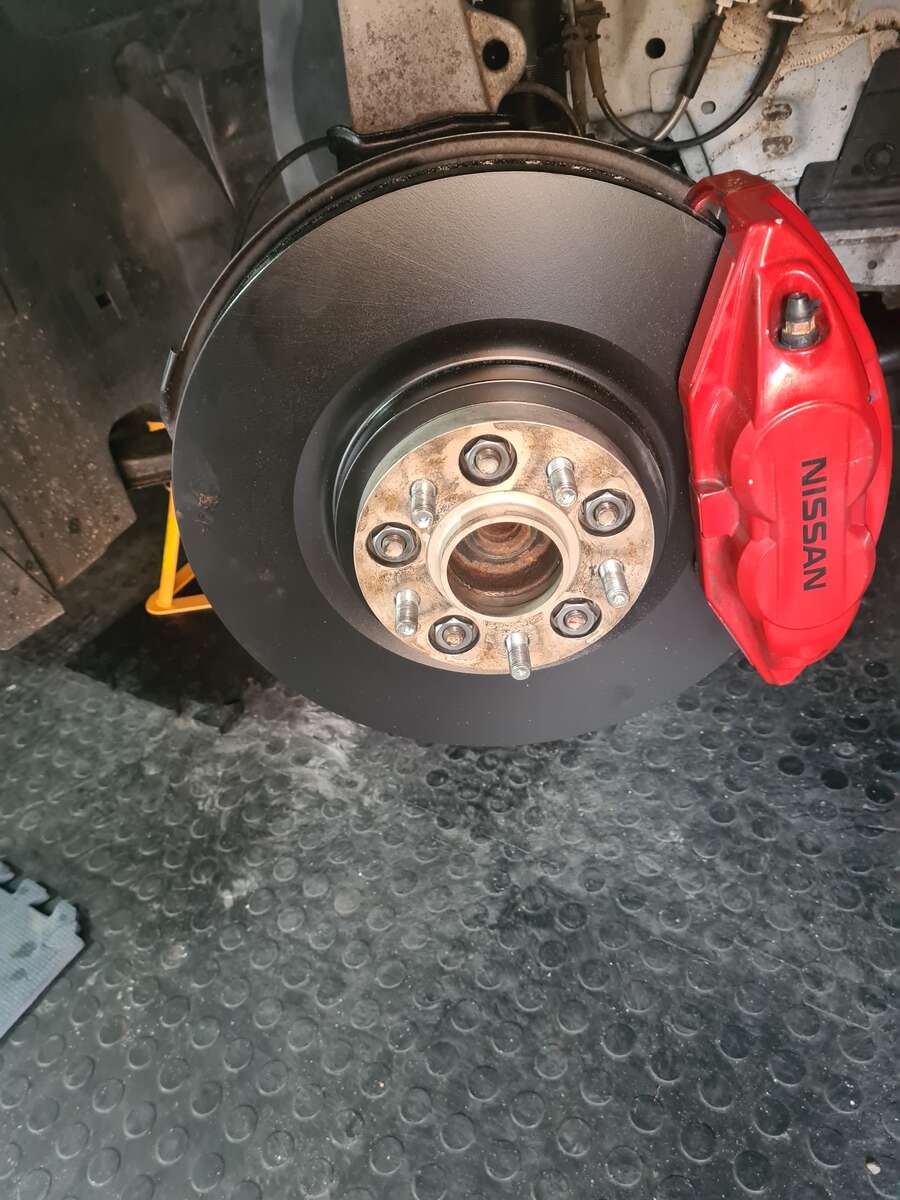
quick update from the weekend. Took the garage i booked the car in at over 2 hours to remove the chocolate Eibach nuts, they are now destroyed but at least they are off! Raised the issue with Eibach and they literally couldn't give a monkeys! I wont be spending anymore money there thats for sure. Either way it meant I could fit the fresh discs and pads ready for Anglesey in a couple of weeks. Spacer are back on now with some proper steel nuts this time. Also checked my catch cans. They are certainly doing they're job and have stopped a considerable amount of sludge going anyway near the maf's or throttle bodies. Definitely worth while for anyone who wants to drive one of these cars hard. Went for a good 4 hour blast out round Wales yesterday as well (should have taken some pictures). Fuel tank is now suitably empty so i can attempt to fit the additional fuel pump over the weekend along with diff bushing, diff brace, subframe collars and engine mounts (a lot to do in a day but I'll see how i get on).
.jpg.70a81135f0143b9448a9c773cf7d23cf.jpg)
-
I was out in Wales again yesterday afternoon after finally getting the car back together. Some great driving roads with great views!
-
Give this a try, polish then seal. Its really good stuff https://www.britemax-direct.co.uk/products/britemax-easy-cut-final-shine-metal-twins-polish-cleaner-kit
-
In other news, additional fuel pump is here courtesy of @nissanman312, so i big thanks to him for sorting this out! Just need a few more bits and that will be ready for fitting and testing. All parts are from Protec, so should be no issues with quality. Short term plan for testing, I think I am just going to wire it to a 12v plug, route it to inside the armrest console and simply plug it in when at the track, before hard wiring it in with a switch further down the line.
-
Thanks buddy. Unfortunately the spacers are going to have to get cut off. I split a nut in half on Saturday by drilling down both sides, so essentially the nut was in 2 halves and it was still welded to the stud! The nuts are made from aluminium (and very soft aluminium at that, i managed to round one off with 1 hand!), which in hindsight is absolutely shocking from Eibach. Really not something you expect from a company with a reputation like that. There was plenty of copper grease on them and they were torqued upto the factory lug nut spec. They have just galled so badly from heat cycling! They were only fitted in January as well. I will probably complain to Eibach once its all sorted as these thing obliviously aren't cheap. When searching online for this issue, Eibach spacers are the only ones that come up, no other brand seems to have this problem. Either way @Adrian@TORQEN is sorting me out with some new wheel studs which should arrive today, as well a host of other new parts. Great service from them to pull me out the sh*t so quickly. I will post some pictures of the butchered spacers up for everyone's amusement when they're finally off.
-
Oh dear, i had best set a side of full day for doing mine. Great tip on putting the new bush in the freezer!

