

scobie140
-
Posts
1,000 -
Joined
-
Last visited
Content Type
Profiles
Forums
Events
Gallery
Store
Everything posted by scobie140
-
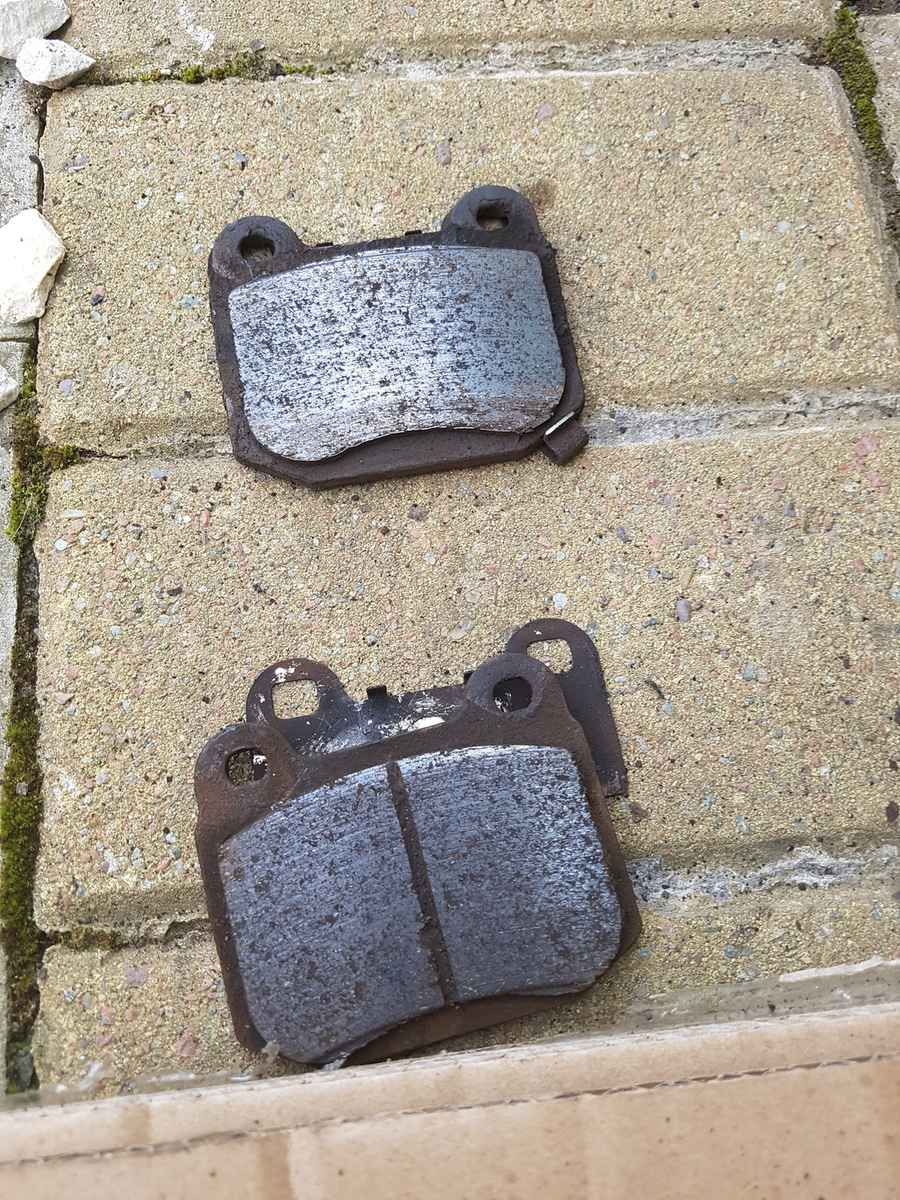
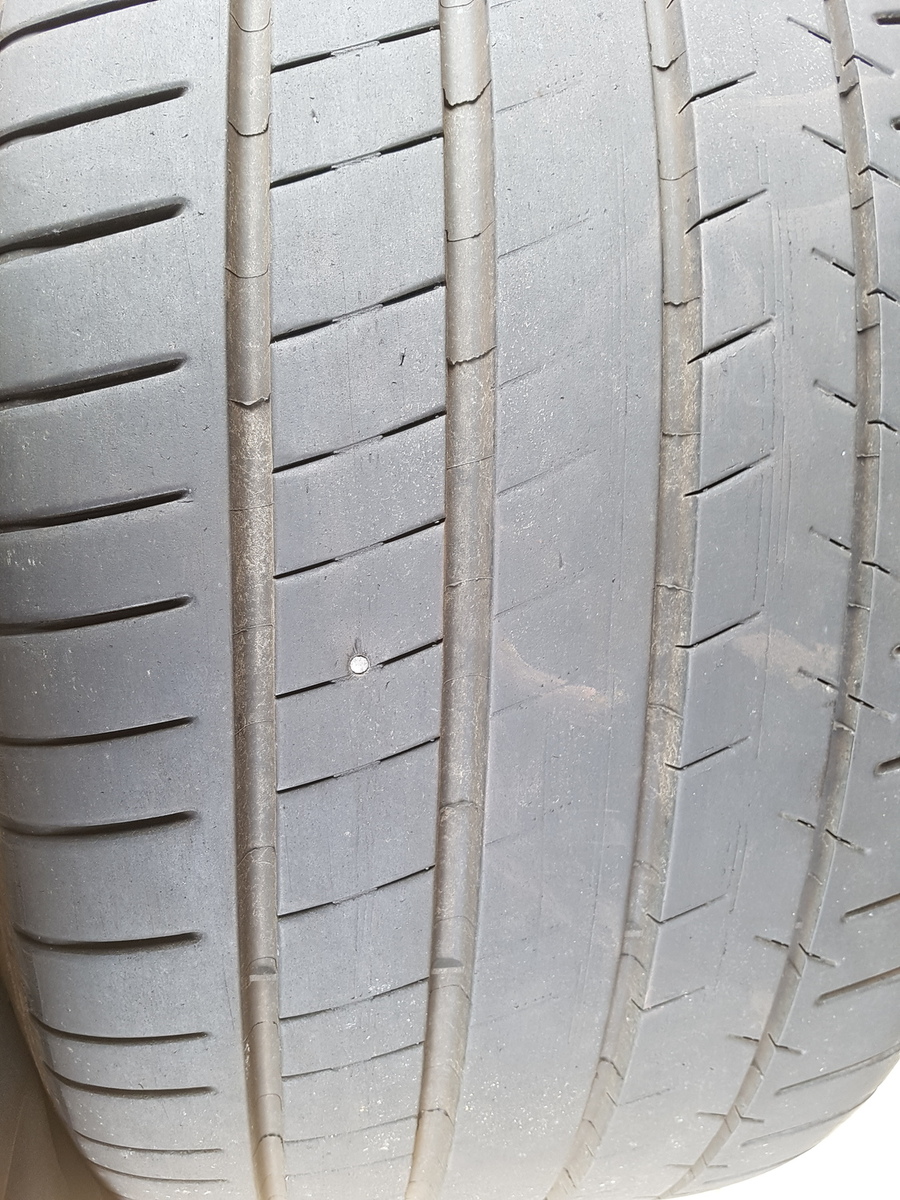
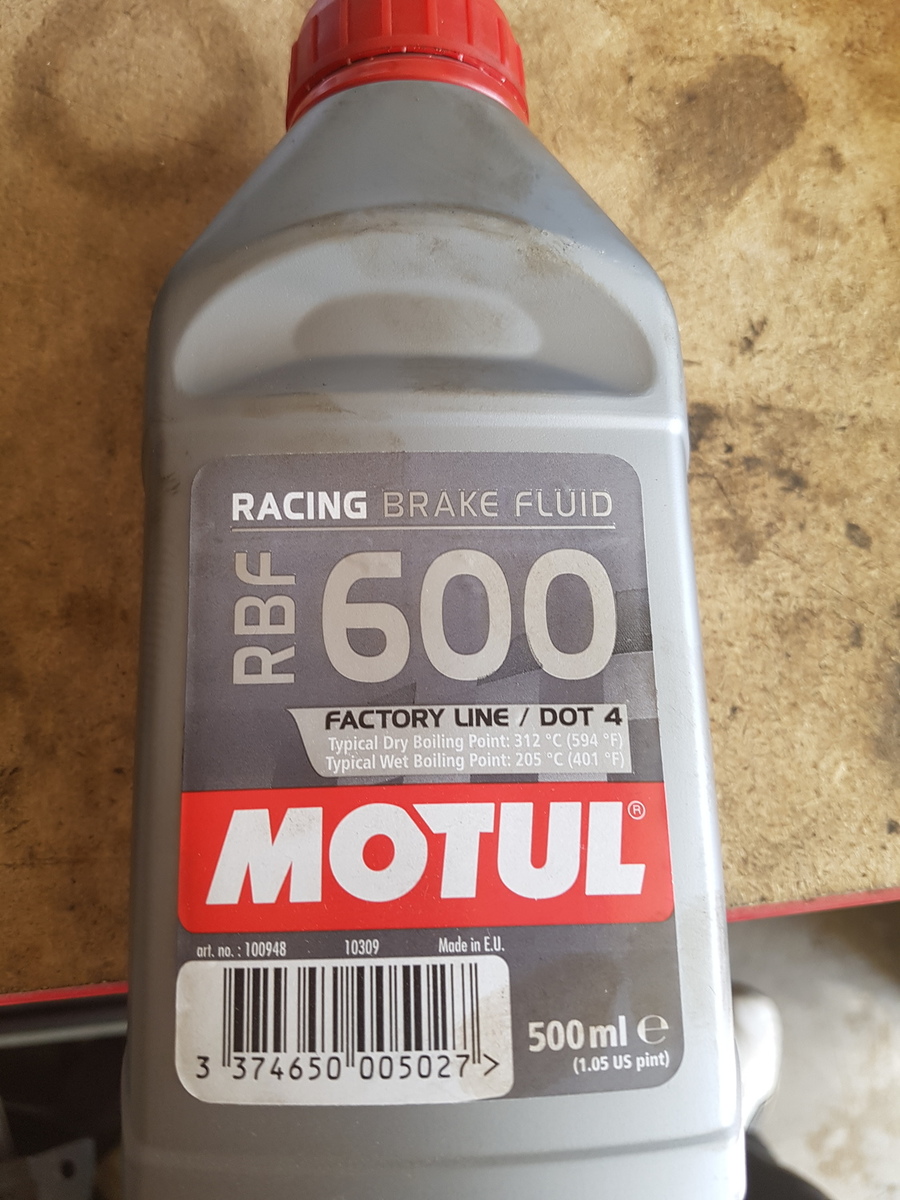
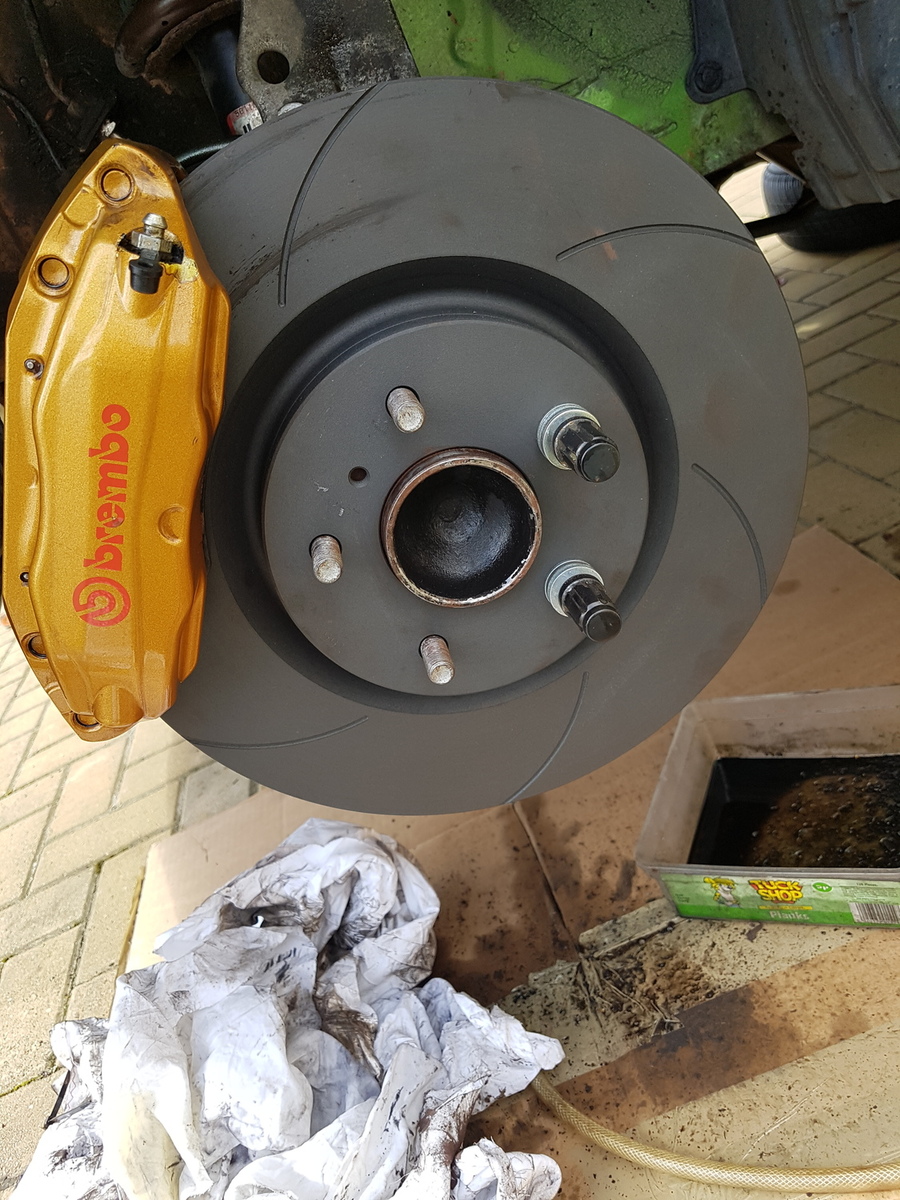
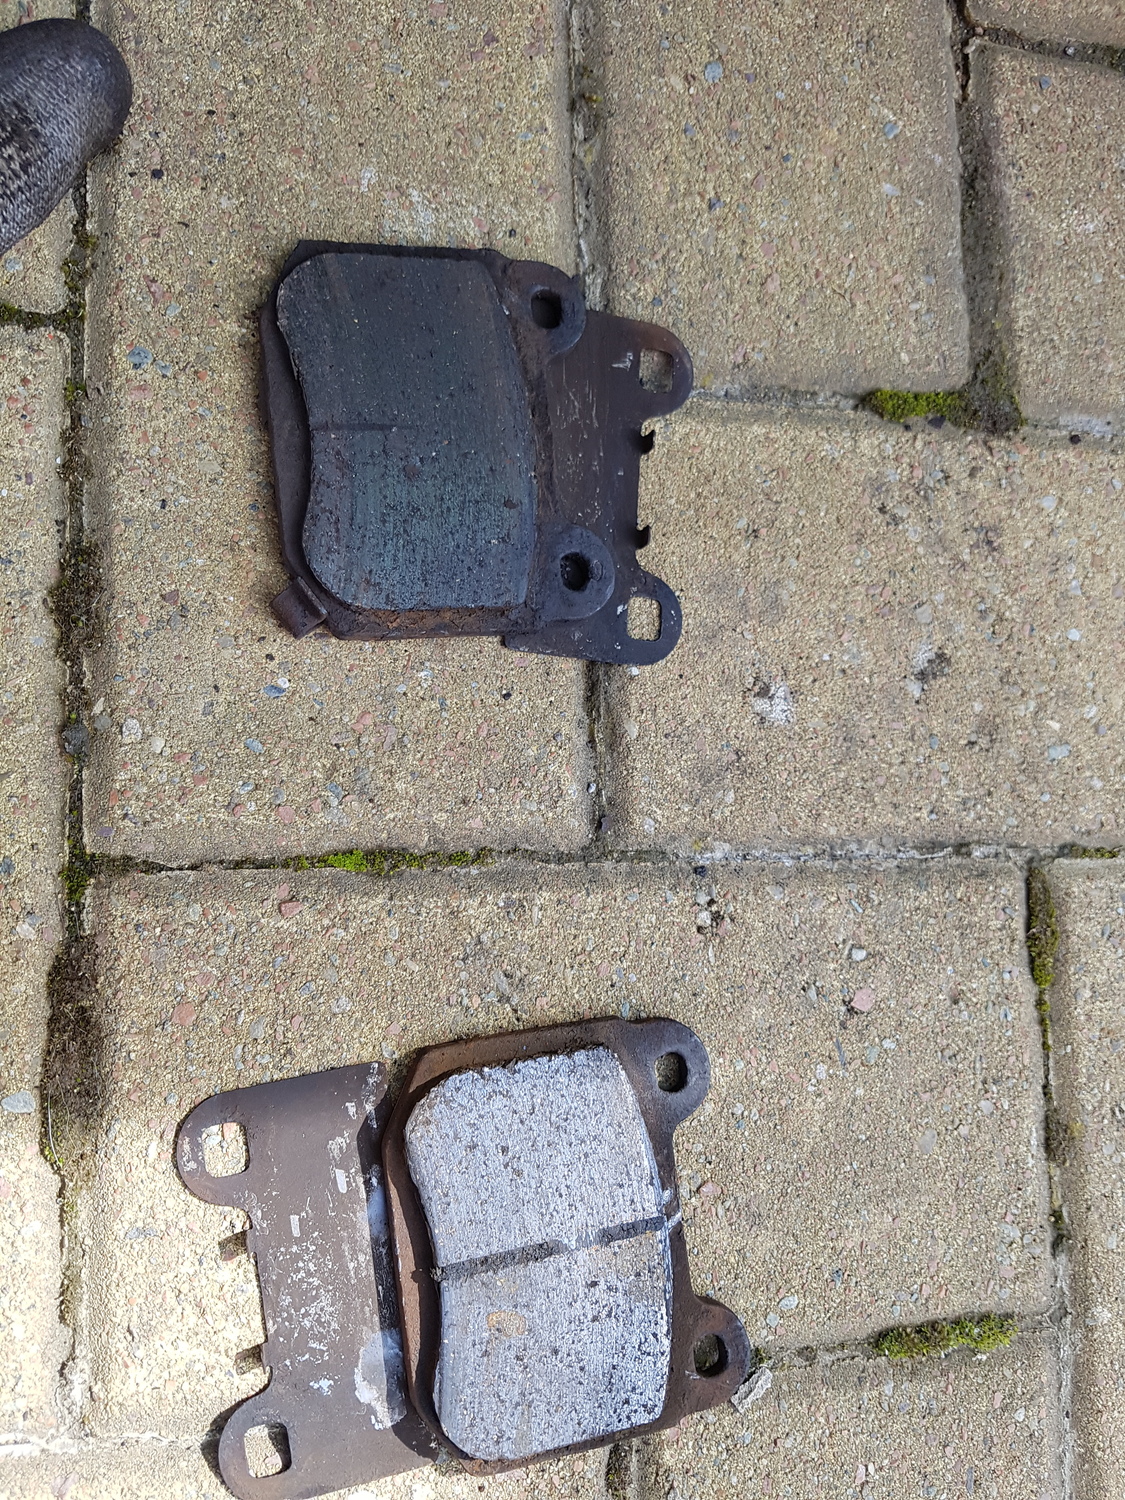
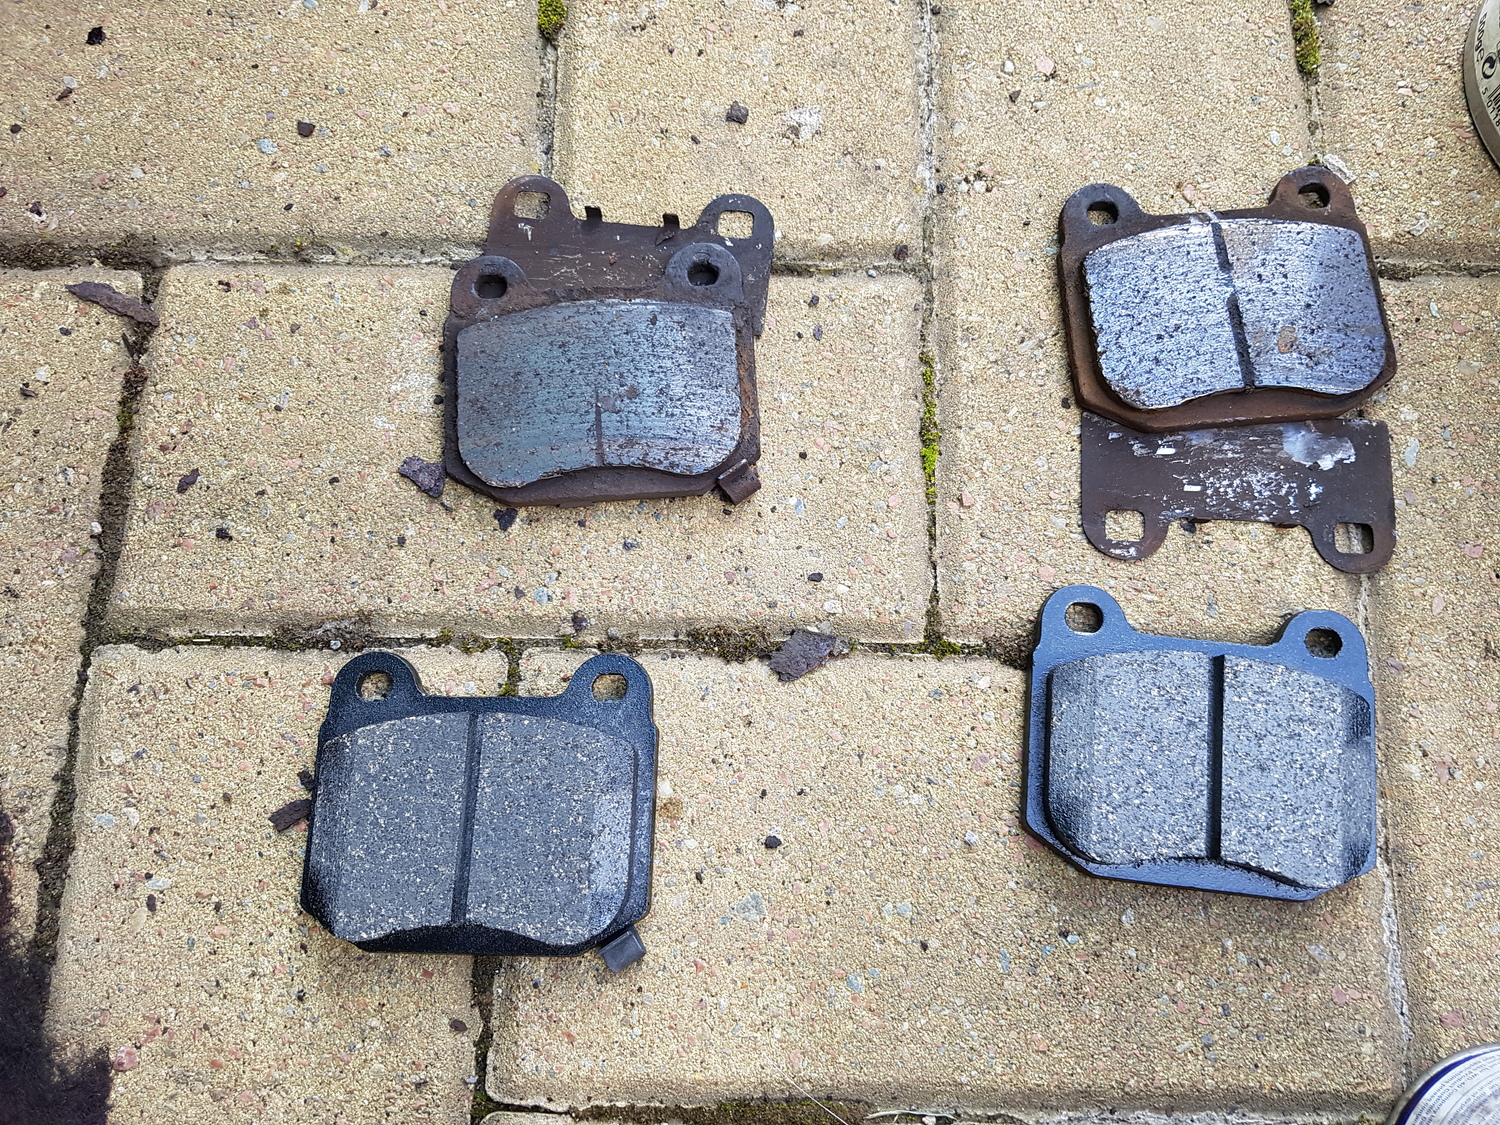
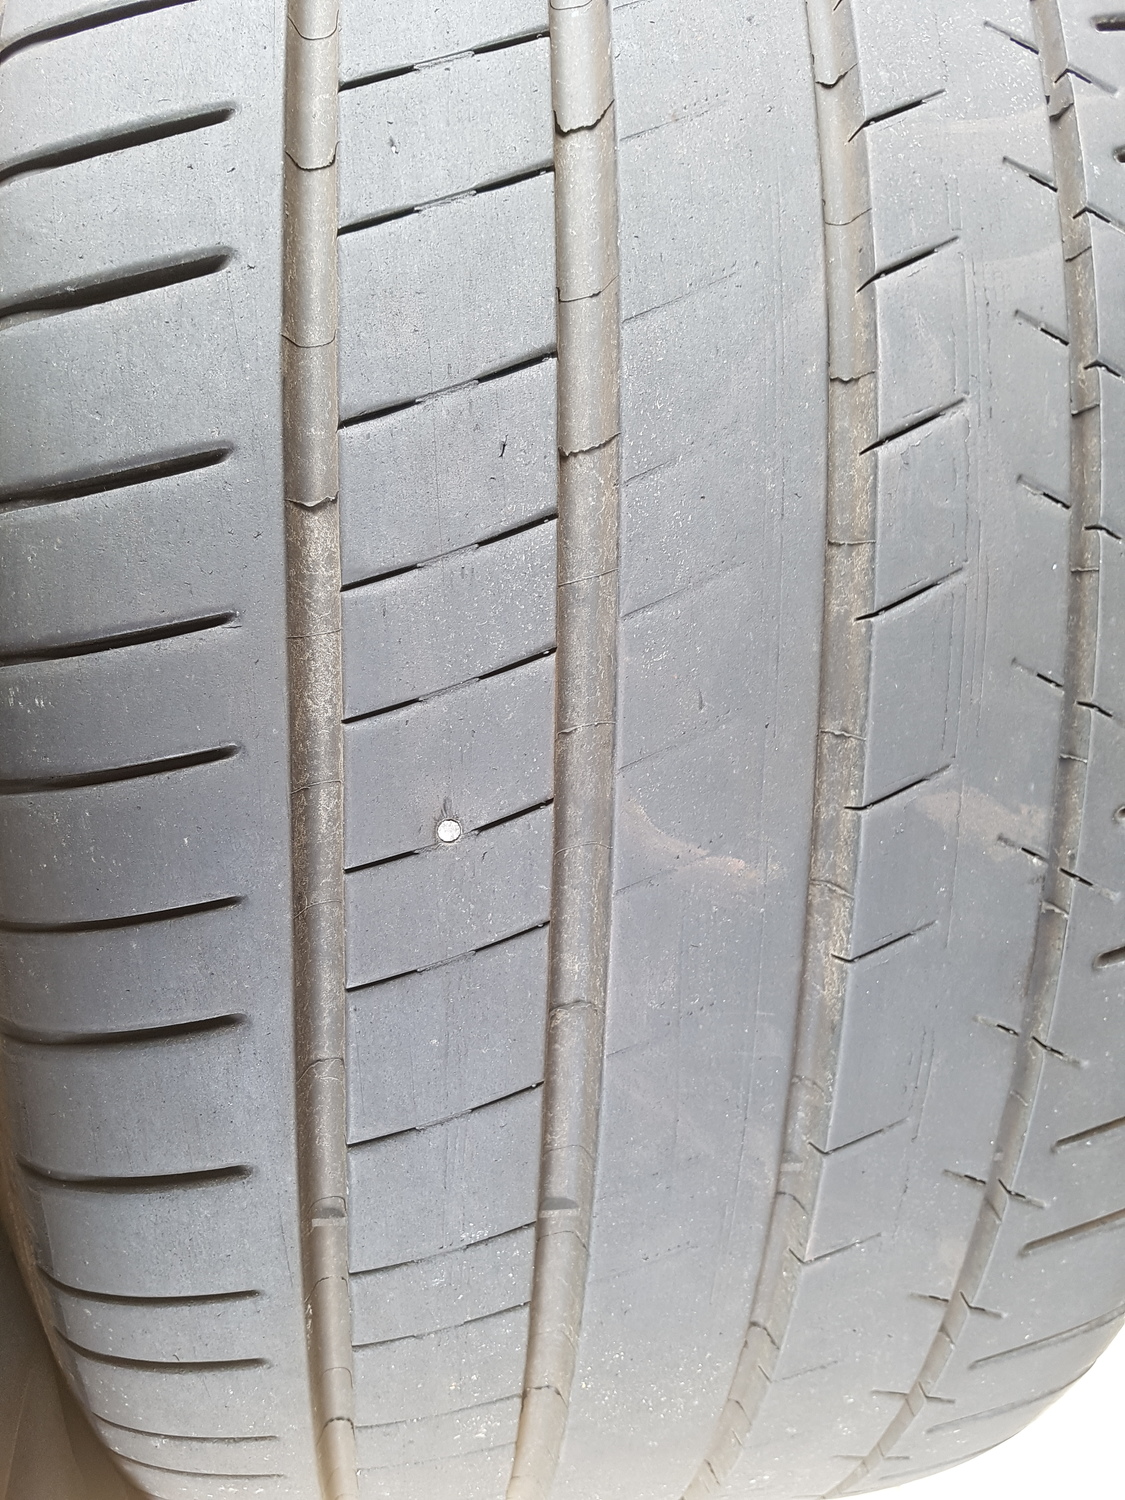
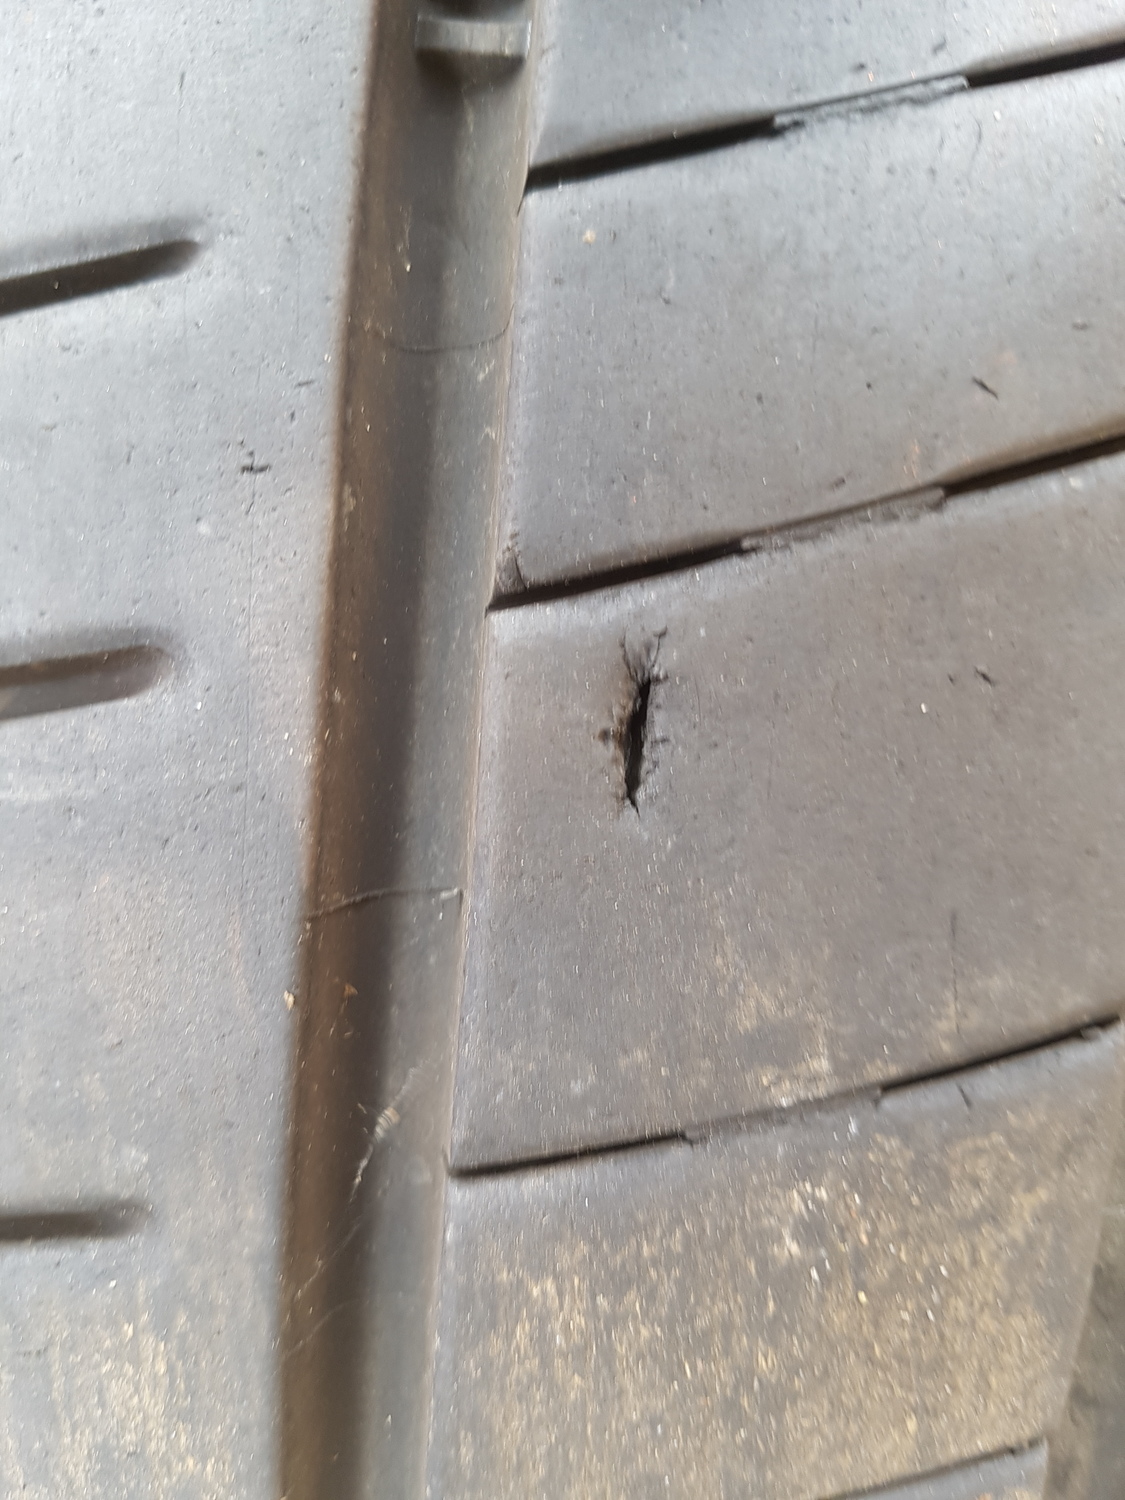
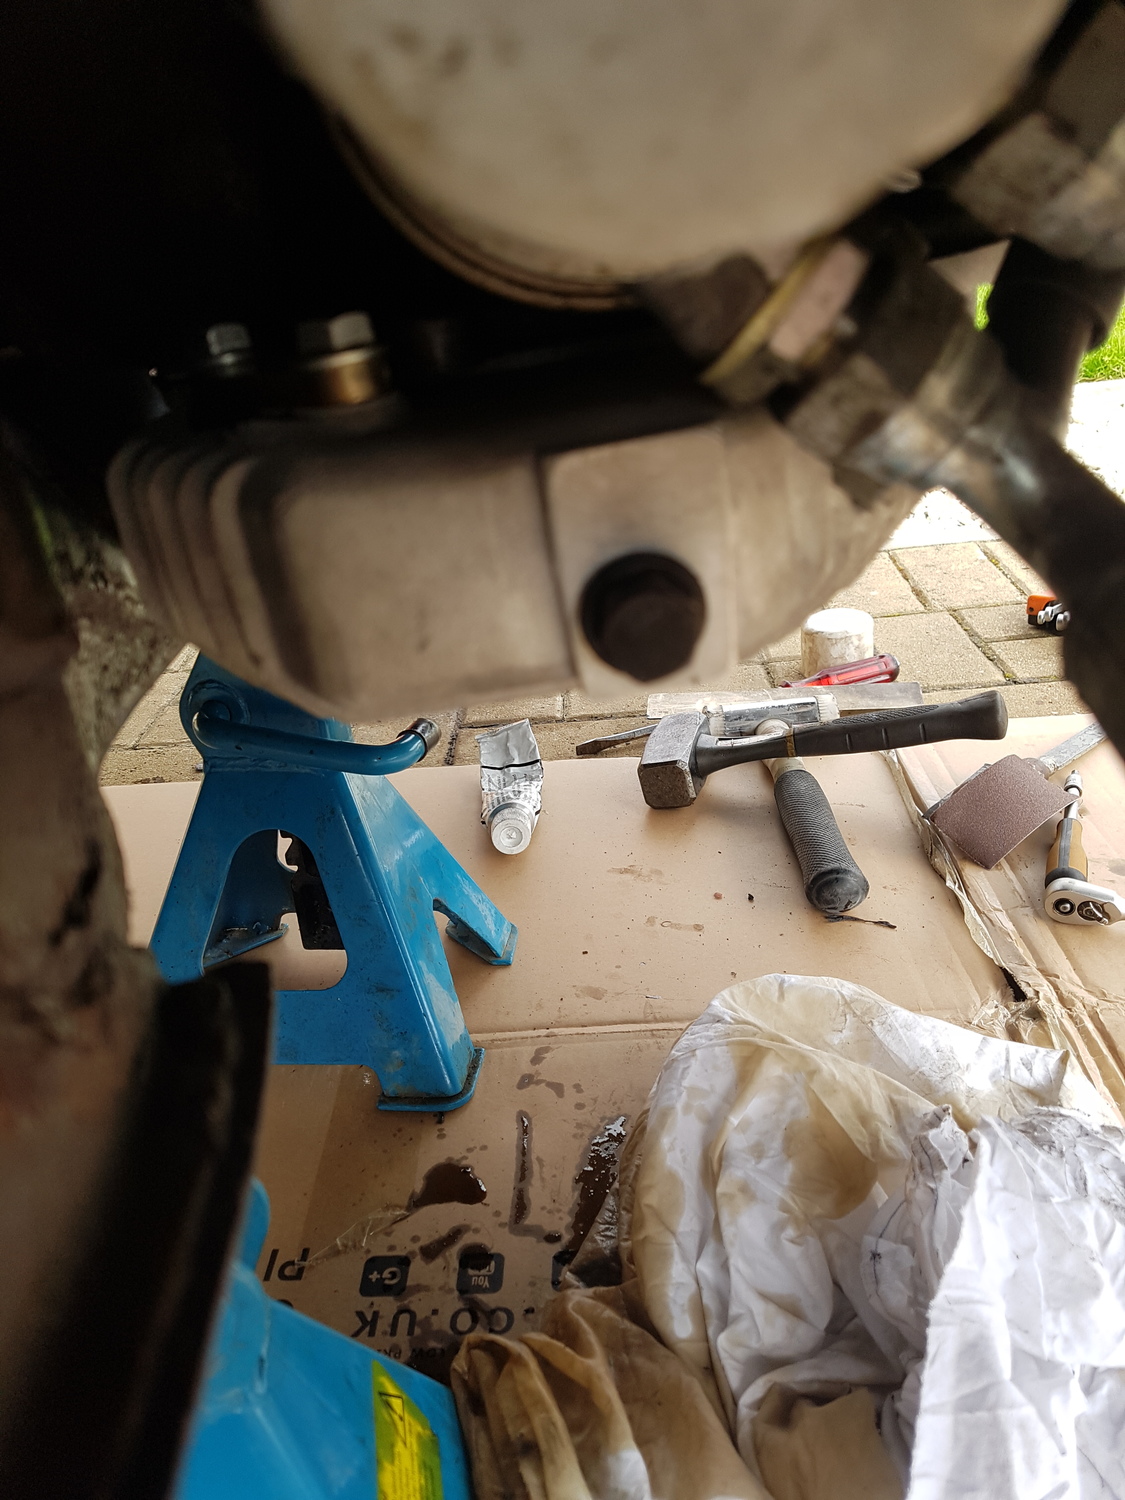
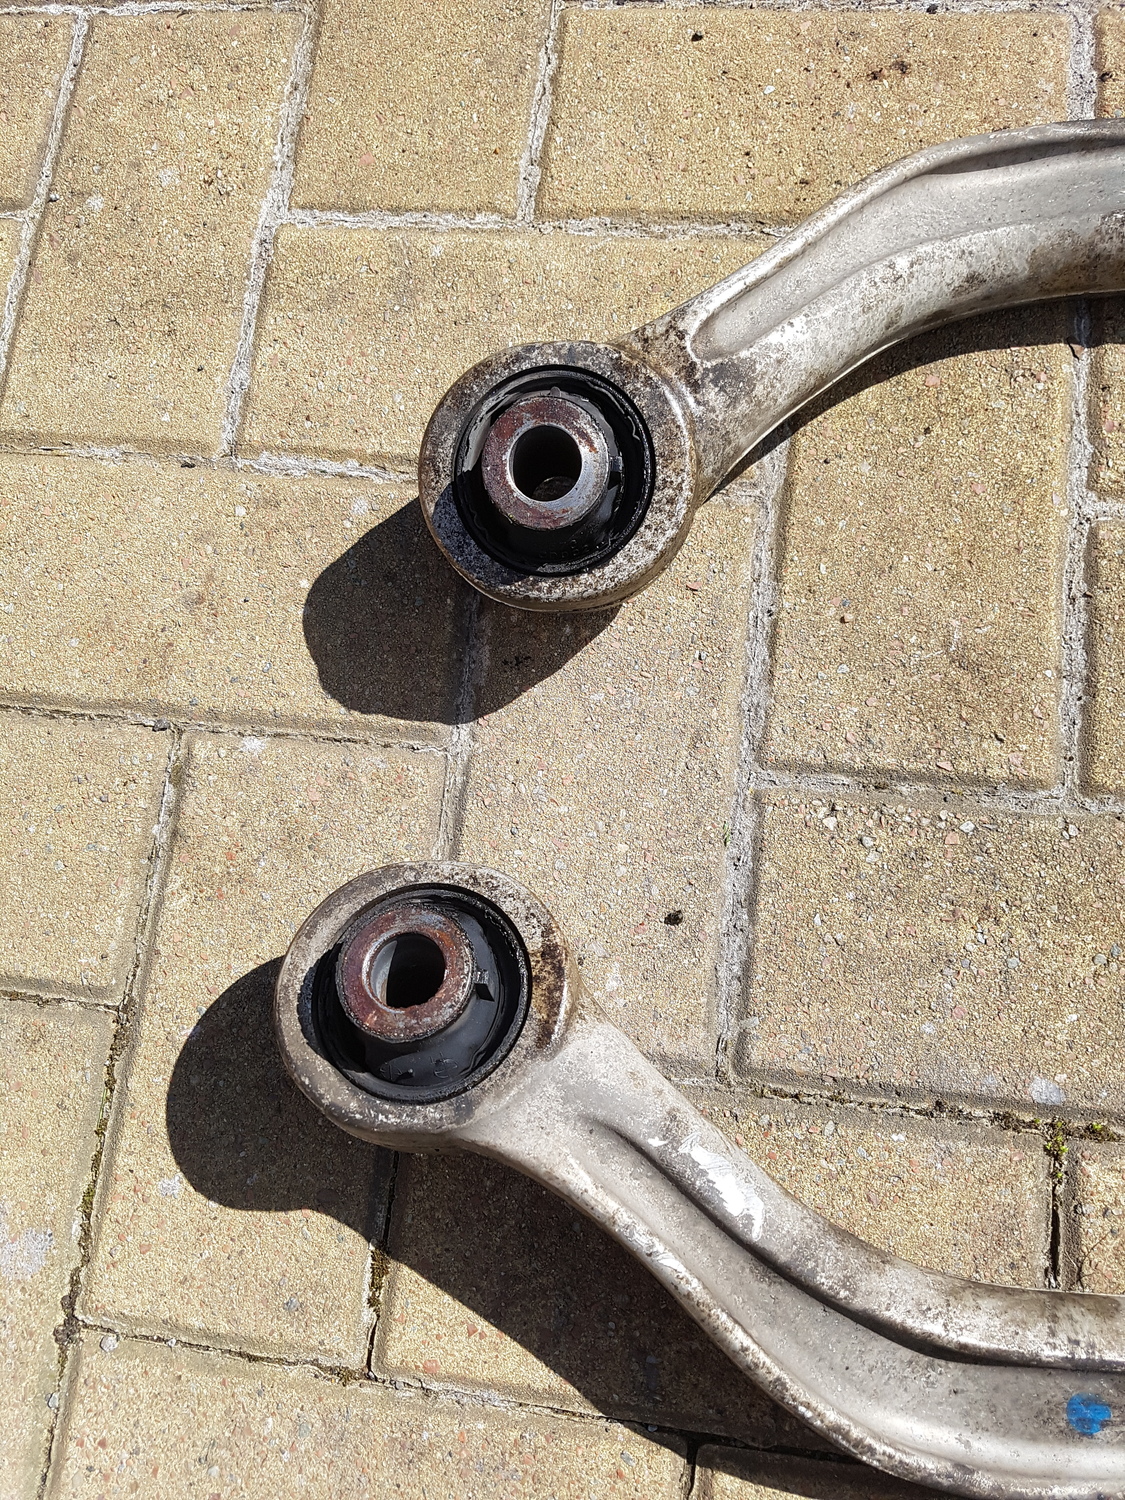
Got a bit more done today. Lower front subframe grit blasted and painted. Just used hammerite with a brush, its possibly the worst finish I've ever seen but its 2 really thick coats & out of sight under the car so better than it was before Old bushes pressed out New ones ready to fit nice and snug, suspension doesn't sag anywhere near as much when lifted with the new bushes so shows how much play they last ones had. Rear discs and pads were badly needing done! Driverside Passenger side compared to new ones Bled the brakes through with just under two bottles of RBF600. Way overkill bleeding this much but got carried away Now for some bad news, checked all the wheels while they have been off and all were fine apart from the rear driver side. two bits of metal and a bit of a gouge out the tread. Never had to put any air in when I've checked the pressure so not sure how recent they are but another repair on the to do list. Nothing major just another niggle. Just awaiting pulleys arriving from america then she will be back on the road and booked in to get the calipers resprayed


-
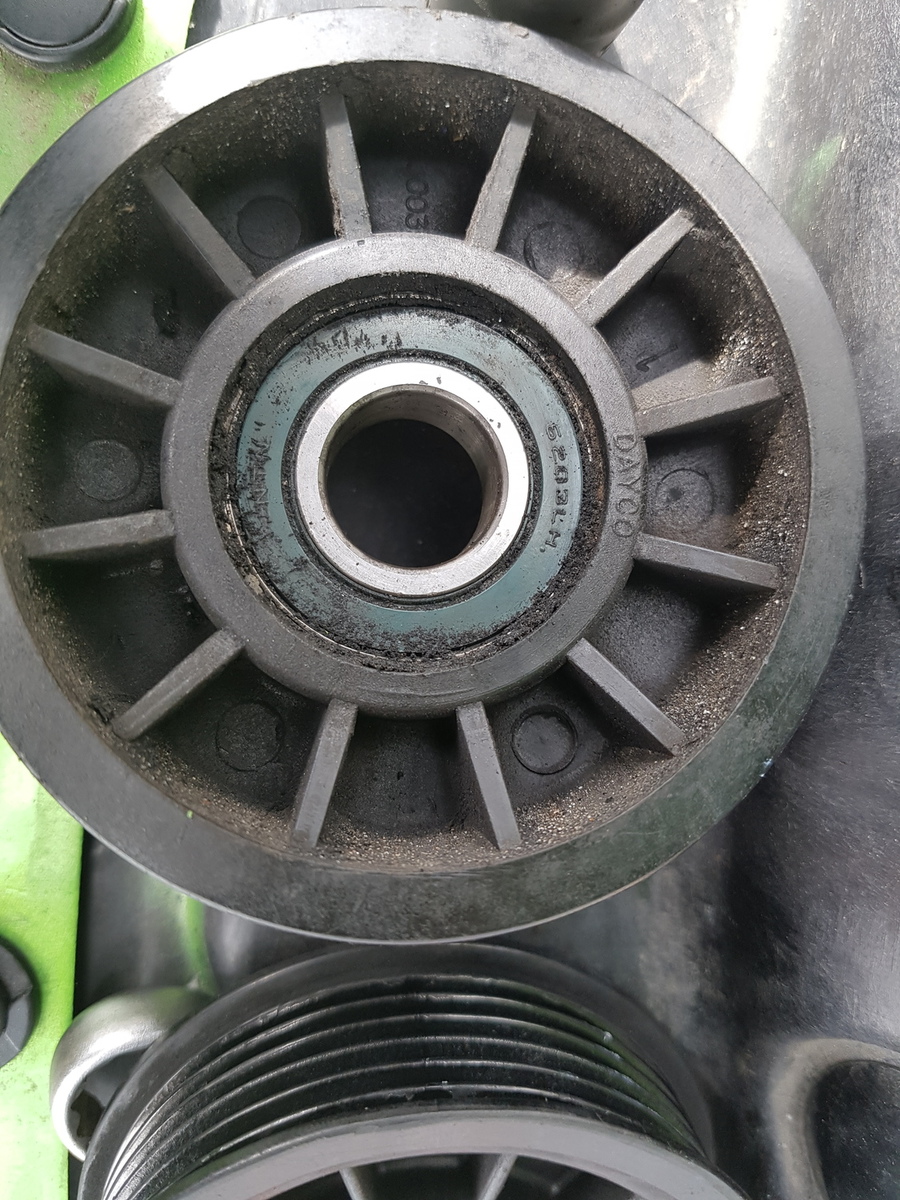
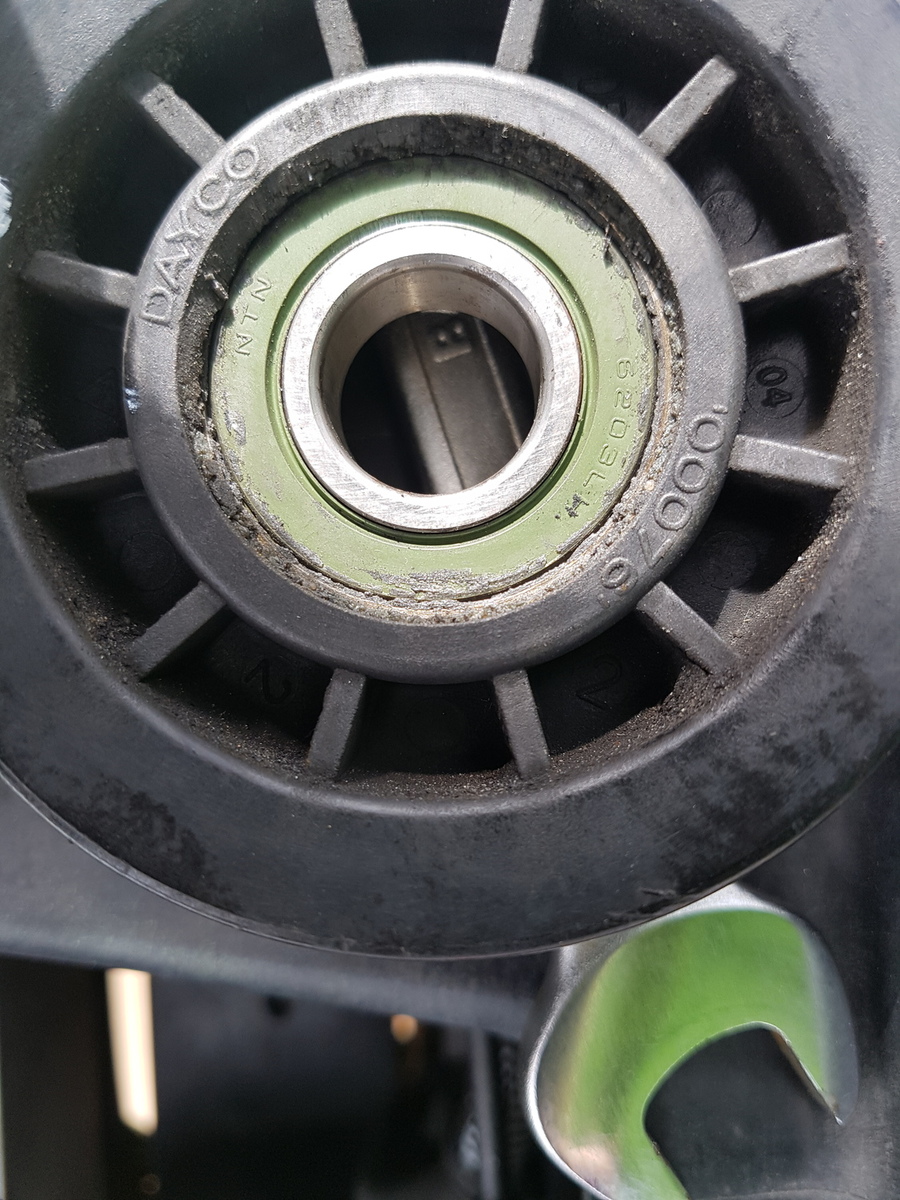
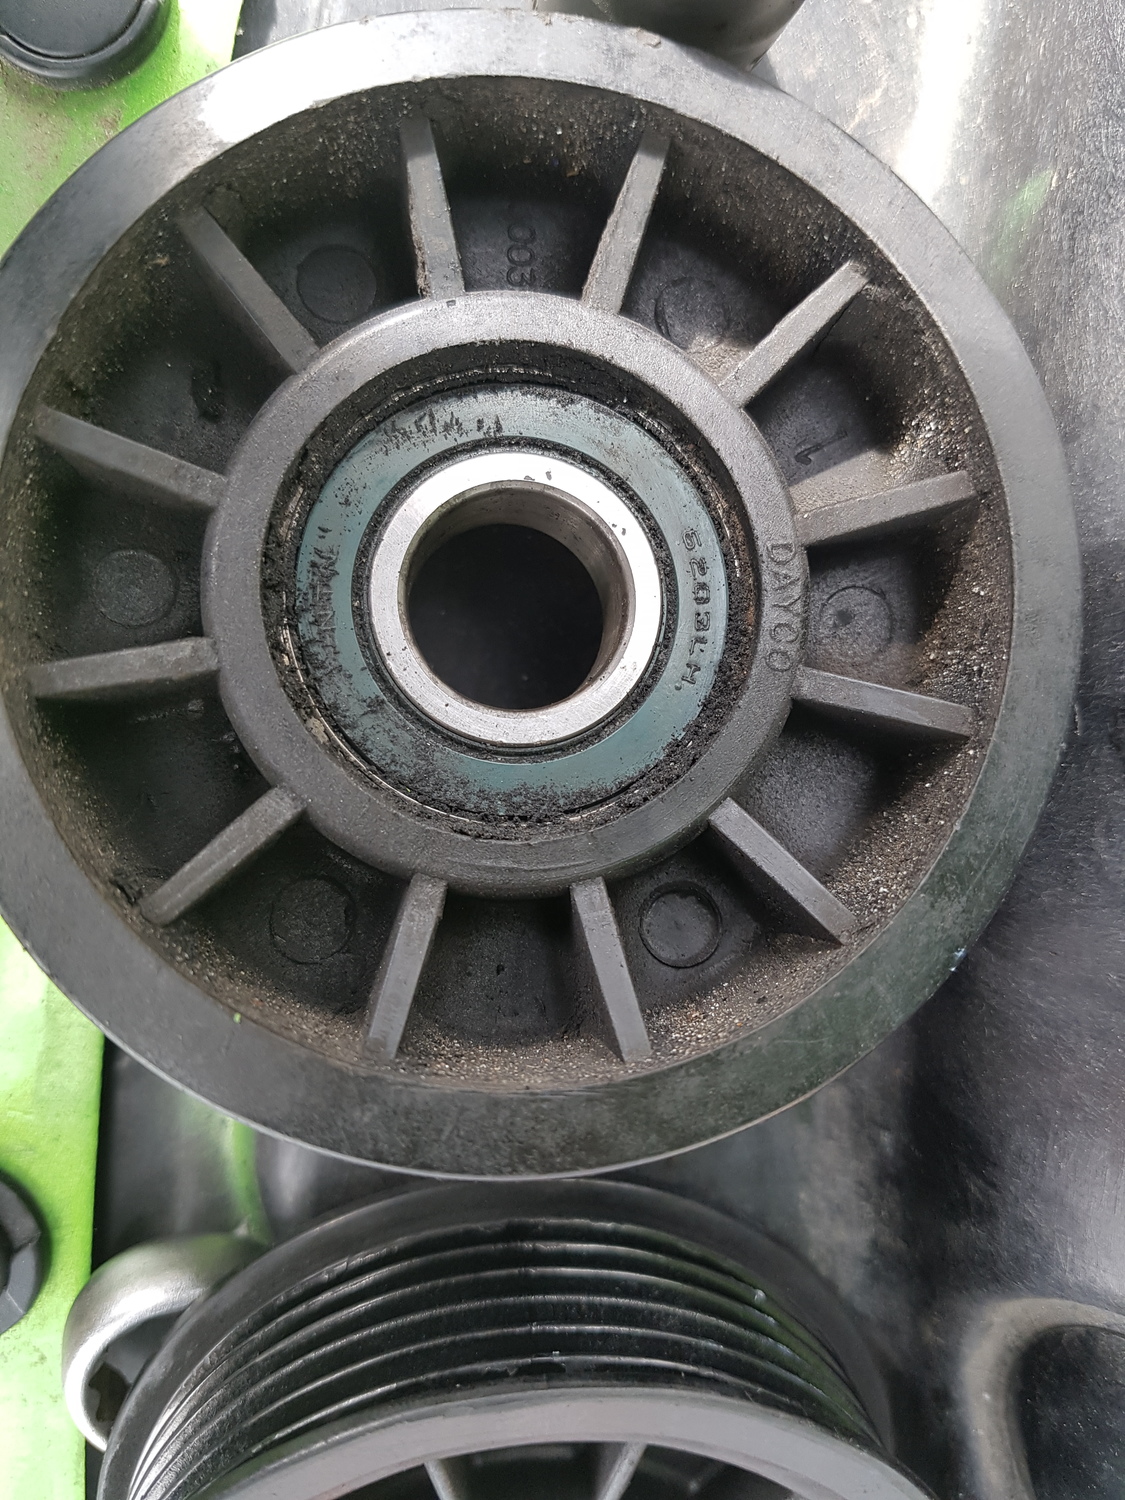
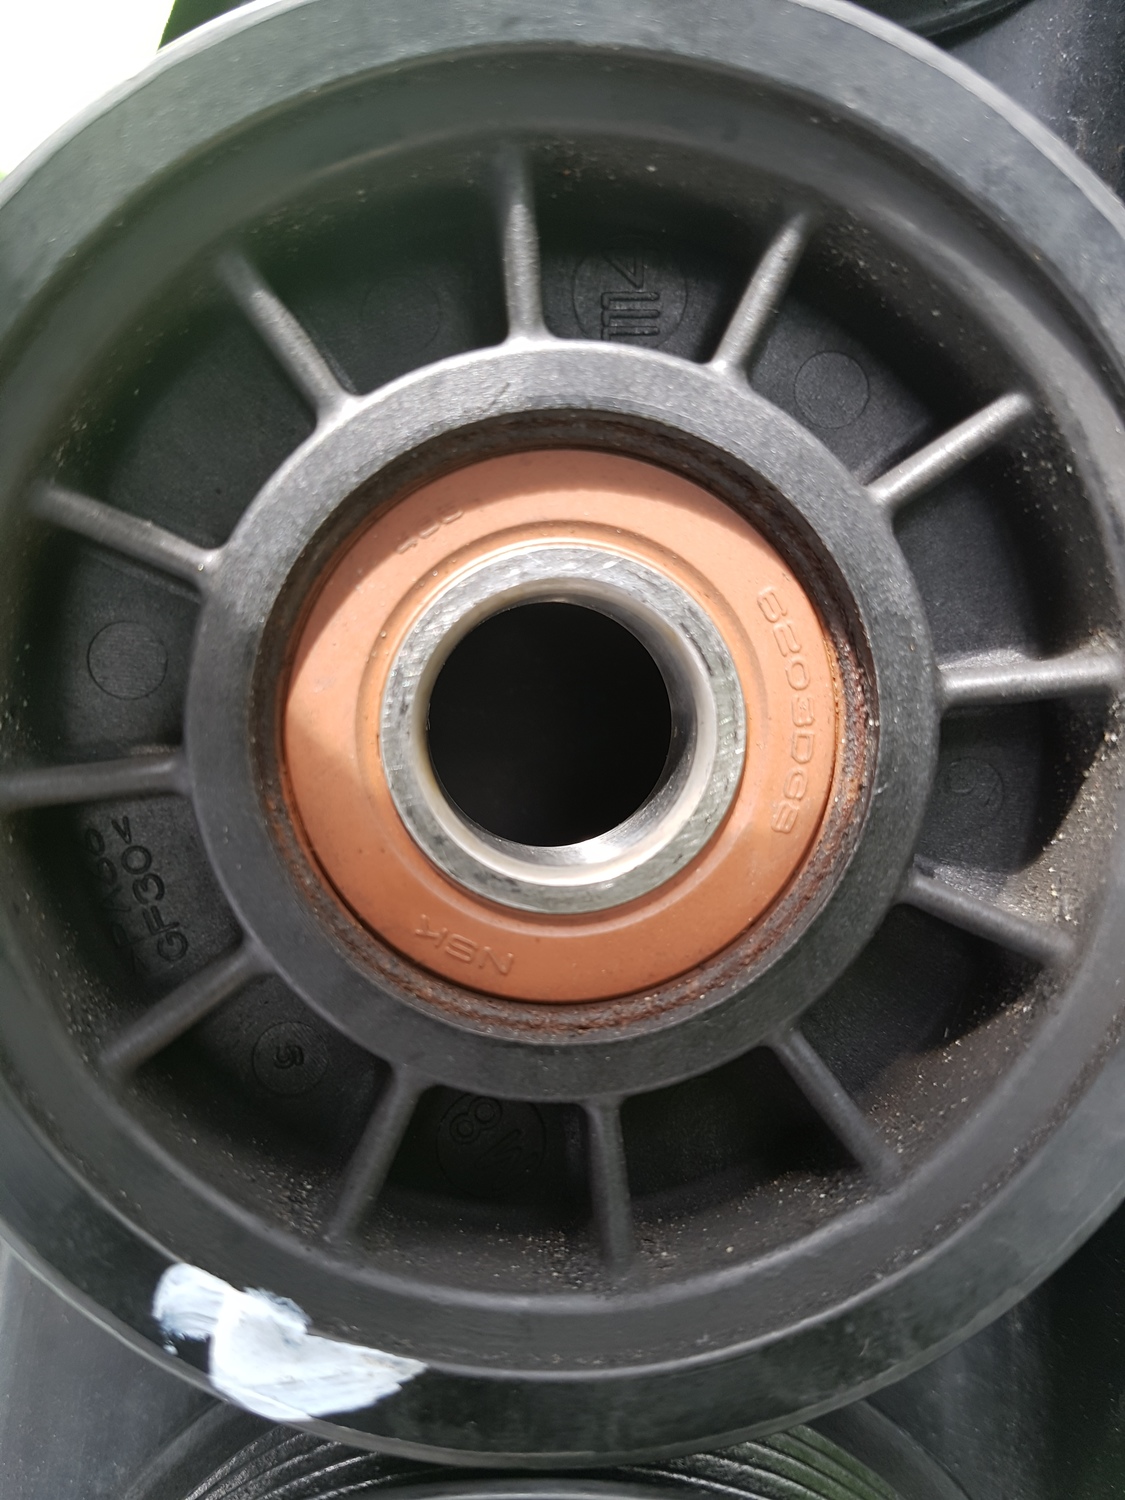
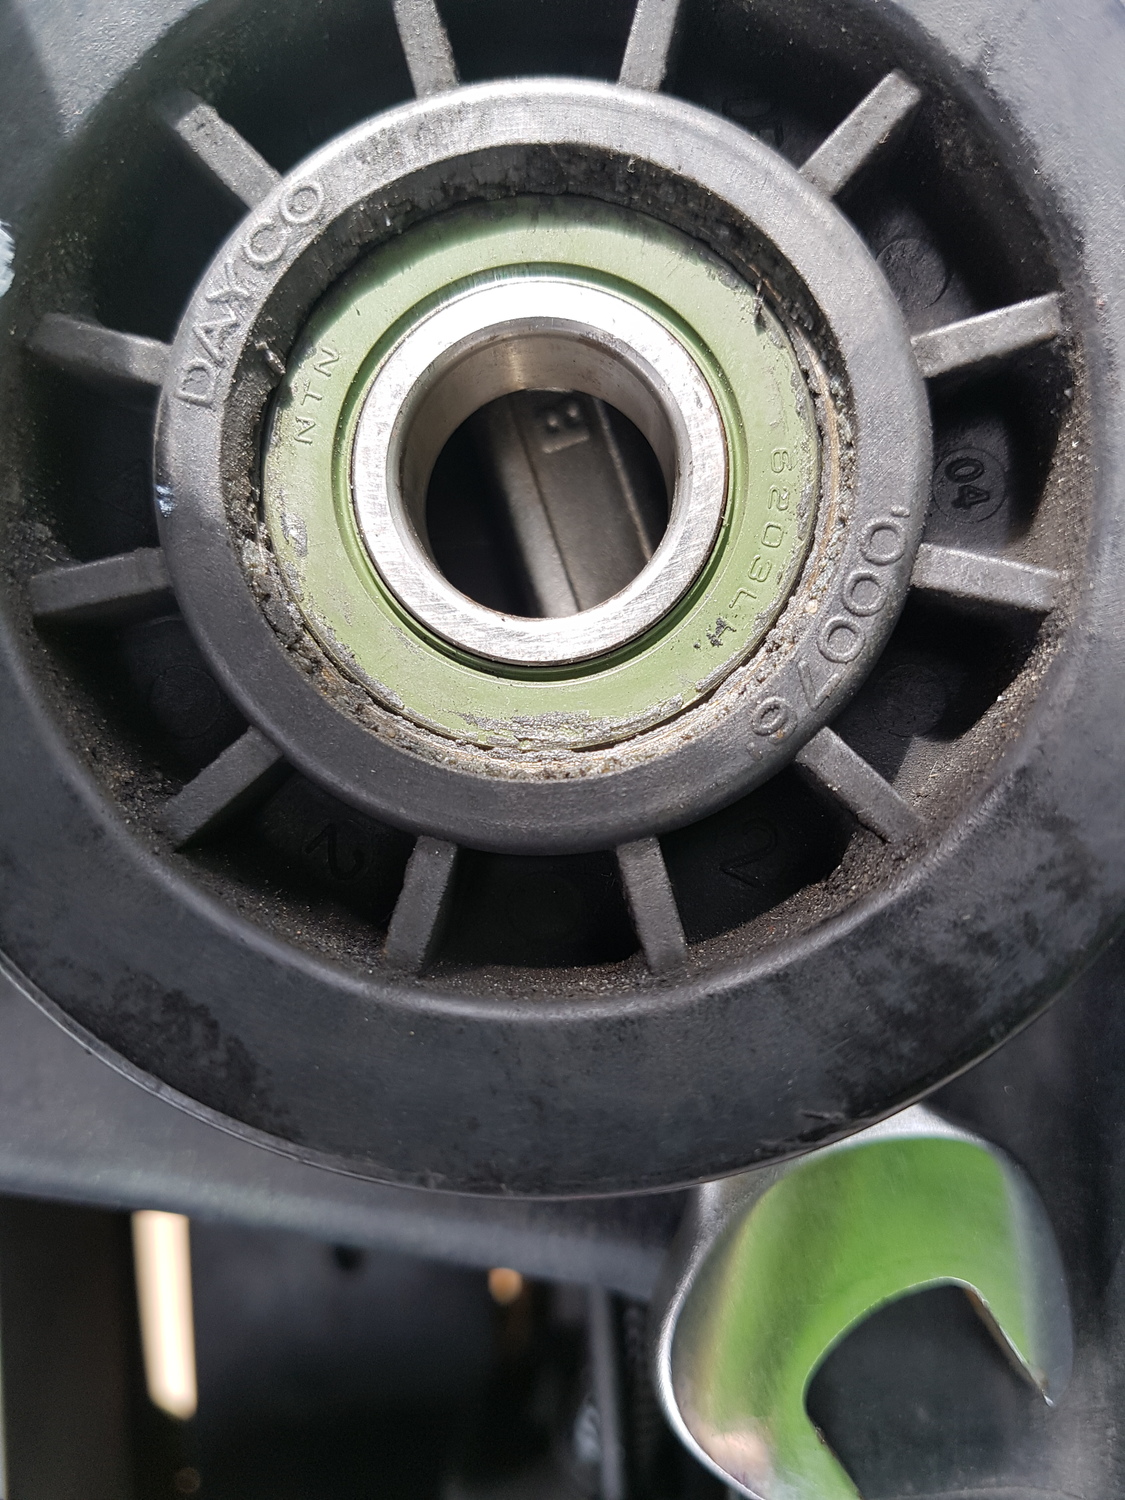
Where do you guys source your idler pulleys from? The bearings are away on two of mine from the vortech mounting bracket. I thought it would be a nice simple job to pop a circlip out then press the bearing out and re fit a new one but these are sealed into the pulley New SKF bearings are about £4 each so thought it was a cheap fix I've had a google but can't find the pulleys I need. If anyone has any ideas on where to source them I'm all ears. Pics below for part numbers etc

-
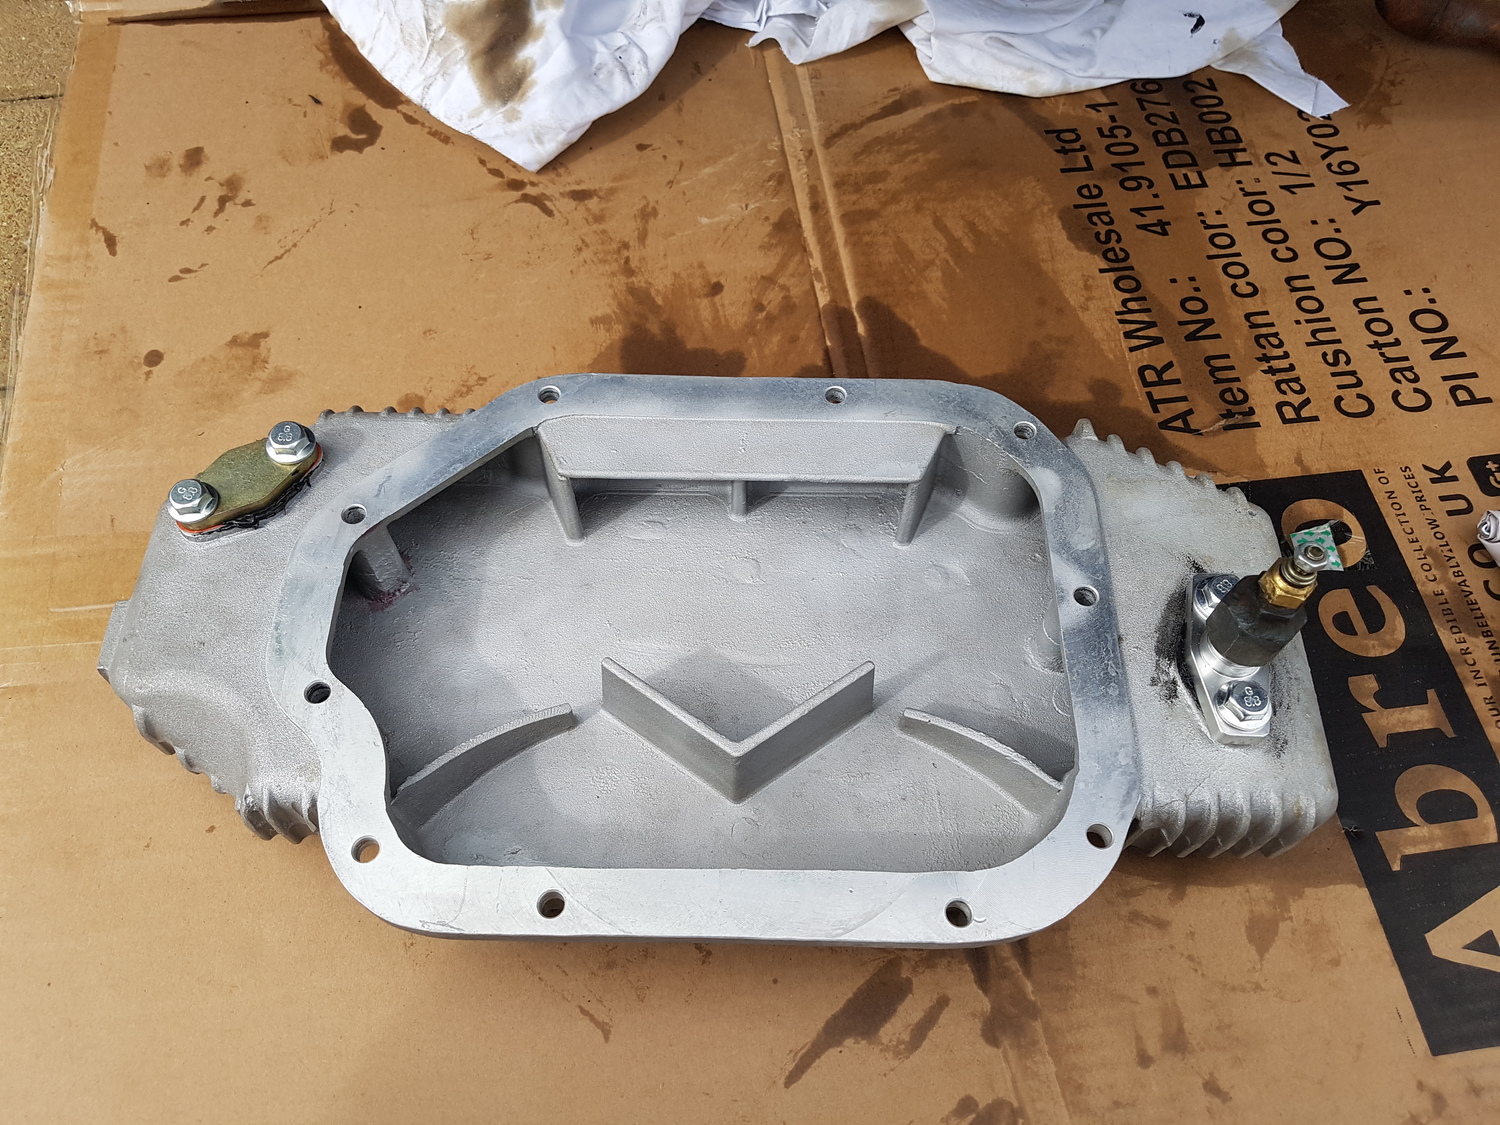
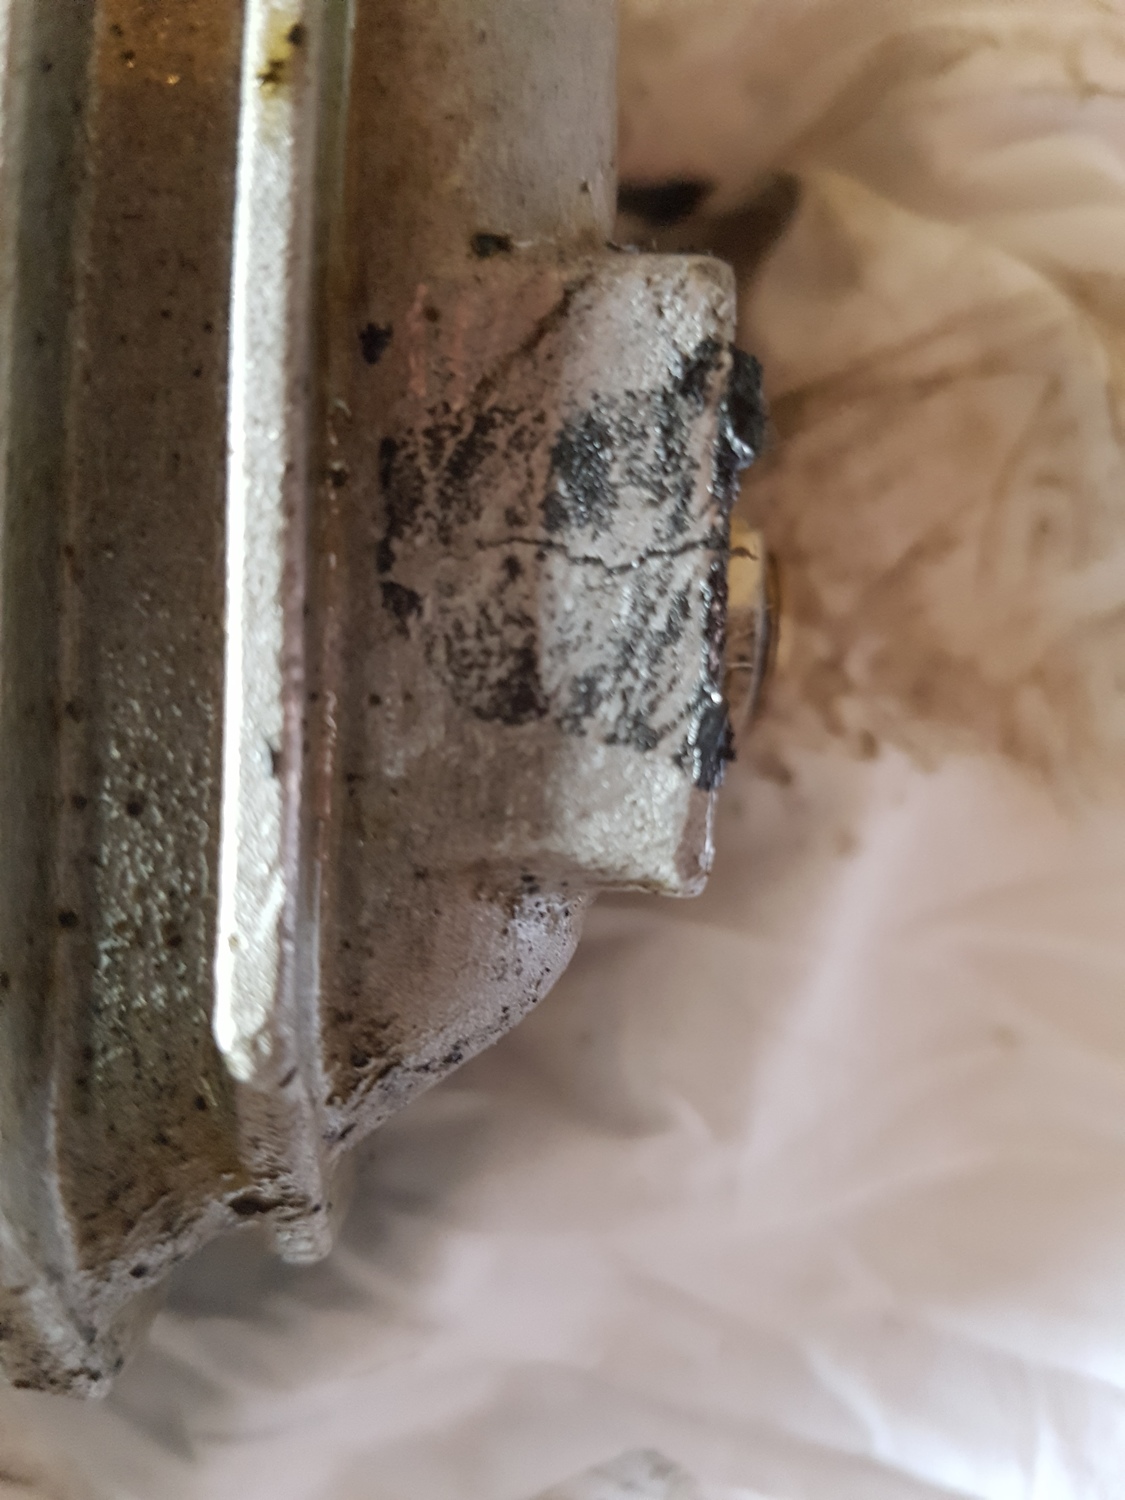
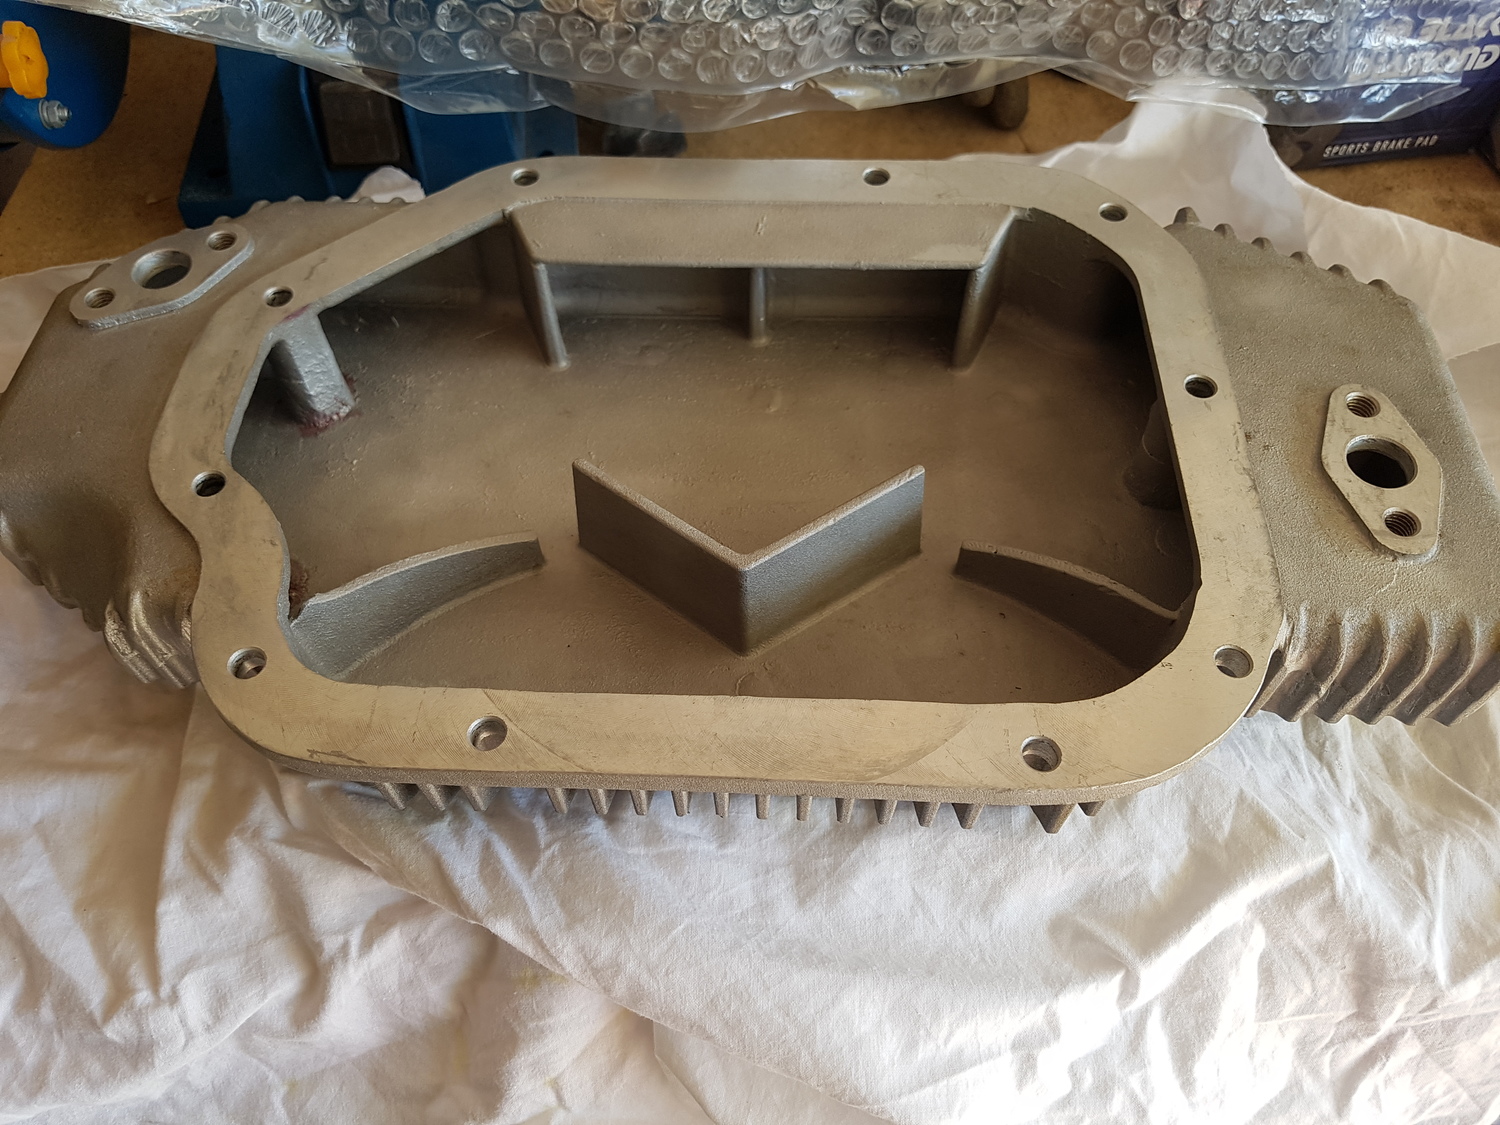
Managed to get up early and get a bit done before heading out for nightshift New sump with oil sensor and blanking plate ready to fit New sump allows me to use y magnetic sump plug. Really happy to have this back in. The offending crack. never noticed this the 1st time i fitted it as it only shows when the plug is in but it does explain why the plug was a slack fit. Annoyed as I should have noticed this but at the time was rushing t get the build finished. Previous owner was obviously a bit heavy handed with the sump plug Had enough time to whip off the idler pulleys. The two ones with the green seal sound rough but the orange NSK one sounds and feels fine. I'll get these popped out and get new SKF/NSK/FAG ones ordered up as this is the brands we use a work so know they are decent. Bearing sizes are 6203 for anyone needing these in the future


-
Its a copy of the Japseed one which is a copy of the APS one Ebay special from the far east. It's just cast aluminium and seems decent enough quality, more importantly its not cracked! I did try to source a APS one but didn't have any joy. Due to speed bumps in my street I can't risk any of the other brands which offer either spacers or deeper sumps I need to go wider for extra capacity. Rained off today and nightshift all weekend so will hopefully finish next week
-
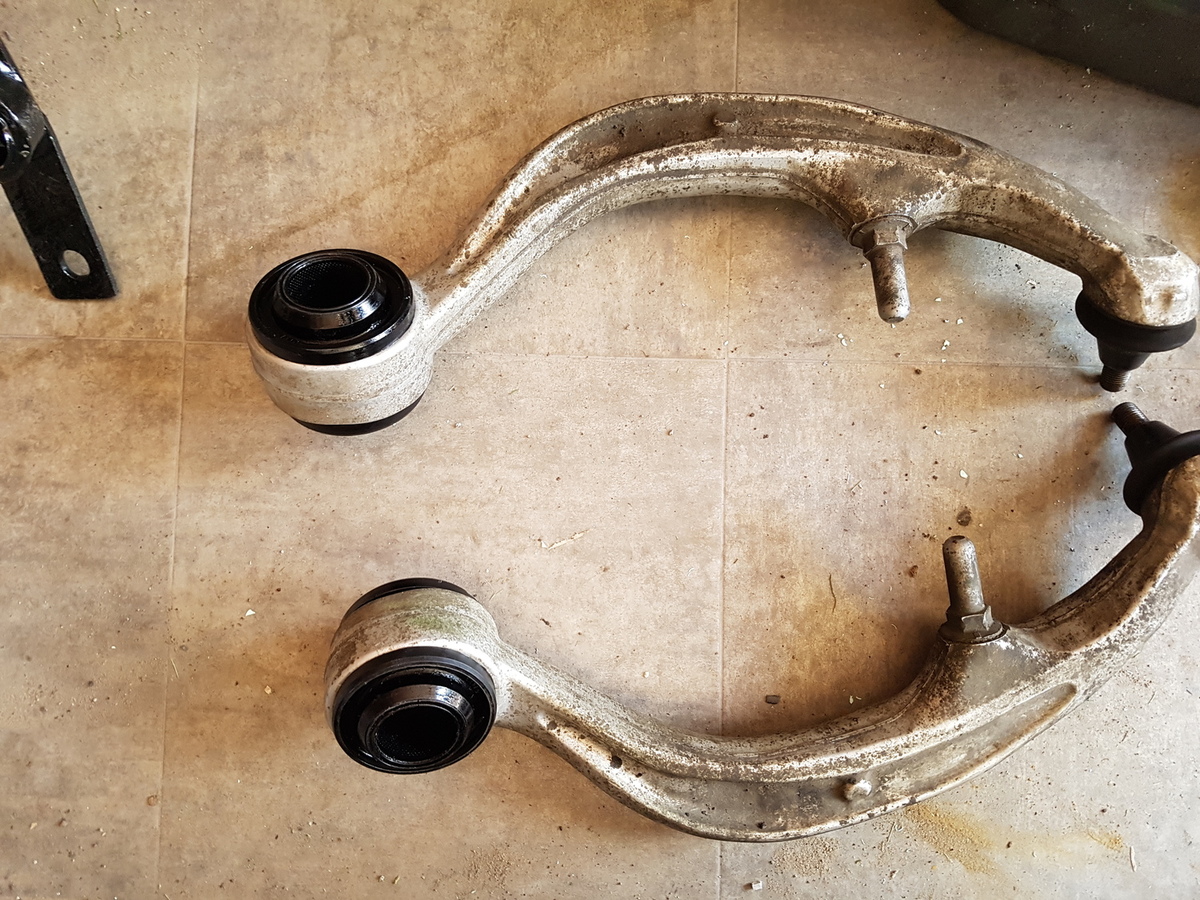
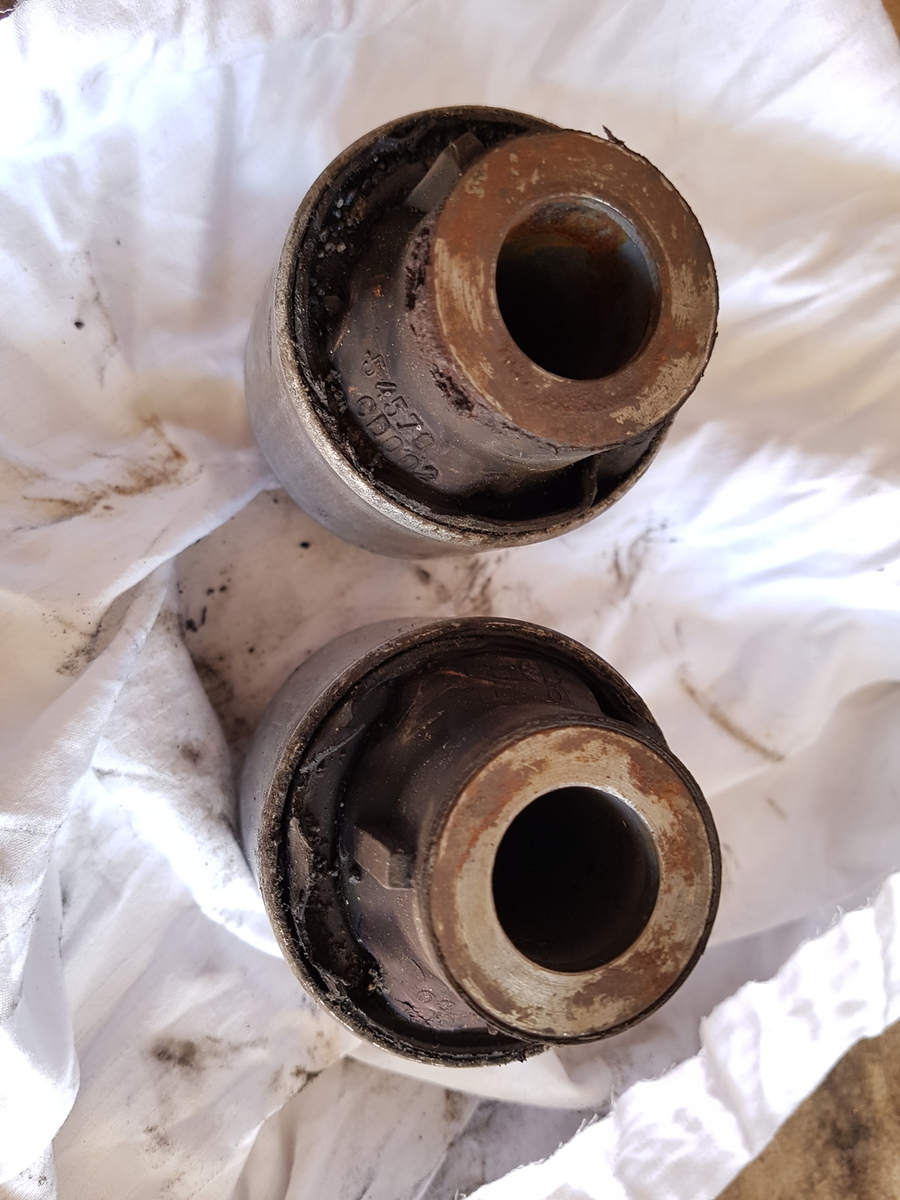
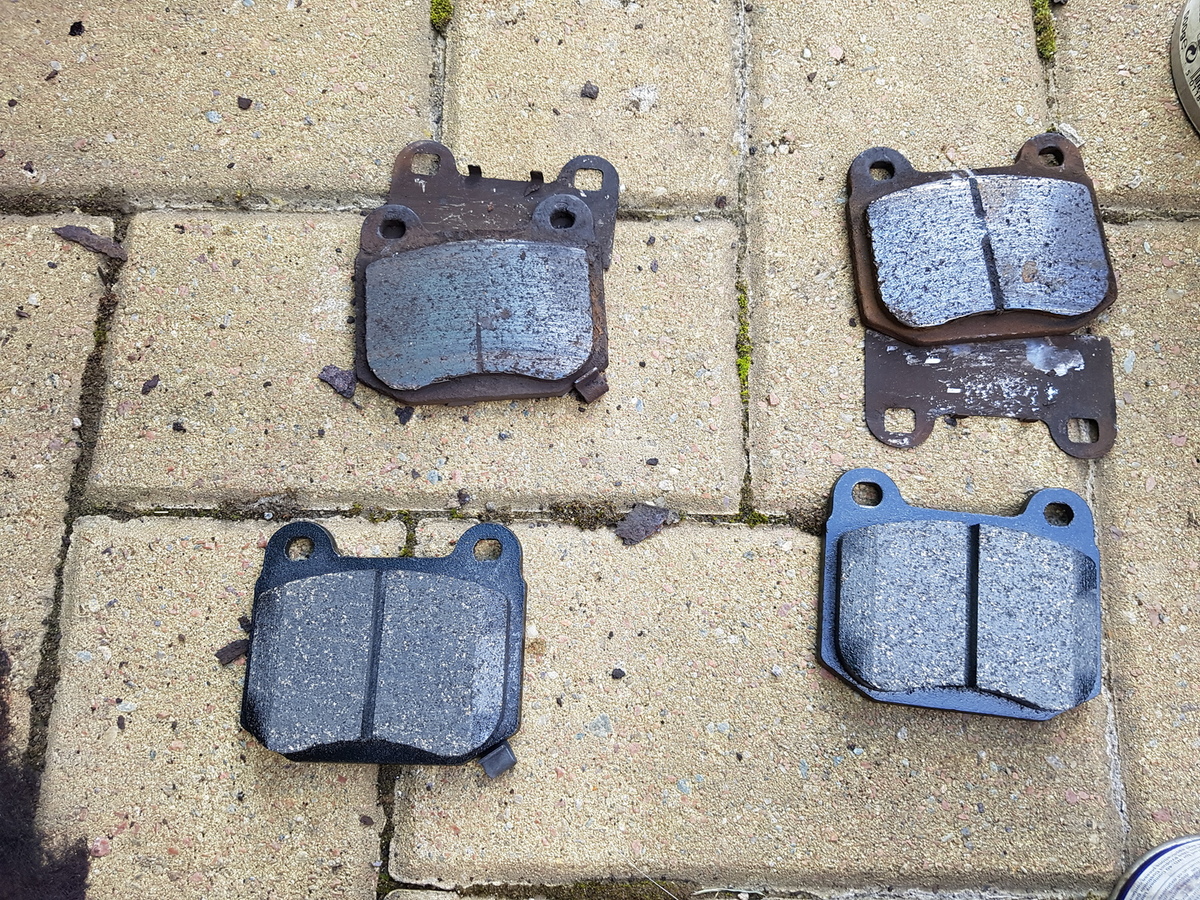
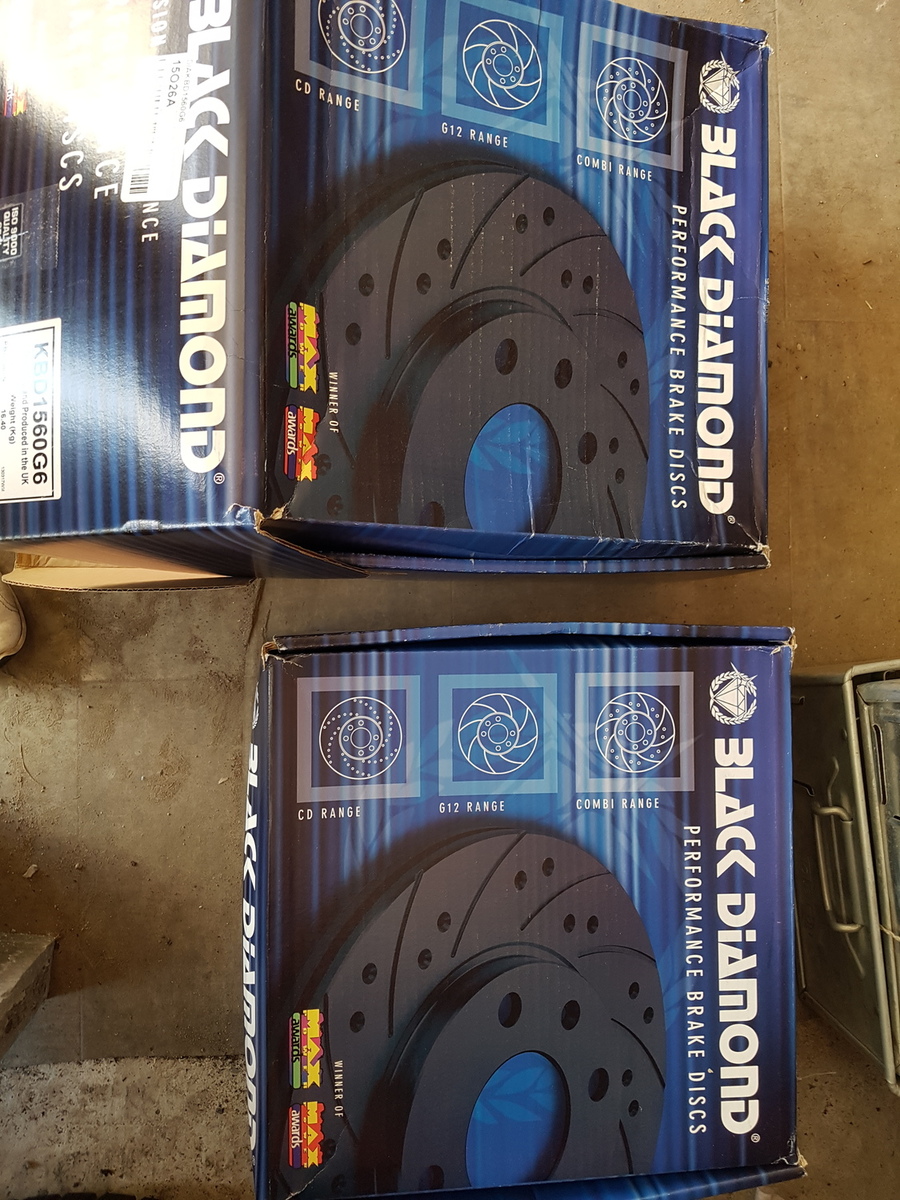
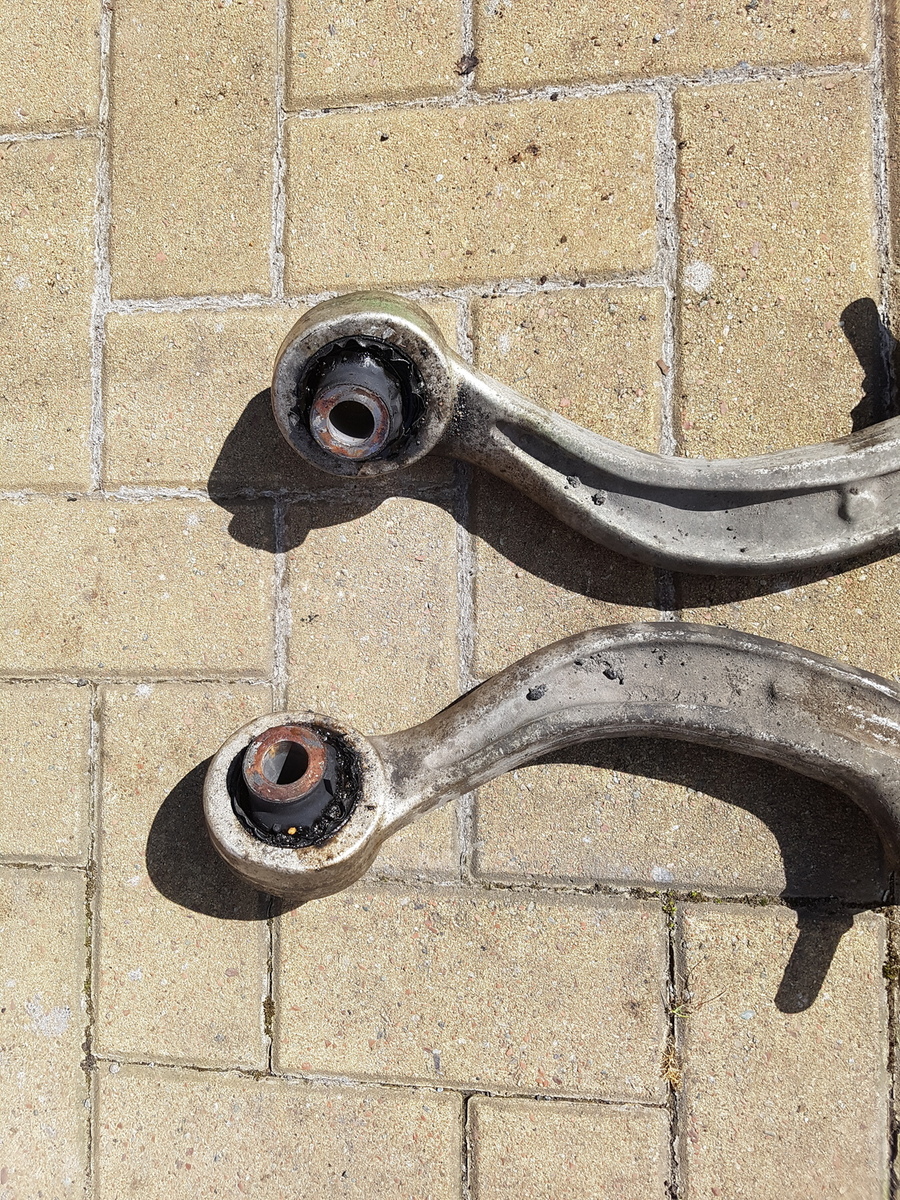
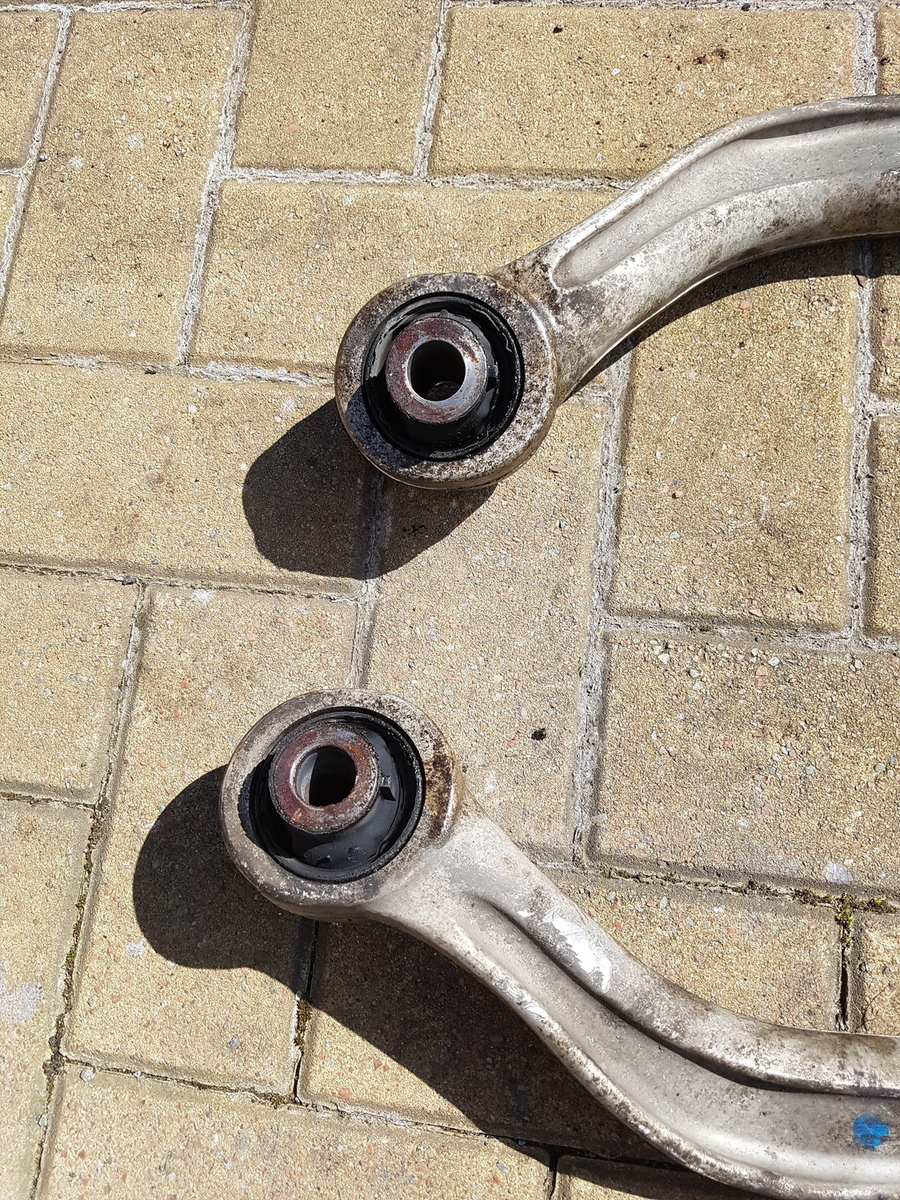
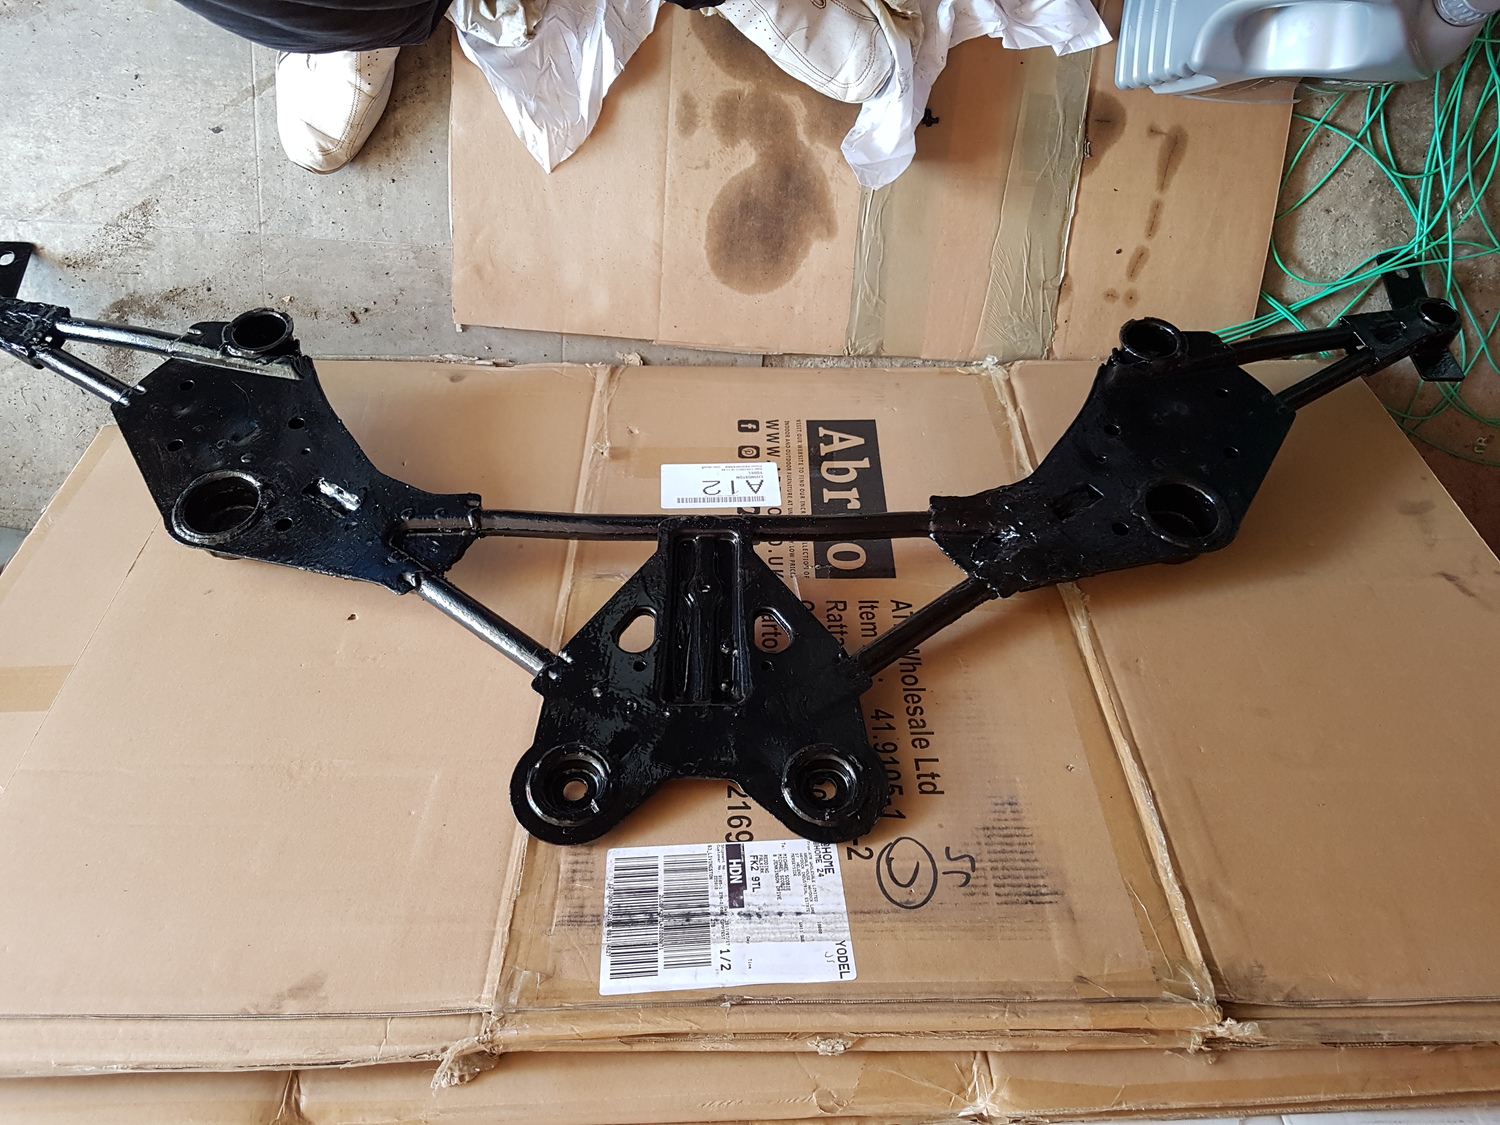
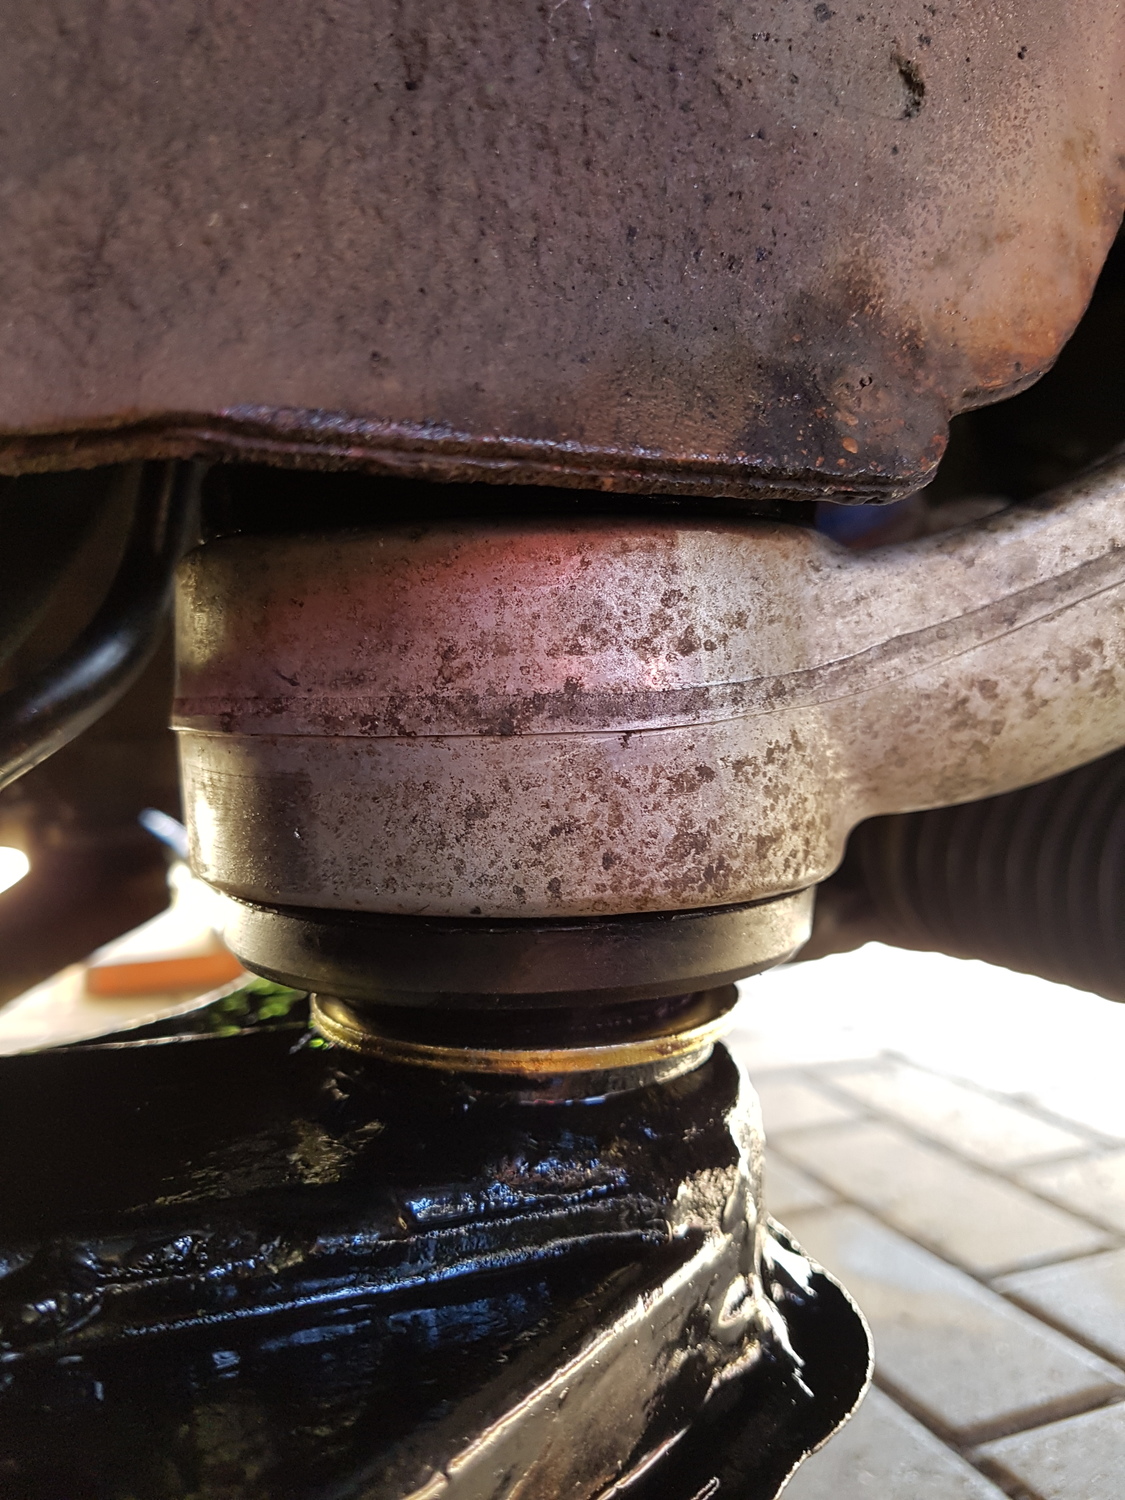
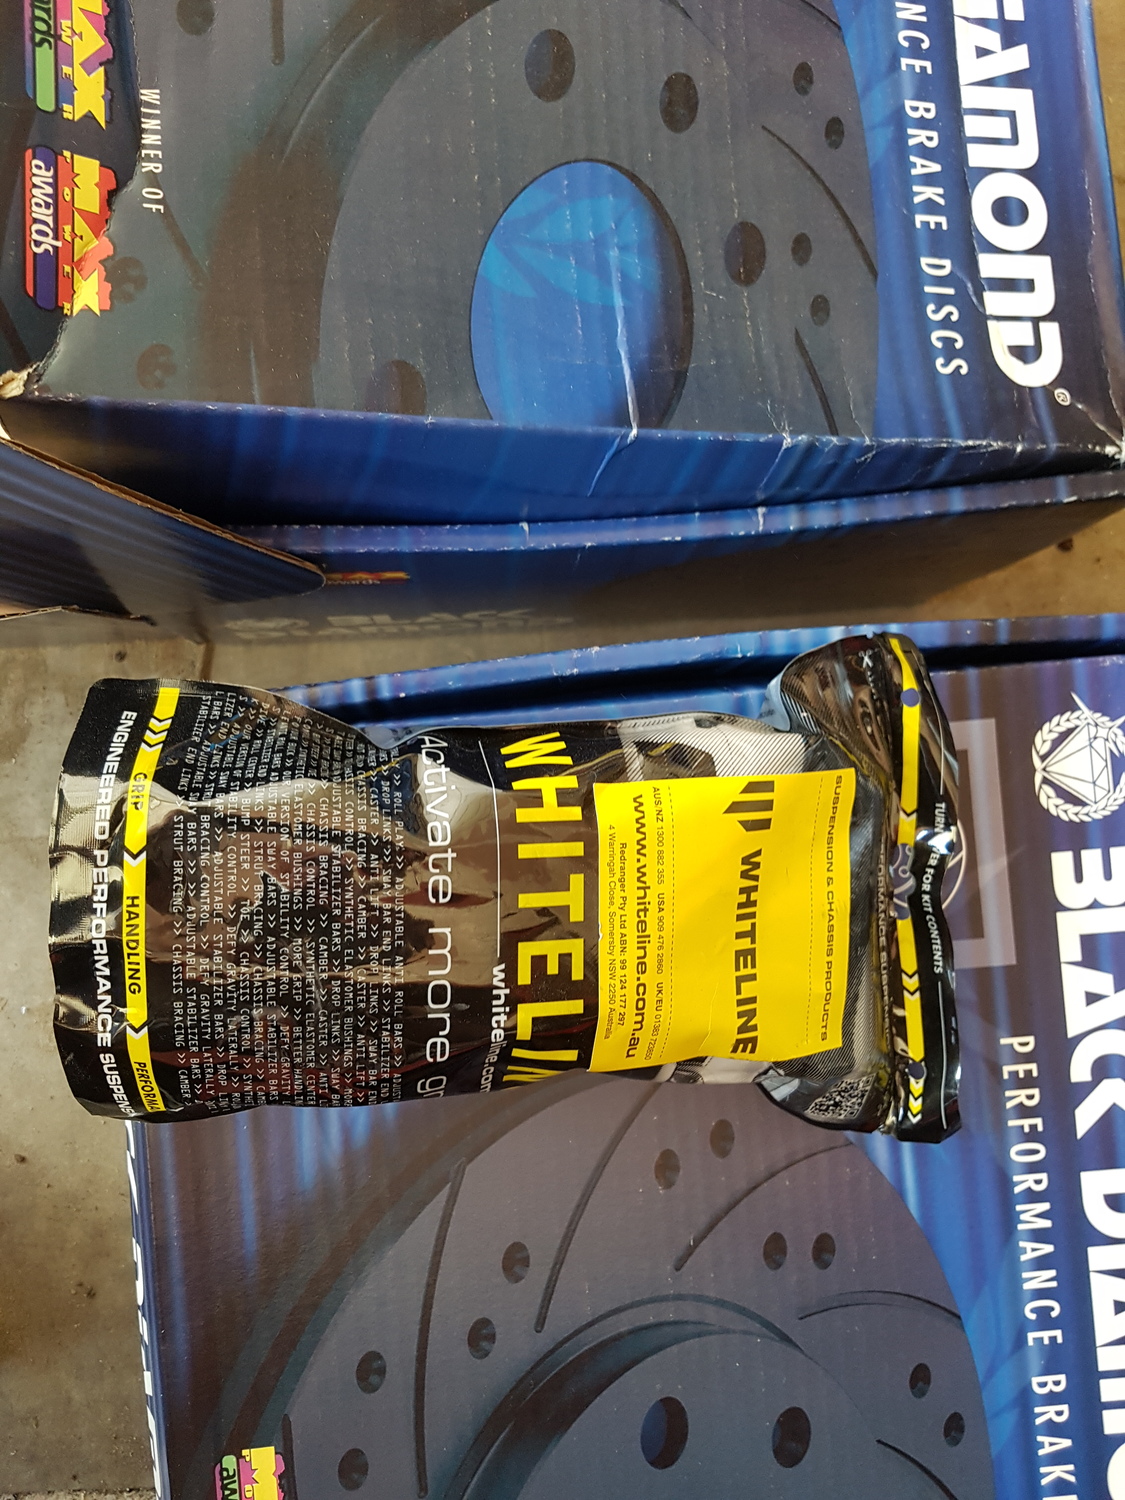
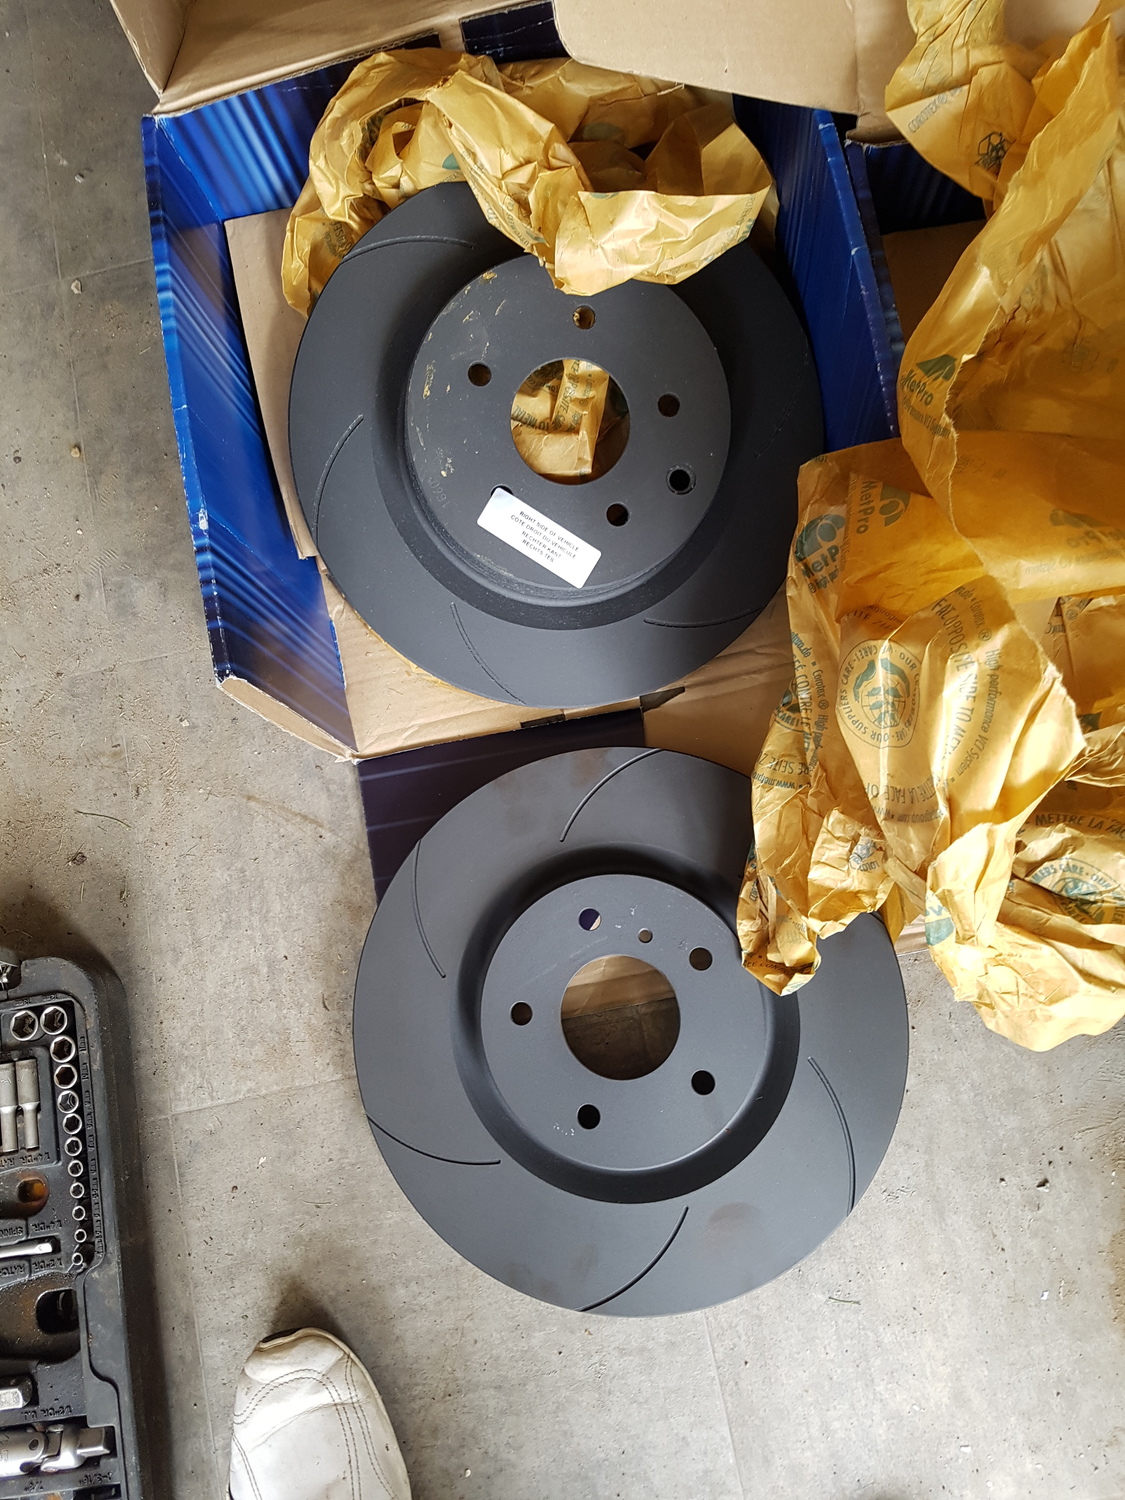
Been quiet on the car front due to working on the garden so the jobs have been slowly piling up. Finally finished the garden so time to knock a few of the jobs off the list or atleast make a start. Known issues; Banana arm bush is well gone now Cracked oil sump Passenger brake was squeaking constantly Drive belt idler pulleys starting to squeak. Had a look at the brakes last week and it turns out that the inside pad had seized in the caliper discs were looking a bit done anyway so time for some fresh discs. New banana arm bushes from clarkemotorsport New oil sump Ripped off the lower sub frame and arms. It all came away pretty easy, i'm not used to this The banana arms were replaced by the previous owner the week before i bought the car so decided to re-use them and just replace the bushes with whiteline. As you can see they are pretty worn. I'll not have access to a press until this weekend so this is as far as i can take this just now. Moved onto the front brakes, decided on black diamond discs all round and ferodo ds2500 pads on the front with black diamond predator pads on the rear. Nice easy job. The hardest part was getting the seized pad out, this took some persuading. All pistons moved freely and piston seals in decent condition so happy with that. Not much difference between front and back All fitted and bled, calipers badly need a re-spray! Something came up so this was as far as I've got. Hopefully get the sump done today if the weather holds out but i'm not getting my hopes up. While the lower sub frame is off i'm going to clean up and paint it.


-
Can't remember off the top of my head, I sure it was either M4 or M6. It was fiddly I remember that much
-
The clips are just a plastic which the bolt/screw can't remember makes its own thread. They can easily strip after being take on and off a few times. I replaced mine with stainless nuts & bolts when they gave up holding the bumper tight.
-
Youl never be finished always that one more thing to do or tweek to make
-
Try zmanalex he sorted me out with a 2nd one a few years back when I got caught out with mine. Or try a cheapo from ebay if you don't use it often
-
I'd go for the bleeding like alex said. I had a nightmare bleeding it a few years back when I changed the clutch line to a braided one & I never let the level in the master cylinder drop so must have just been a small air pocket in the slave cylinder.
-
Not my cup of tea but I appreciate how much work and money must have went into that as it looks immaculate. The wheels look huge! Any engine mods? or future plans?
-
Try sitting them in a bowl of boiling water from the kettle for 5min before fitting them, depending on what plastic they are made from it might soften them a bit to make them less brittle when fitting. Make sure that where they are being fitted is spotless with no rough or corroded surfaces that could affect the fit. Worth a try
-
Updated with pics* D1 Spec Controller - Ashtray Fitment
scobie140 replied to jamiebridge's topic in Performance
tidy -
Forum Premier League Fantasy Football 2019/20
scobie140 replied to Stutopia's topic in Off Topic Discussion
Pressure is on to defend my title -
I've not done it but I'm sure its quite a big job to remove the fuel tank from the zed, Gutted for you either way
-
How To Do Things In The New Forum
scobie140 replied to Stutopia's topic in Forum IT Issues & Bug Reporting
I didn't drag it in to upload it I clicked on the choose files as when I tried to drag it, it just loaded the image up as a web page. -
Paul T. 2nd Zed Build thread..... Supercharged- Hulk Buster
scobie140 replied to P15UL T's topic in Member Build Projects
Chris couldn't remember which one you had. There's lots of other variables in the builds it could be, I'm not chasing any numbers just curious on what others have done different to get different results as there is a few things I would do differently if I was to go down that route again. -
How To Do Things In The New Forum
scobie140 replied to Stutopia's topic in Forum IT Issues & Bug Reporting
How do you remove an image once you've uploaded it to a post? I just uploaded the wrong image in a thread and can't see how to delete the attachment so just shrunk it to hide it -
Paul T. 2nd Zed Build thread..... Supercharged- Hulk Buster
scobie140 replied to P15UL T's topic in Member Build Projects
Garage envy Cars looking good aswel It was your graph I'm sure we compared when mapping mine recently, are you running the 2.87 pulley? as I managed to make 340ft lb but was a good bit off on the HP..thumb.png.012a8e635ccb5f4a6b35e6ca8c4e25ed.png)
.thumb.png.b232b0438eee00d593aaafdfdb22af77.png)
-
Does this mean all old threads with pics such as guides etc using photobucket will loose their images? Nightmare if that's how it's going to work
-
We have the golf r, really good fun car which lead me to boost the zed due to it making it feel slow
-
For the rear the diff has a jacking point and the front has a jacking point in the center behind the engine but can be a nightmare to get a jack in without driving onto a few planks of wood first or just go for the sills. I use a bit of nylon with a slot cut out to jack form the sills but some people buy a cheap hockey puck and cut a slot in that and use that to jack up and sit the axle stands on. http://www.350z-tech.com/forums/attachments/how-articles/22544d1077160587-how-factory-jack-points-jackinfo__small_.jpg
-
Have a good look through the forced induction section on the forum and over on the yank forum as they have a good thread on it that answers alot of questions. It depends on how much power your chasing on what supporting mods youl need or if you need to forge the engine. It's not cheap even doing all the labour yourself so might be worth trying to find a already boosted one Sent from my SM-G930F using Tapatalk
-
I used that last week. worked a treat
-
I don't have that one but I do have the JWT light weight one. It does make a noticeable difference to how quickly the revs climb and fall compared to stock.


.png.18a76060bbac8de79bb4a9a50df1fd75.png)
.png.f5995483cd938c858f89196ea5454b0e.png)