-
Posts
9,959 -
Joined
-
Last visited
Content Type
Profiles
Forums
Events
Gallery
Store
Everything posted by Keyser
-
So many comments - Thanks for taking the time and I'm glad some of you are enjoying the thread, I know I read loads of build threads online. @hicksi- you know some random stuff mate This would make ours a Mk2 then, water cooled, belt drive and the final drive after going through the "reverse" assembly is drive shaft, it’s still a very basic engine and still uses the Chinese monkey metal for most of it No idea where @Beb and I will go next we may just upgrade ours with a bigger engine, nothing set in stone just yet. Don’t call it isolation please, it makes it sound like solitary confinement or something I’m far from that, yes I’m working from home (I did anyway) although I had a call out yesterday for a server fail, but I have keys so I just let myself in sorted the problem and left I’m also home with the lovely Mrs K who is also working from home, my 2 daughters, one is on long term sick with a rotator cuff injury and the other is still having to go to work as she can’t work from home, most of the staff from the factory have been furloughed but she is the accountant and all the paper work still needs doing, but she is pretty much on her own so not high risk. Keep the comments coming, I’m off to write the next instalment Keyser
-
Only a hint????? You sir have the skin of a Rhino At least I'm good at something I call it thinking outside the box section - see what I did there did ya? did ya? O come on that was good I agree with this and I'm sure I could do my bit - Not so sure you are up to yours though!! I know 3 people from Scrapheap Challenge, if you used to watch it I know Bowser and his wife who were on it for a while and Dick Strawbridge who went on to make his own series was a Major in the Royal Signals and my old OC - small world
-
I'ts like anything I could make it stronger but weight is an issue it is only the 250cc version and I'm adding some "saftey" features and therfore weight already! The plan really is to do it up, pass the MOT give it some "light" abuse for a while then sell it on and @Beb and I have plans on getting the bigger version - I say plans we just do random projects and Beb is a master at finding wierd "bargains" Mrs K hates him for that as he keeps making me spend money - but she loves the fact I'm out of her way and in the Zed Shed so it's swings and round abouts , she also likes to feed so when Beb is here she try's to fatten him up - think Christmas turkey Keep the comment coming
-
Read it again - 6 hours first day and "another day in the blast chamber" so 14 hours and that was just the main frame But I'm having all the fun on this project Get back to licking your batteries Cheers for the support - I do like comments
-
Morning, morning, morning Another quick update to help pass a few more minutes of your day as you sit there wistfully staring out of the window at your pride and joy hoping the weather holds after the lockdown and you can actually go for a drive. First repair This is a genuine non modification repair, I mentioned in a previous post that I spotted that the lower wishbone brackets/mounts were damaged, my diagnosis is that they had a fairly heavy bang on the wheel and it bent the wishbone and the mounts, this explains why all the other 3 wheel mountings are black and this one is silver. So I assume they bent that beyond repair and replaced it, however they damaged the hangers This is the good side This is the damaged side I think they put the new wishbone in then basically beat the bolts and hangers with a hammer until it fit This has in turn lead to further damage as the extra pressure of not being straight has elongated the holes, as you can see after I cut the bent bits off So the challenge was to make some replacement hangers and reset them in exactly the right place – I Love A Challenge I immediately ran to my PC and produced a full CAD design of the part; cross referenced the materials used with the steel stress and tolerance guide. I then transferred the design to my CNC programme, loaded it into my precision CNC machine and set it to produce the required parts. No stop wait I was confused for a moment its @andybp that has the precision CNC machine, O well lets see if I can produce anything worthwhile using only my old “agricultural” milling machine a welder and a 4” angle grinder shall we??!?? Here goes – I started by taking measurement (I did use a micrometre) then produced my version of a technical drawing Materials were as always selected from my steel pile as having about the correct dimensions, in this case an offcut of box as the side walls were thick enough Cut that in half the “other way” Cut a curve in one end To give Test fit Happy with that make 3 more (I wanted a spare) A hole is needed – the micrometre says 40mm from the inside of the curve at the closest point Set a reference point and came in 40mm Then it has to be in the middle – 30mm bar so 15mm to centre Ha hows that for tolerance (it took about 5 mins to get that and it still moved .002mm when I tightened the stops – I only did it for you Andy!) I have issues – anyway moving on, a hole was drilled Now for some chamfering I set a guide inside the vice (you can’t see it) but that gave me the correct angle to mill the parts. So now we have Now this is just because I wanted to try and replicate the original part I ran a line of weld across the top of each bracket Milled that Then cut them to length and sanded them off to give the finished article Next to the damaged part Next up – alignment and fitting Stay Safe!!! Keyser - Remember we're all in this alone. Lily Tomlin
-
I'm not sure but the women don't seem so impressed
-
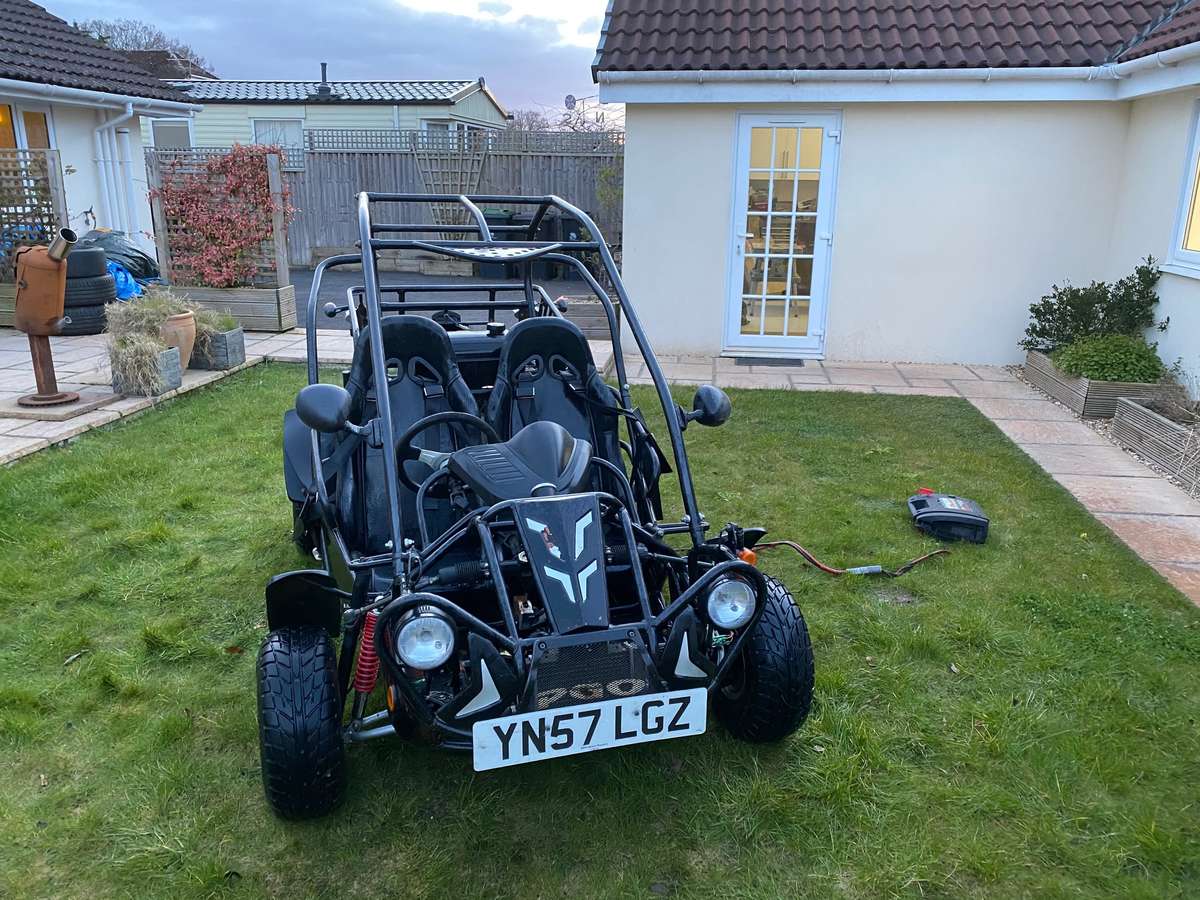
Hope you are all well rested and ready for the next exciting (or not) episode in a Bugs Life! I have a few thigs to do on The Bug to get it up to MOT standard, Beb and I agreed that we wouldn’t mod it, which we both knew meant we will do anything we want to it I don’t think we have any unmodified projects between us! I also get carried away doing these things, it is basically my hobby to spend weekends when I’m not out in cars either at meets or on track to play with them in the Zed Shed. Mrs Keyser sews and makes clothes and handbags for fun I engineer (I use the term loosely). This brings us on to a clean up, the wiring needs a few repairs like the lights shown in an earlier post, I’m rewiring the dash and it needs a clean so I thought I’d take that out to start. This is the battery box as you can see this vehicle needs a serious detail The brake lines looked dirty, so they came out The gear stick needs a good clean and maybe some paint Yup, that’s out as well Now cleaning the engine is awkward, so…………………… That came out – I’m so glad I fitted an overhead winch, it makes working on your own so much easier That left The Bug a bit bare Now I can see it all I realise that a lot of the body work needs attention I know a lot of forum users are mad about detailing but I don’t use the 2 bucket, 6 sponges and loads of chemicals and wax I don’t even start with a clay bar I prefer the 1 container approach for the really dirty metalwork – and I fill that container with crushed glass 1 hour in 4 hours in 6 hours in At this point 3 things became apparent 1. This is a PITA to blast as you can’t get behind a lot of the frame! You can’t even get to it from underneath due to the undertray. 2. This will be a complete pig to respray for the same reason. 3. The front offside lower wishbone mounts are all badly bent, they will need some serious attention but the undertray covers the point they weld to the frame. Nothing else for it the undertray must go – out with the angle grinder. Access granted - You can see the rust I couldn't clean as well. The afore mentioned wishbone mounts More on those and the repairs to come in another post. After another day in the blast chamber I had the frame “clean” and ready for the repairs to start I’m getting a couple of hours a day in so hopefully this will keep progressing, the parts I ordered are starting to trickle in and there seems to be more than enough to keep me going until the rest of them arrive – I’ll keep you posted. Be Safe! Keyser - Being alone makes it harder to find someone to blame. Mason Cooley (So true Mason)
-
You forgot the 911 Turbo !!!!!!!!! How the, what the, I mean you, but .............. No...................... Really ........... I'm speechless .................................... and thats rare!!!! You've been in lock down to long mate !!! Nice Guitar collection though
-
The final instalment in the dash build Well done if you stuck with it, 2 days went into this, It was fun to be fair and what else are you goanna do on Easter weekend while on lockdown? Another template Transfer to ally Test fit Mark the deliberate mistake in red – I used the front template again and forgot about the overhang at the front Now it fits So cut a rough hole in it Then mill it all up square To give Make a back mark it out then drill it Tap some threads into the back plate Clamp it all together Must have got one of those dials in the right place my welding isn’t as ugly Extra clamps to keep it all square All sanded back Drill a hole in the cable box Add grommet Finish the lid The finished article ………………………. And on The Bug Hope you enjoyed that, tomorrow we move onto extreme cleaning Be Safe! Keyser - It is far better to be alone, than to be in bad company. George Washington – I’m definitely a bad influence not sure about company
-
Well I have an hour to kill so I thought I’d post up some more on the dash build, Firstly I removed these original mounting tabs and the temp gauge holder All gone Now this is all the wiring that needs to go “neatly” (read hidden) to the back of the dash So some more bits I had laying around I milled 6mm of one edge (the side wall is 3mm) see if your ahead of me Spot weld Big weld Sanded back Lined it up on the frame and spot welded it in place Ugly weld So, I checked the dials on the TiG I came to the conclusion there are a lot and I have no idea what most of them do Back on the bench 2 more of the same angle bits and a piece of card (to allow for powder coat_ Now you know why I milled 6mm of it All welded up More coming …………………………….
-
Don't ask she got more paint today
-
O the toy box - well lets see - I have the road toy - Then we have the track toy Currently refurbishing the off road toy Then we have the indor toys we have an E-Quad and E-Kart in assosiation with @Beb the E-Kart is still in prototype I LOVE TOYS!!!!!!!!!!!! Keyser.
-
-
Moving swiftly on then, Made a couple of mounting brackets for the gauges Welded those in Onto the top I angled the edges so I can go for an invisible weld Here goes again (Try not to burn myself this time ) Clamped Spot welded Welded Sanded I like it so time for a test fit Tomorrow the back and cable entry fabrication Stay Safe Keyser - " I don't want to be alone; I want to be left alone.” - Audrey Hepburn (and she didn’t have a Zed Shed )
-
Before I worry about minor things like how to make it stay in place I thought I’d improve the temp gauge angle – Que the montage – That’s better Now then the ends of the dash – Hmmm Ahhh I know Bit of aluminium pipe cut down and cleaned up Cut that in half Weld those on the ends and it looks like this Next I removed the original das mounting tags Cleaned the metal up and noticed the bar is threaded = idea for mounting Some aluminium angle Cut and drilled Tack weld that on Rinse and repeat for the other side Some tatty scrap from the bottom of the pile Cut and cleaned up to make the fill in bits Onto the welding (self taught ally TiG welder here don’t expect YouTube welding tutorial levels of quality) But it sticks together so not all bad Then the welder broke (OK I drooped it – it was hot!) Stop laughing ya bastards I knew it was hot I just lent in the wrong place – I have the scar and everything!!! Anyway, I keep spares for the welder so that didn’t slow me down for long! The burn did – I cried like a little girl Still more coming ………….
-
Back to it then? Hope you all had a great bank holiday weekend not that you could get out much given the current situation, this did mean that I "had" to stay home and as Mrs K was busy painting the hall as the painters couldn't come and I would only be in her way in the house I thought it best if I found something to do in the Zed Shed Been busy all weekend on The Bug, it’s amazing how quickly time flies by when you are fabricating things, if time was being billed this would not be worthwhile but I really enjoy this stuff and I have the tools and space so why the hell not Before I crack on with the rebuild there are several issues I need to address, and I’m waiting for a load of parts to arrive which may be slower than usual again due to the current lockdown. Anyway, the first thing I decided to tackle is this – The Dash! So, what’s wrong with it? - Well it would be quicker to list the things that are right with it, 1. Nothing Problems. 1. The speedo which has all the warning lights incorporated in it is not in line of sight. 2. It is not waterproof or even splash proof as you can see above it has no base. 3. The buttons (pic below) especially the indicator switch are useless while just testing the indicators I can’t turn them off which is a half press a complete press is about 1.5cm imagine trying to do it while driving! 4. The heater gauge which for some reason is bigger than the speedo is mounted behind the dash on the frame – I have no idea maybe they added it later? 5. There is no fog light switch – but then there is no fog light. We need one though. 6. Its plastic and looks cheap Apart from the horn button which is OK I have nothing good to say about it. My solution was to get back to my Blue Peter fabrication technique – Starting with a cardboard template that puts all the switches in a row, separates the indicators, incorporates the temp gauge and puts the speedo where it should be in front of the driver! Find a big enough scrap of aluminium And cut out the basic shape, Now the fun, go through a plethora of hole cutting bits to get the right size for eacj switch and/or dial Bit of help from the DRO on the mill to get 30mm centres in a straight line @andybp before you say anything 0.022mm is within my tolerances That got me to here and that will fit here something like this – Front Back I made this up as I went along so I now had to work out what to do next ………………………. More in a mo………………………
-

Zed Shed Antics - Working remotely for the good of mankind :)
Keyser replied to ATTAK Z's topic in Other Cars
Like you need my permission look forwards to seeing your progress and I’ll be more than happy to give any advice I can. -
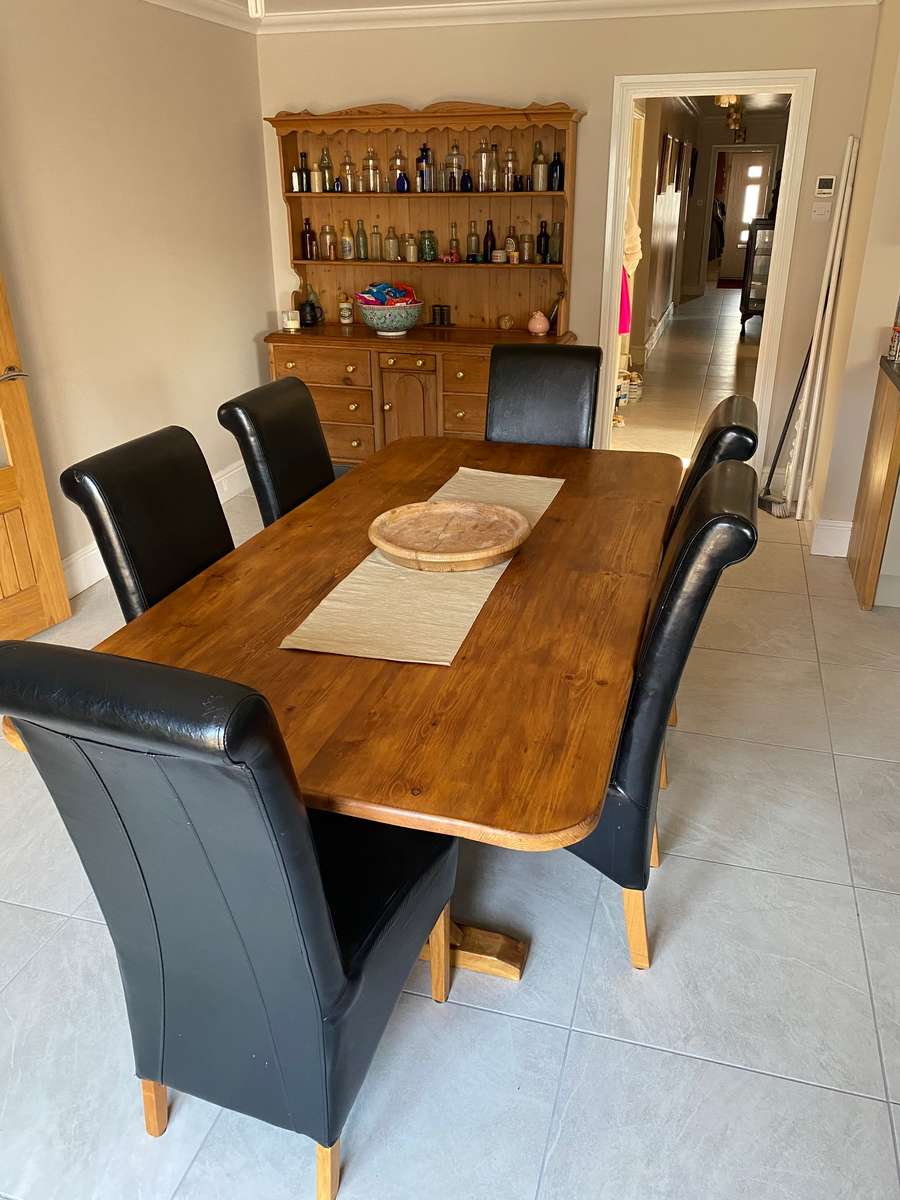
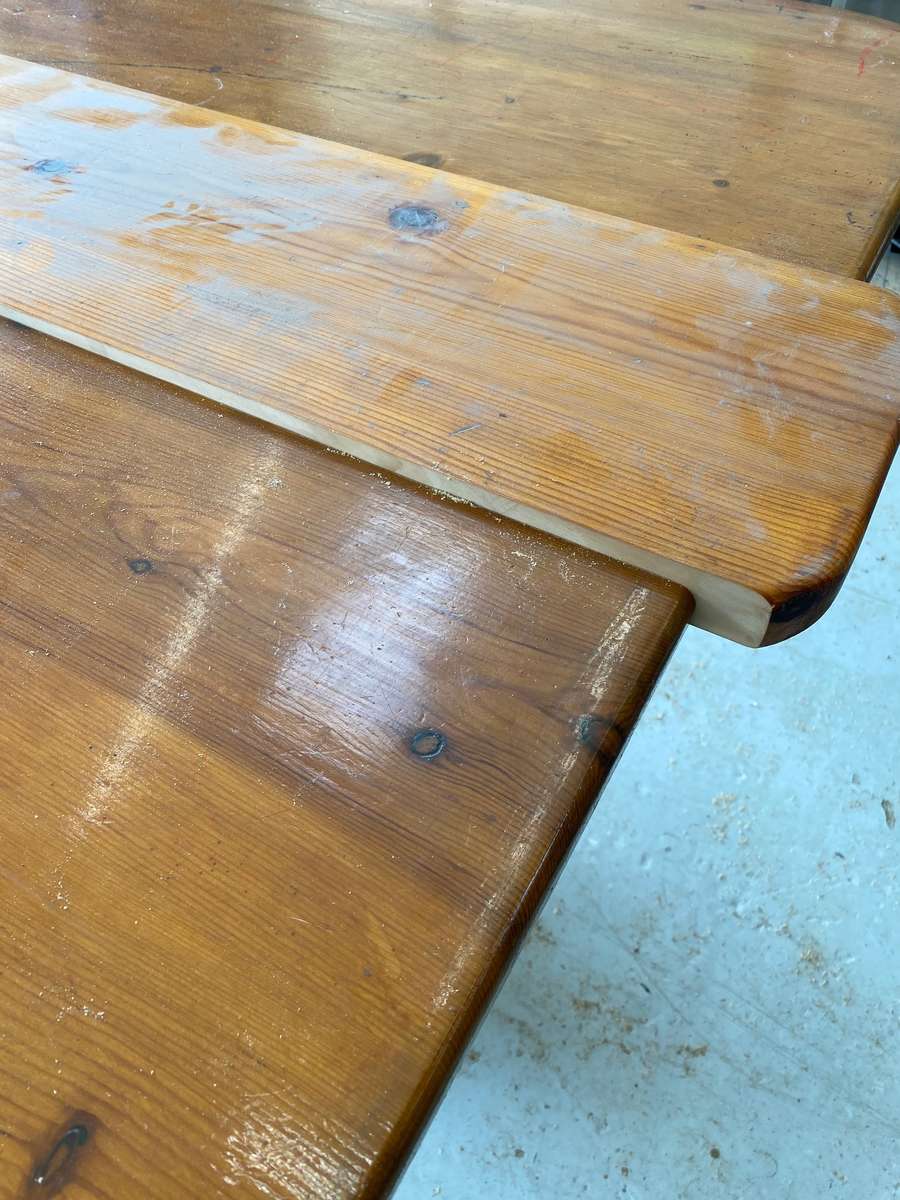
Good Morning to all my readers (yes both of you) and my favourite critic @andybp So, nothing interesting on The Bug just yet, spent a bit more time on the wiring yesterday which anyone who has chased electrical faults round a car will know is boring and monotonous, it’s just tracing wires and testing components. I do love the way they change wire colours at any connector randomly, there never seems to be any reason to do it, I also can’t find (or can’t be bothered to look hard enough) a wiring diagram although they are never that good anyway in my experience. As my thread covers EVERYTHING a here are a few pictures of not cars, instead I invite you to join me on a trip down nostalgia lane for those who are really REALLY bored! So grab a drink and off we go- My dad who passed a few years back built a table when I was a but a young man, he may have even built it before I was born, I remember it from as far back as I can which would make me about 5 or 6 years old, that table moved with the family until I joined the army in 1988. Then, when my parents moved to a town house the table disappeared. I never thought much about it back then to be honest but I noticed it one day stored in my dads garage, this would be around 2006/6 it just so happened that we (by now I was married with my own children) needed a dining room table so I asked if I could have it, dad was happy to pass it on but storage had taken it’s toll. One end was rotten from standing on a concrete floor and both sides had wood worm. I trimmed about 6 inches of the length and about 2 inches of each side then sanded it down varnished it and we have been using it ever since. When my parents passed, we inherited an oak dining table one of those extendable ones, a modern one and nothing spectacular. As it was a bit bigger Mrs Keyser decided we would use the oak table and the other one became her sewing table for a while. But she hates the oak table as you can’t put 6 chairs under it as they hit the legs and it messes with her OCD to have 2 chairs “out” We (read Mrs Keyser) recently did a make over and redecorated the kitchen-diner and the subject of the table came up, Mrs Keyser wanted to buy a new one! I complained and said get the old one out, it has huge sentimental value to me, Mrs Keyser said she loves the table but it’s too narrow as it had to be cut down when we first got it. You can seat 6 but it’s hard top get all the food down the middle at Christmas ask @buster So the point to all this inane rambling is when my dad originally built the table he made it with 3 benches 1 full length for one side and 2 half lengths for the other side (they were never that comfortable) the legs were rotten after storage but the seat parts were stored in my dad’s garage loft for years and I got them with the table and put them in my loft, I suggested to Mrs K I widen the table by using the long bench – same wood same age etc it would be good. Mrs Keyser agreed to see what it came out like and would consider using it instead of buying a new table. I therfore started by cutting the tabletop in half and lined it up with the old bench top Planed the bench to the same thickness as it was a bit thicker (you can see how much lenght was cut of a few years back) Glued it together Squared the legs up – 50-year-old wood was a little warped Before After After some sanding, wood stain and varnish it is now back in the dining room That’s 50 years in the family, built by my dad and refurbished twice by me - a lot of memories from around this table! And here it is ……………….. Hope you enjoyed the story if not that’s 10 minutes of your life you will never get back More on The Bug coming soon ................. PS -Mrs Keyser loves it. Keyser - I'm just a lonely boy, Lonely and blue, I'm all alone, with nothing to do (ha Donny I have a Zed Shed = plenty to do)
-
I'd love to hear what you've been up to on the TR6
-
That will be the new iPhone 11 camera Now to work on my speliing
-
You mean bad photography with bad spelling don't you - You can't even insult me properly any more! Slacking Andy SLACKING!!! Hope your feeling better mate EDIT - Did it ever occur to you why I didn't want you to read it!?
-
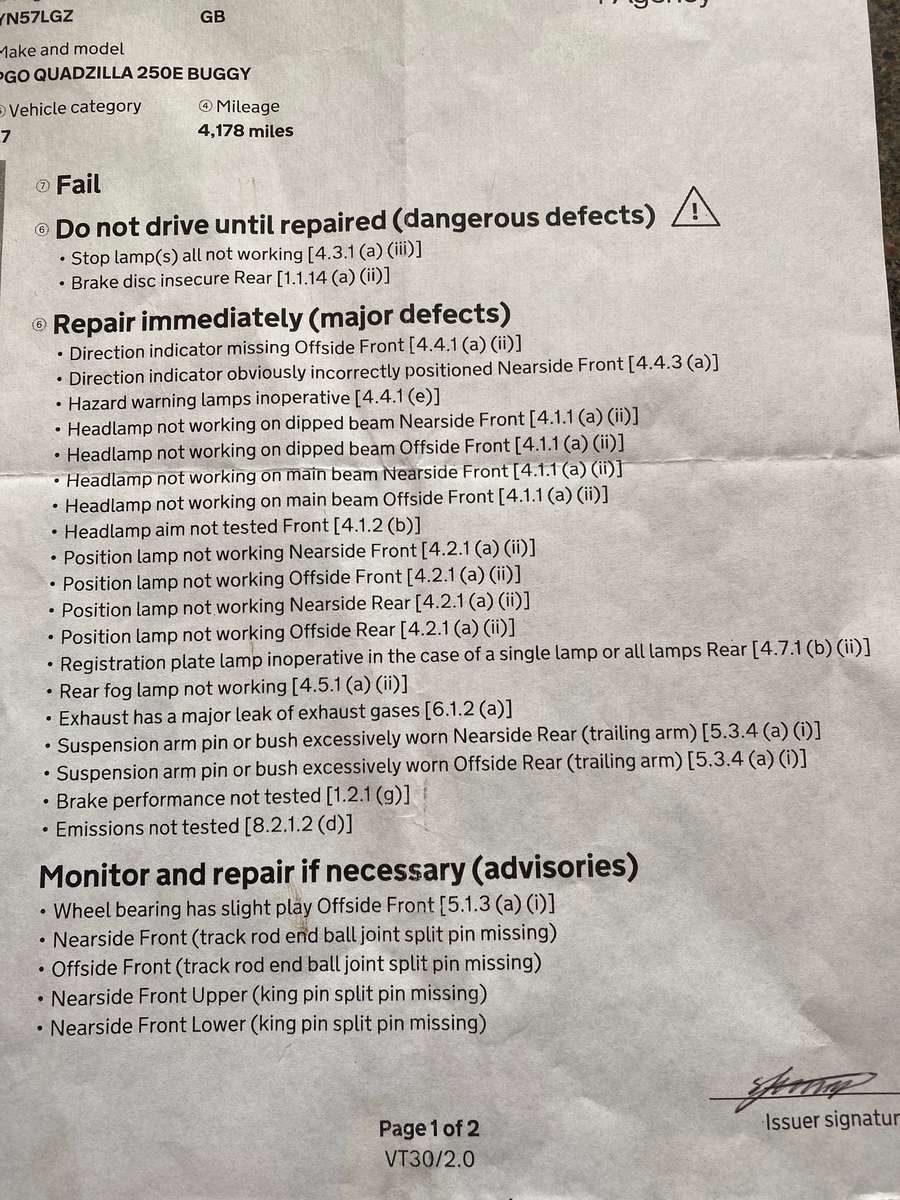
Right while I have a captive audience under house arrest and bored enough to read my drivel, I'll post some more of it to maybe give you something to do for 5 minutes. @andybp You just look at the pretty pictures mate So where are we at, I made a buggy for "The Bug" Now it fits on both the ramps and I can move it around Next I removed the seats needs a clean but so do the seats Qucik hose down in the garden Good enough for now, everything will be cleaned properly later or before re-assembly It now sat like this So I removed some more bits To get easier access to the electrics Starting from the MOT Failure list it lists amongst other things Stop lamp(s) all not working Position lamp niot working Nearside Rear Position lamp niot working Offside Rear Registration plate lamp inoperative in the case of a single lap or all lamps Rear So lets take a look Nearside Rear light Offside Rear light It took a while but I may see why these failed Number plate light Not sure if this is a clear light painted black or just old Anyway I got the multimeter out and the electrics don't supply and power to the lights so the missing bulbs are not the only issue, I started stripping back the wiring loom and the dash came out Coffee was needed! I keep finding "modificatins" to the loom like - So far apart from the broken lights I have found; 1 x Damaged headlamp internal wiring (bent connectors shorting out or not making contact) 1 x Knackered relay 1 x Knackered headlamp switch I'm also having an issue with the indicators as I'm swaping out the rears for LED units, I am well aware of the known relay issue and hyperblink when putting LED's in to the indicators but I have the resistors and when bench tested it works perfectly, it just stops working when I fit it onto The Bug O well more investigation and a lot of rewiring, intrstingly the MOT failure states - "Rear Fog Lamp not working" But it dosn't have one, there is also no wiring or switch anywhere to be found, The law is it must have one from what I have read so fine I'll add one but how did it pass previous MOT's? Bit strange but there you go. I asked the mad scientis @Beb if he minded me modifying a few things as it is our project but due to social distancing and the lockdown I'm just getting on with it by myself, he stupidly said yes whatever you think - Stand by for scope creep Budget is a thing on this project as we intend to keep the cost down to £1000 which is less than it would cost if we had bought one with an MOT, I'll post up spending if anyone is intrested However I have a lot of bits laying around from other projects which I class as free and time is currently on my side so if I don't put a cost oion the time or the bits I have access to I can do a lot of mods for free and I'm doing some of themm because they are needed IMHO the rest I'm doing just because I can and I want to More soon. Stay Safe Keyser - All by myself Don't wanna be All by myself Anymore ......................... (Yer thanks Celine )
-
I suppose it could be Its an off/on road buggy thing me and the Mad Scientist bough cheap of FB Market Place - see my thread I'm about to rebuild it and modify it Zed Shed style It does have a racxk on the back so golf clubs would fit if that's yourt thing I'm gonna off road it though
-
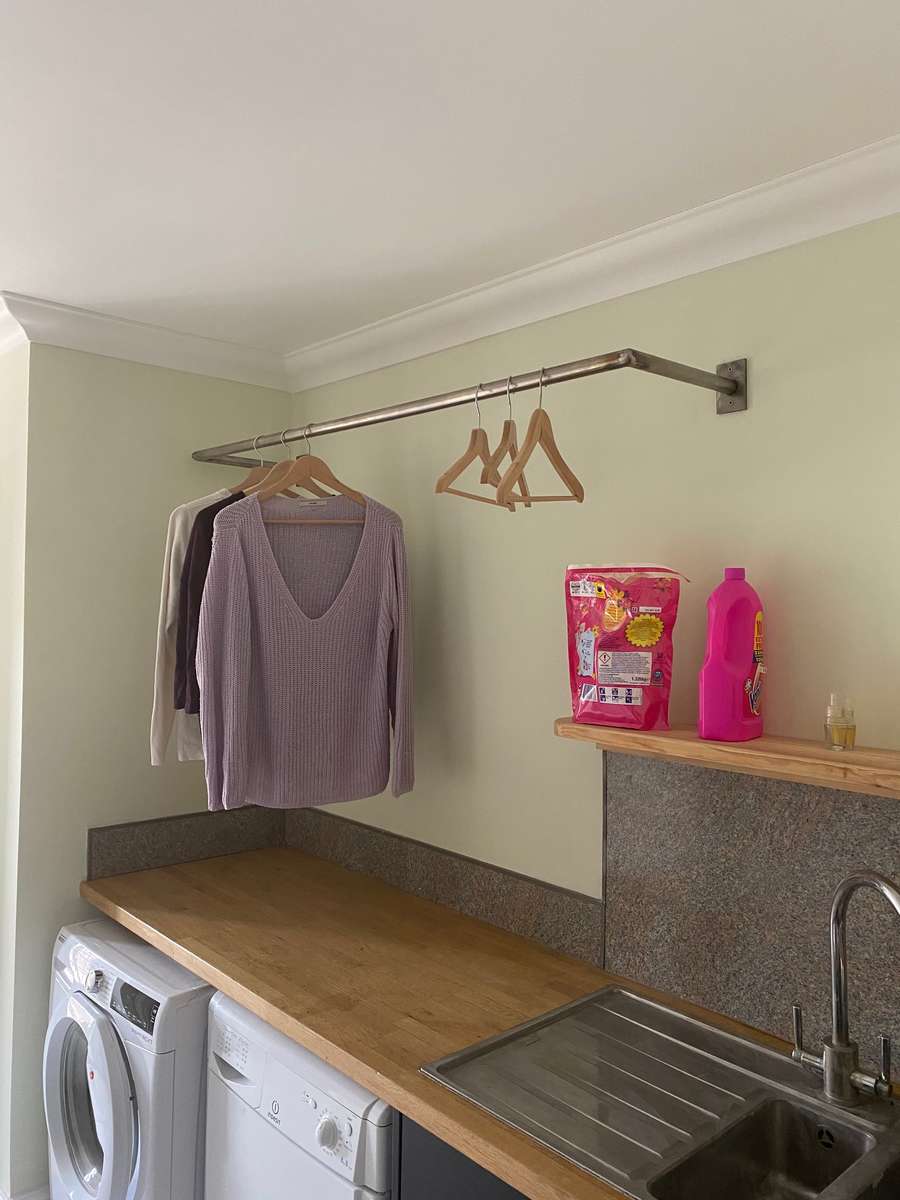
I have no response to that @ATTAK Z - Except why did you not keep your brolly instead of giving it away? No Caption Competition today just a little side project or two - So first thing on the list was to tidy the Zed Shed and the Machine Shop Much better Now find some metal laying around on the pile of bits I keep for "projects" Perfect A few measurments and a chop saw to give me these (after a quick cleanup) Start welding bit of drilling and some more welding added an extra bar underneath I was going to add these but decided they were not needed But wheels were and we have a trolley to move the heater around the garage Next ............. Some old stainless that I also have on the pile - Bit of work on the mill and the lathe Saw some bits up Action shot on the mill Bit of stainless TiG welding (I need the practice ) We have ................... They were supposed to be mounts to go above the washing machine in the utility room to hold a pole for drying jumper etc that can not be tumble dried, in my defence Mrs Keyser just asked if I could make something that would take a spare wooden curtain rail and hold it far enough off the wall to hang coat hangers on. After I accepted the challenge and made them I took a proper look at what she wanted and said a stainles bar would be better so cut 2 of them up and re-used them to make this - Still it does what is needed and I had fun fabricating, it's all from my large "scrap" pile so had some welding and machining practice and keeps me from wanting to go out More Soon when we start working are way through the short!!?? MOT failure list for "The Bug" Just a few more things to keep me busy Keyser - One Man Alone (but very happy) In His Shed. Be Safe Guys n Gals!


